
Set up ShadowRocket properly
From installing the app to importing a working config and subscribing to a rule set for split tunneling — the steps that actually matter, in order.
What ShadowRocket actually is
A rule-based proxy client, not a plain VPN.
Rule-based routing
Unlike a flat VPN, it can send different domains/apps through different proxies (or direct, or blocked) based on rules — this is the whole point of the setup below.
Protocol support
Supports Shadowsocks, VMess, Trojan, VLESS, SOCKS5, HTTP/HTTPS, and Hysteria among others — the config format below covers all of them.
iOS only
It's an iOS/iPadOS app distributed through the App Store (paid) in supported regions, or via the alternative distribution channels linked below where the App Store isn't available.
Config-driven
Almost everything — proxies, proxy groups, and routing rules — is defined in one plain-text config file you import, rather than clicked together by hand.
1. Download and install
Get the app before touching any config.
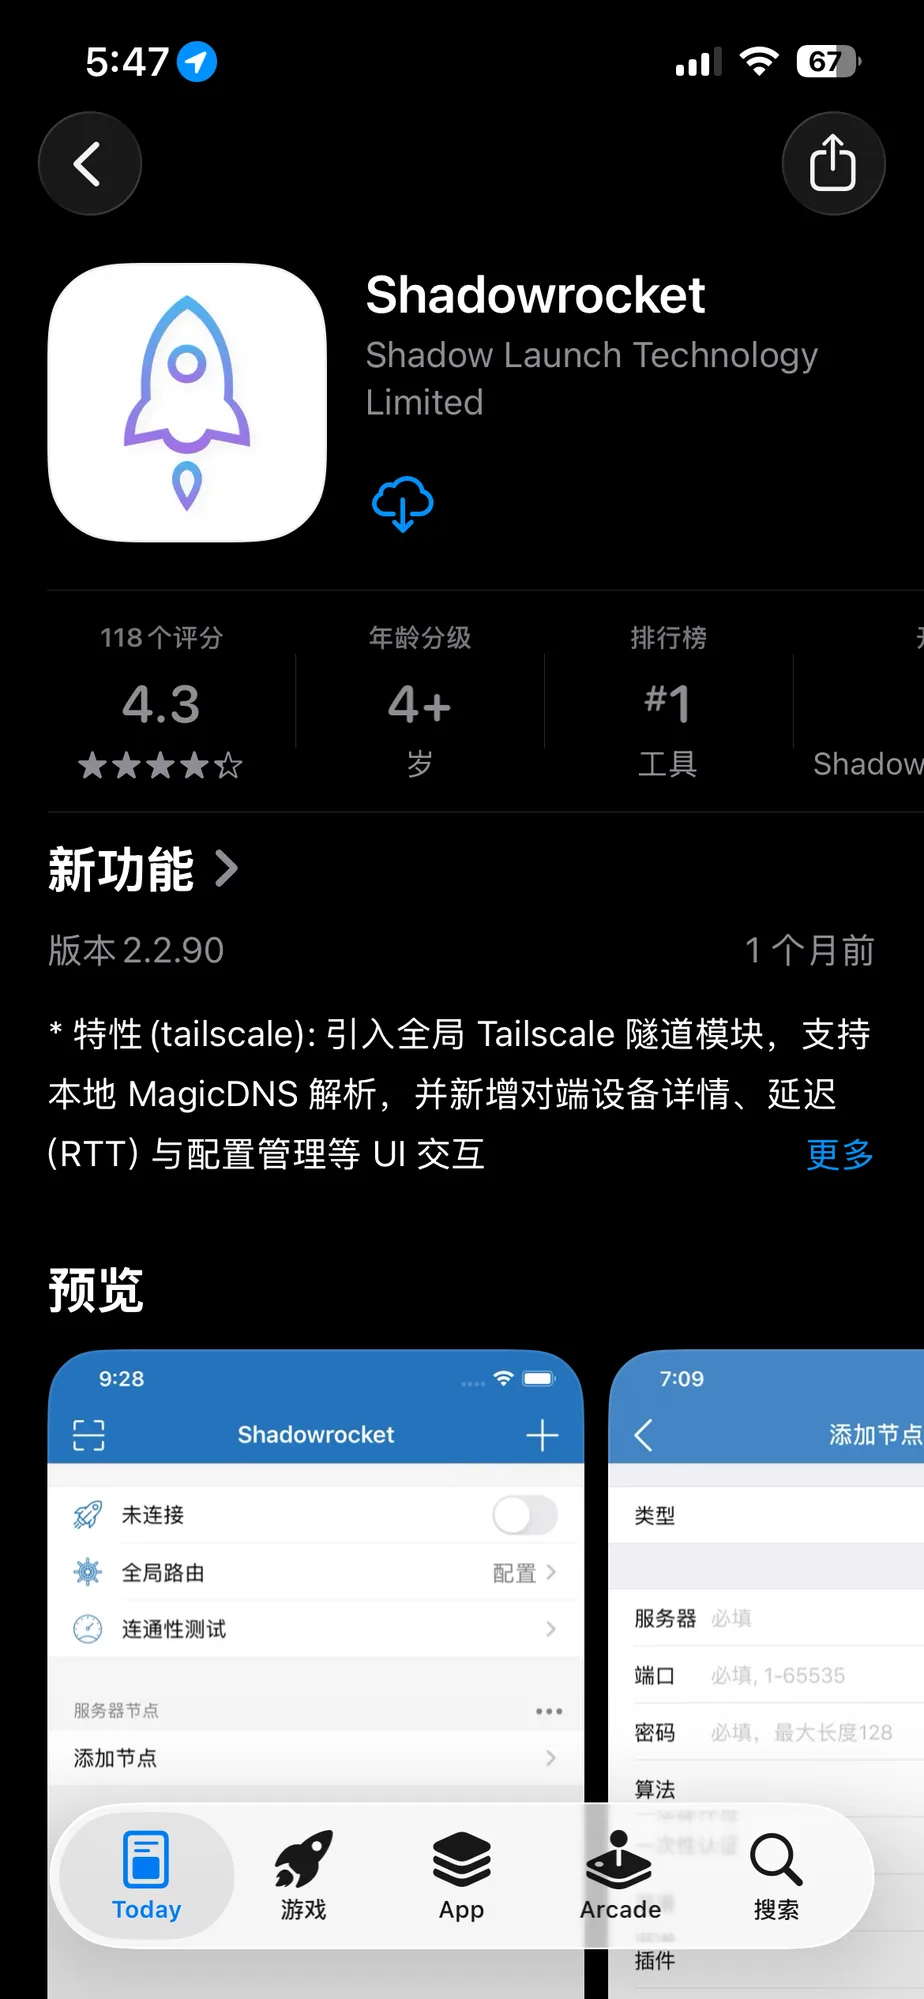
App Store region matters. ShadowRocket is a paid app and isn't listed in every country's App Store. The link above is from the official Apple Store — use it rather than an unofficial APK/IPA mirror, since those are a common place for tampered builds to circulate.
If you are in China region, you need to switch to an international App Store account.
-
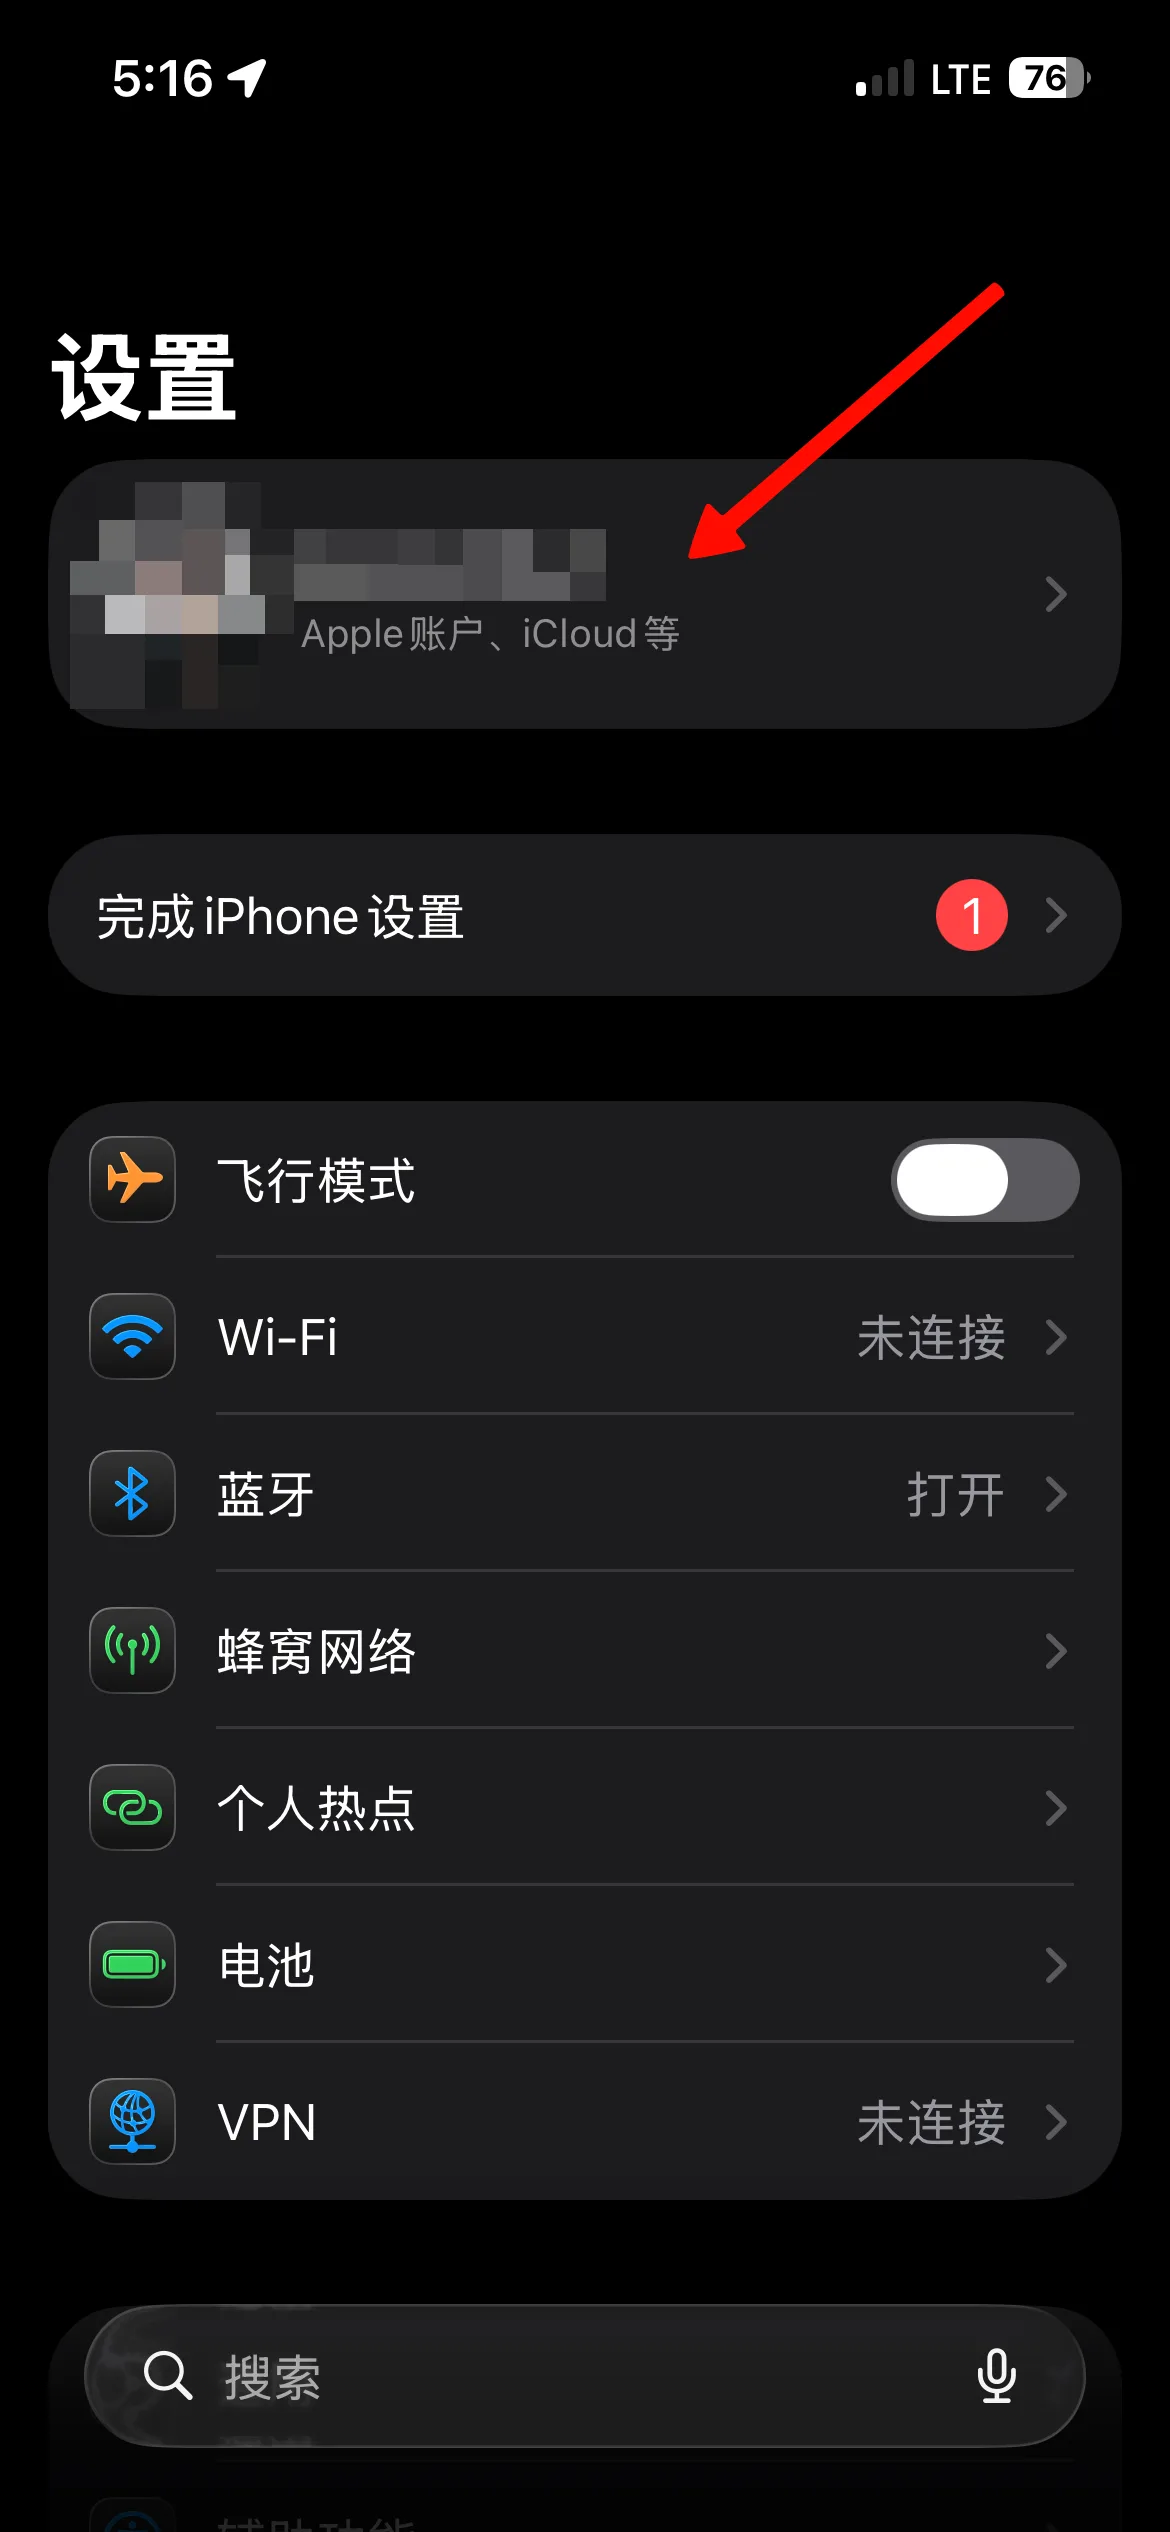
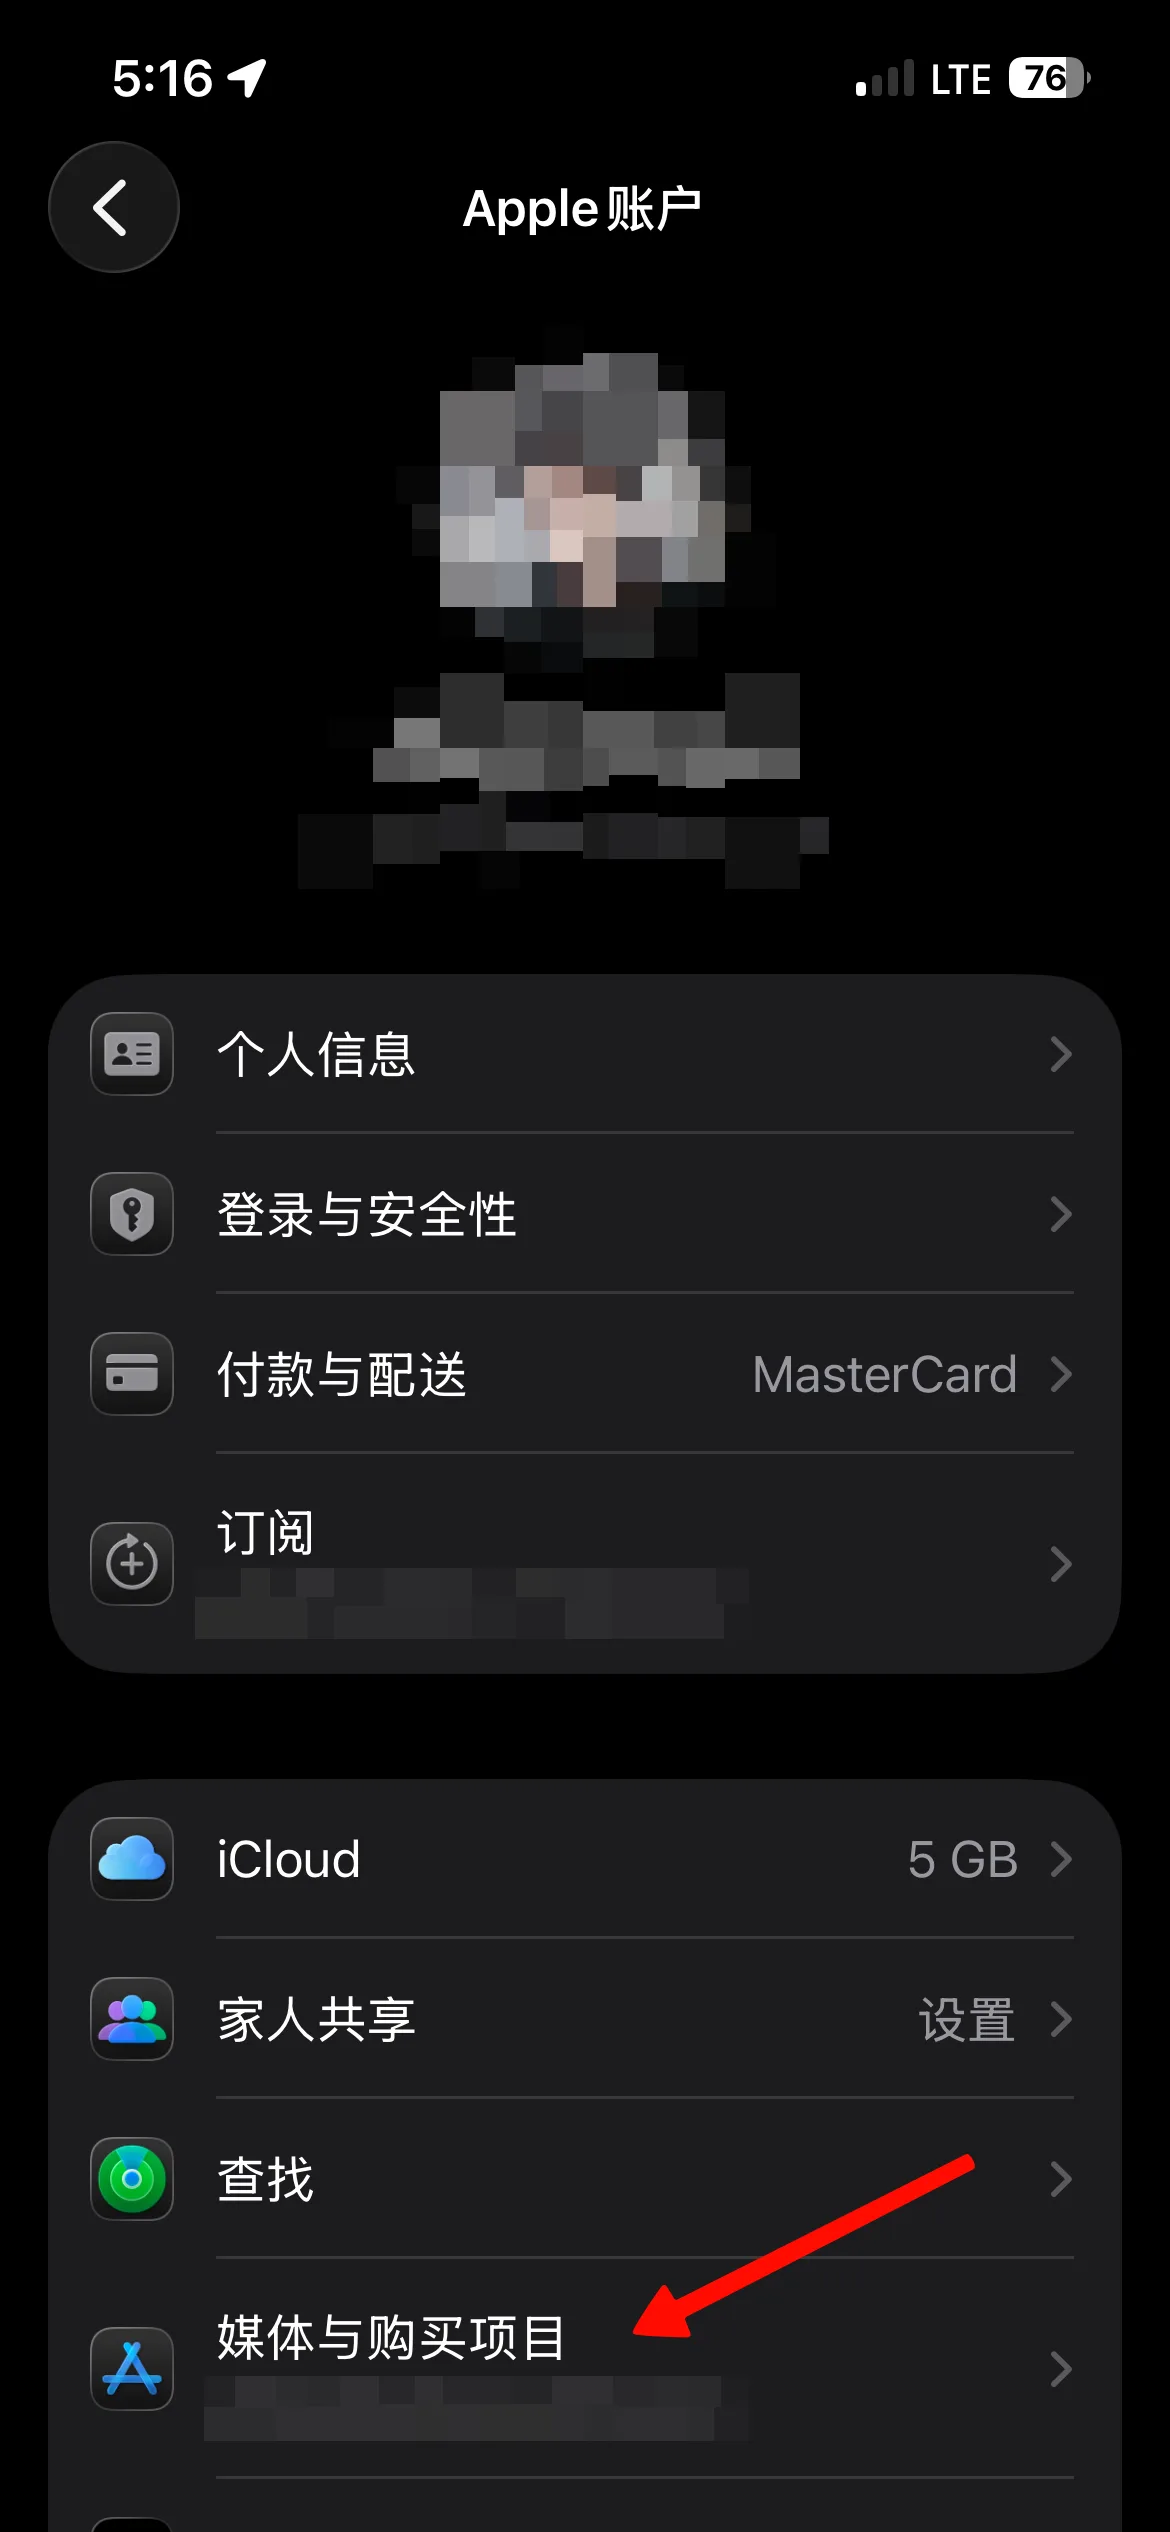
Open Media & Purchases
In Settings, tap your name/Apple ID banner at the top, then Media & Purchases.
-
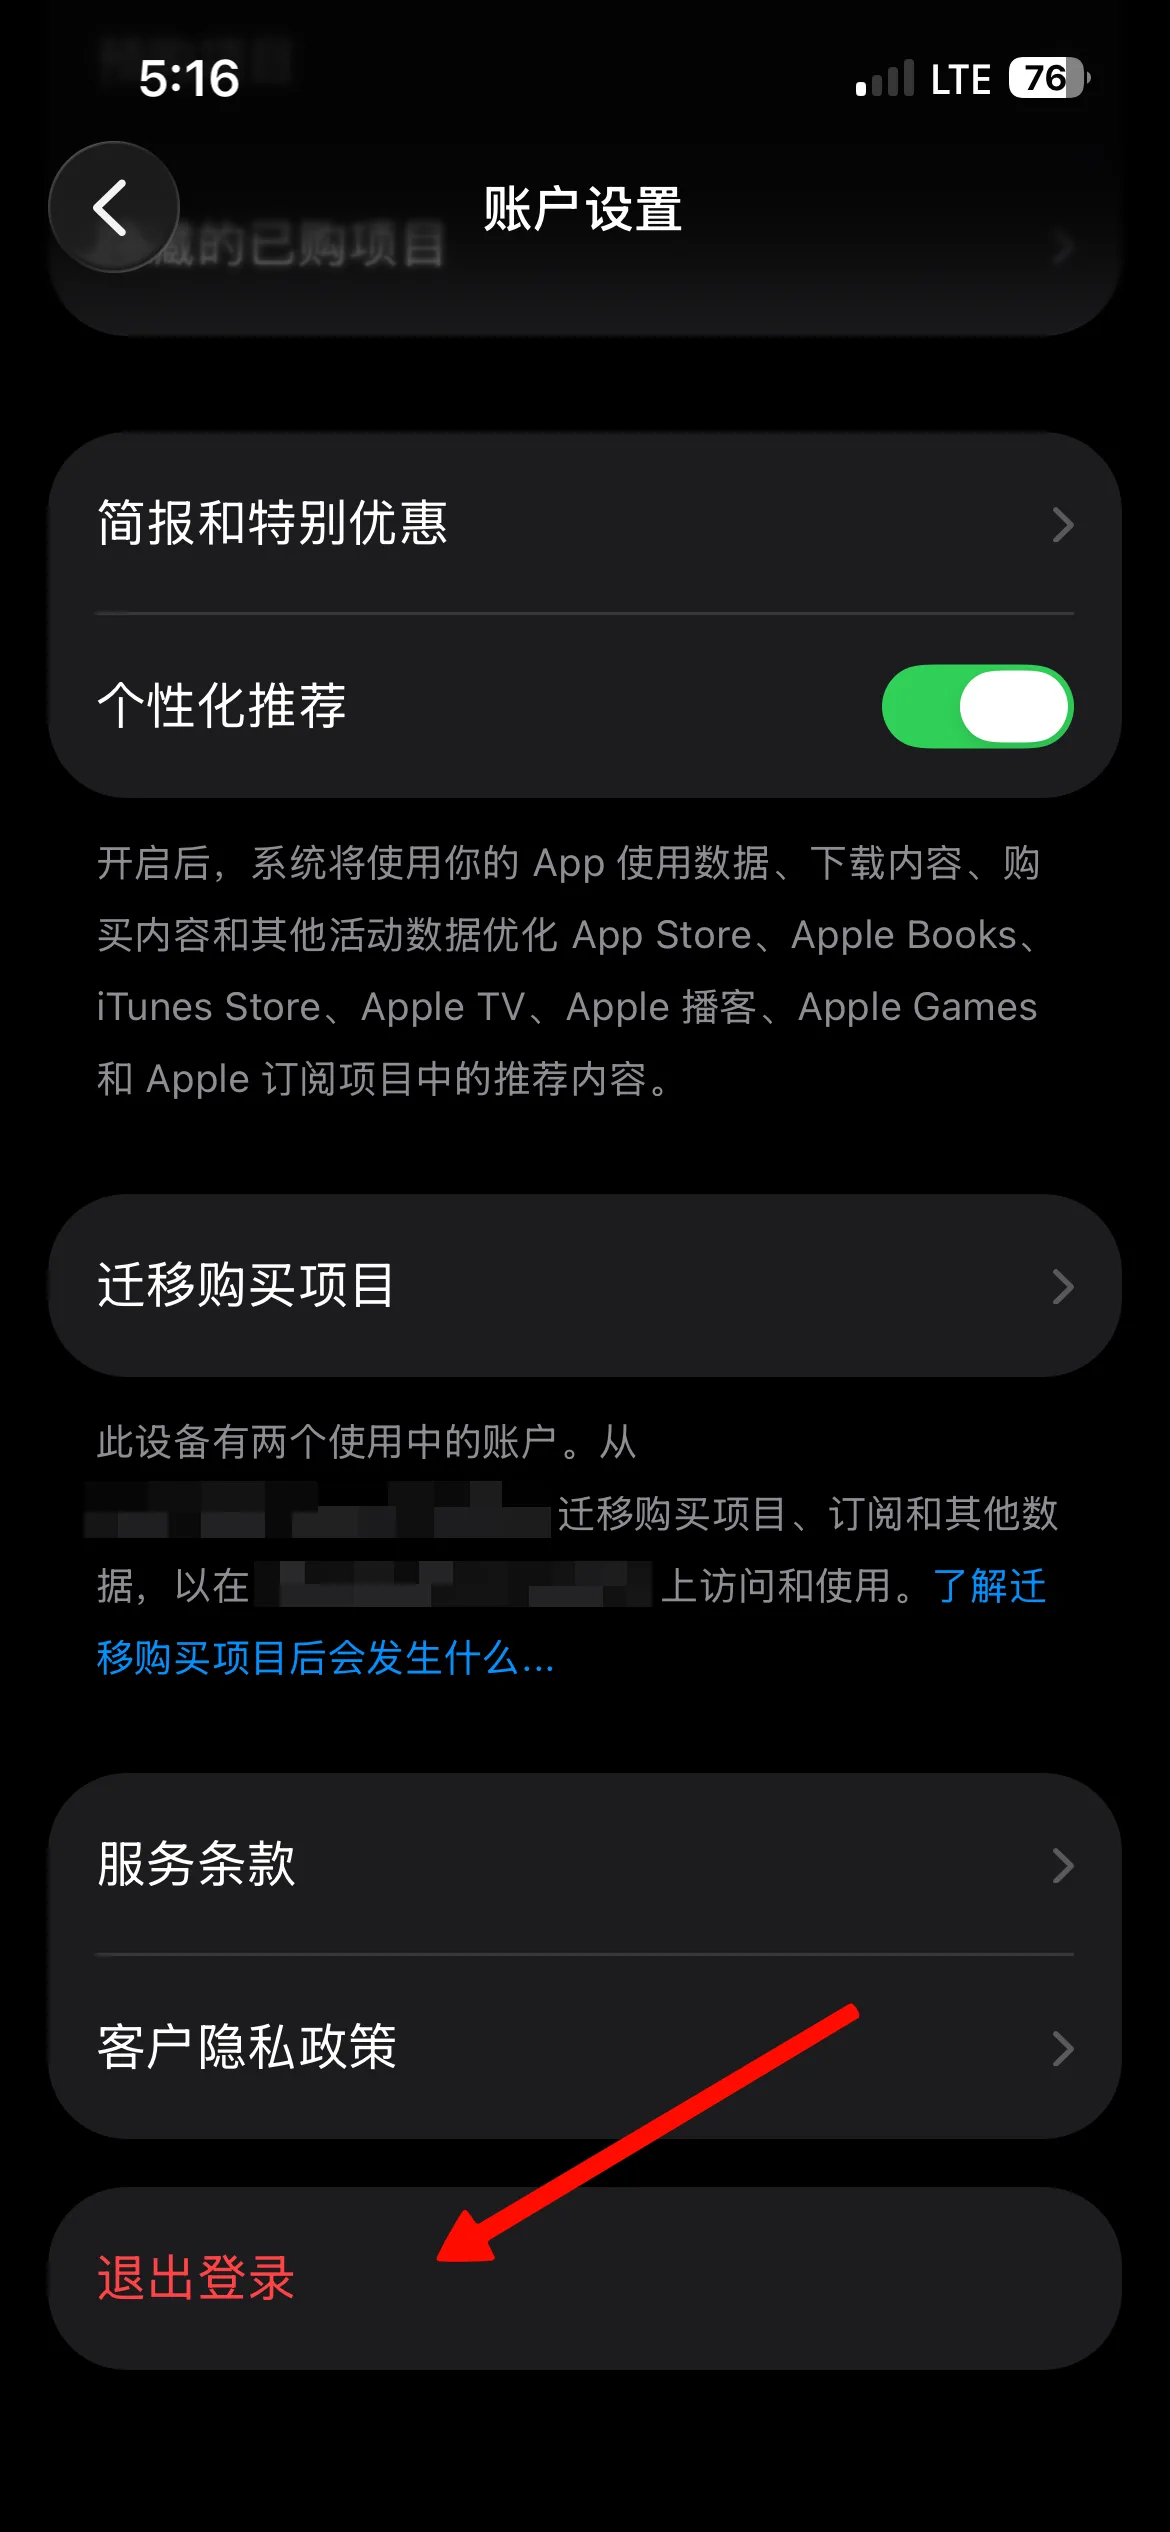
Sign out
On the Account Settings screen, tap Sign Out and confirm. This only signs you out of Media & Purchases (App Store/iTunes), not your whole Apple ID.
-
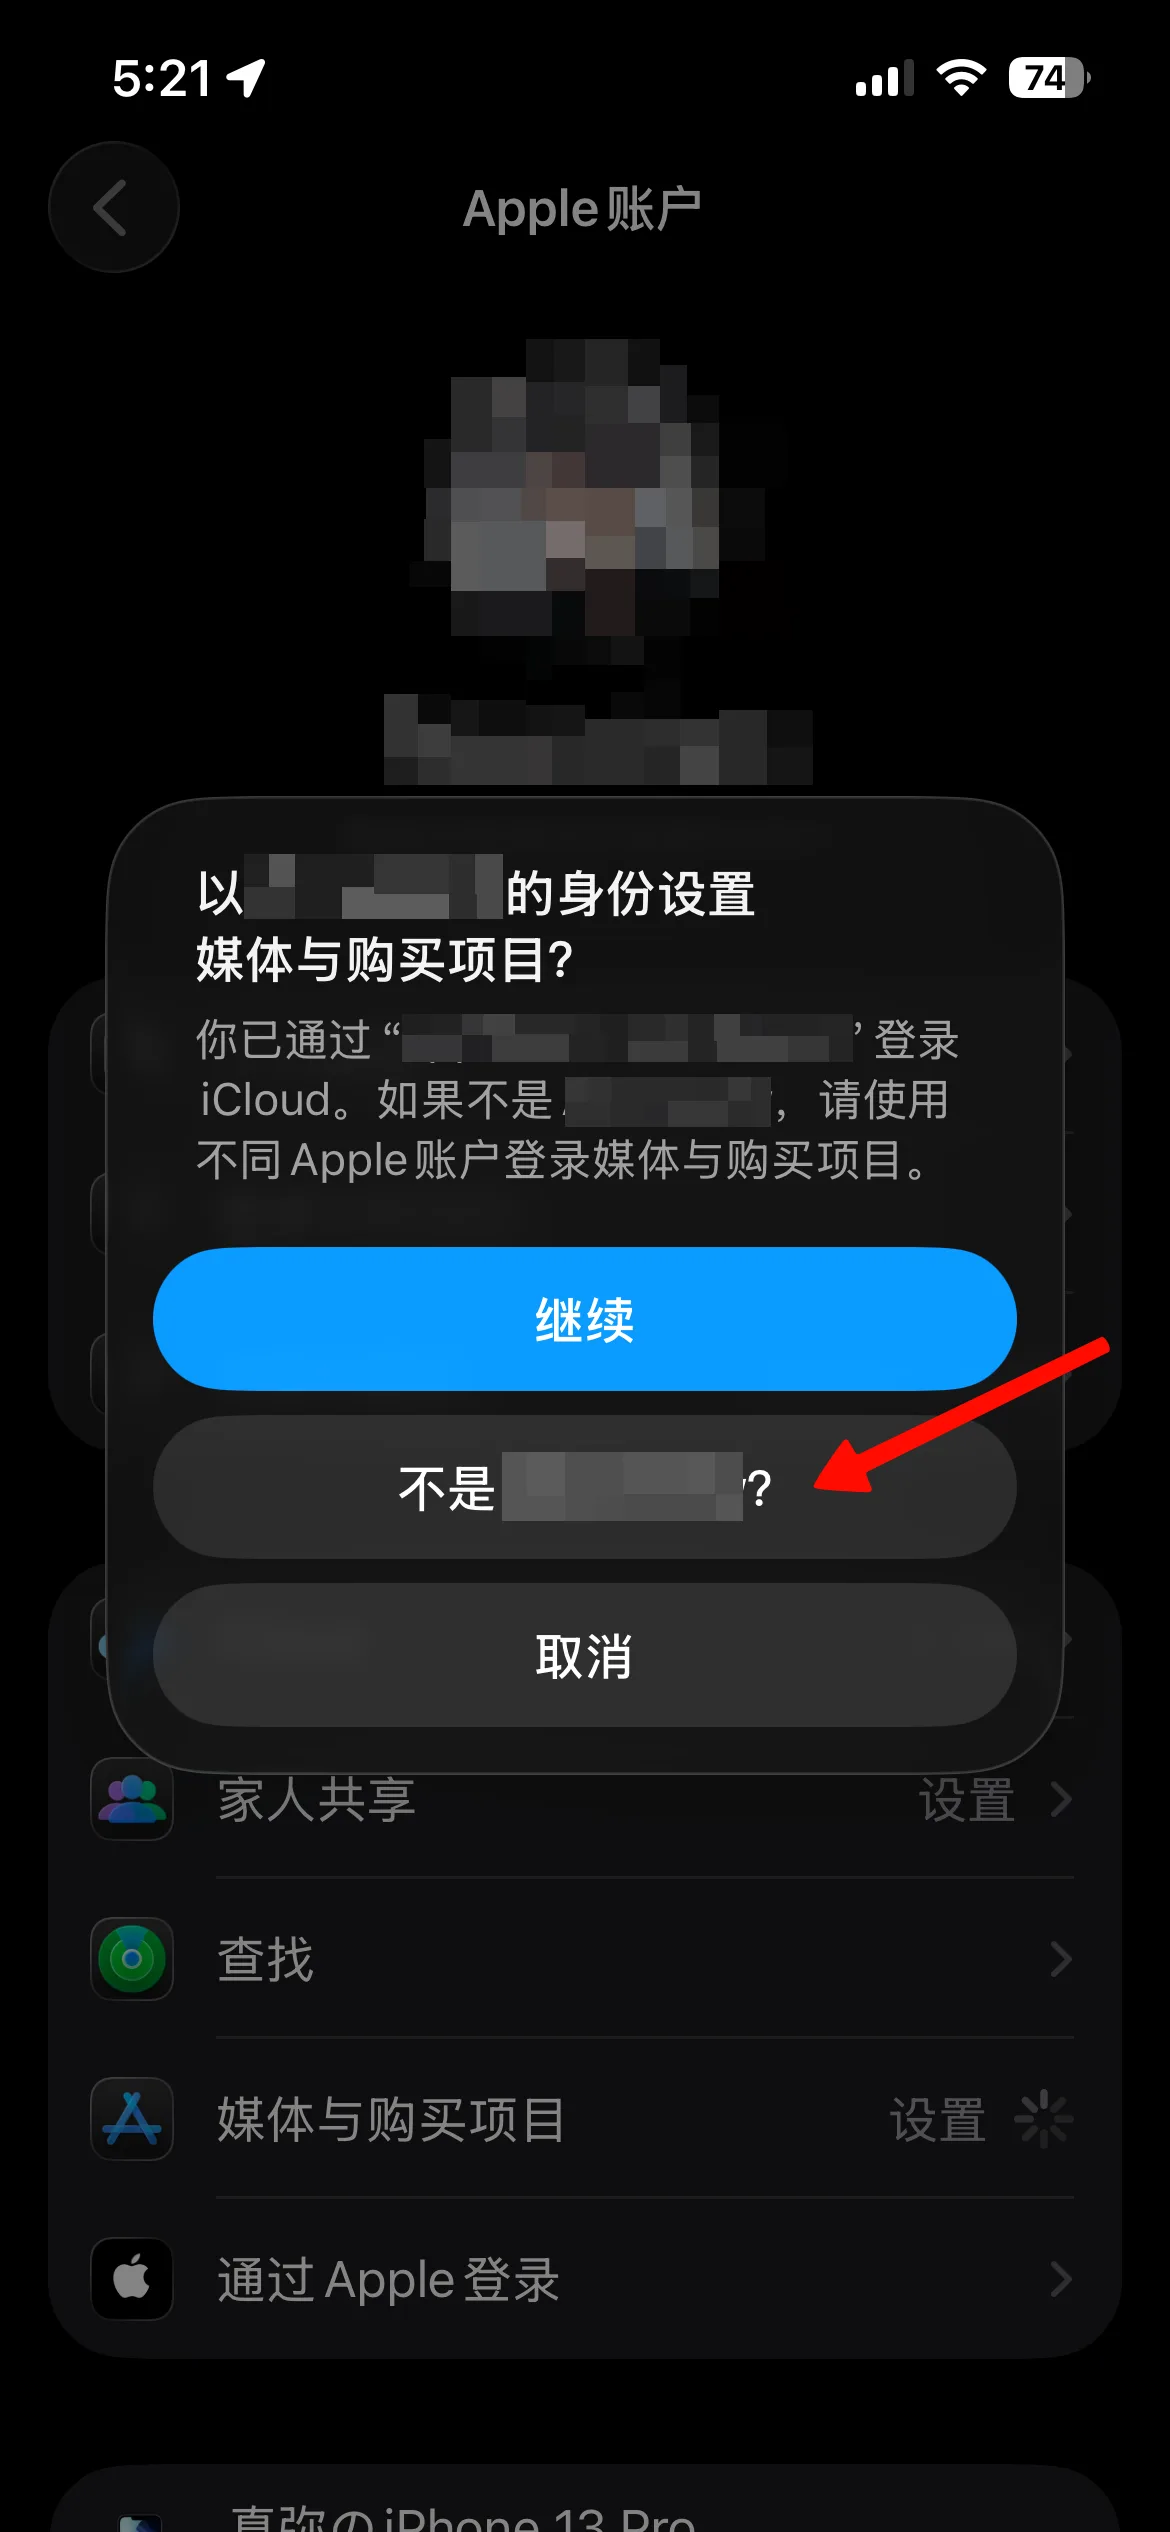
Sign in with the global account
Reopen Media & Purchases. If it prompts to set it up as your old account, tap "Not [that account]?" instead of Continue, then enter the Apple ID registered to a region where ShadowRocket is sold (ask whoever gave you this guide if you don't have one).
-
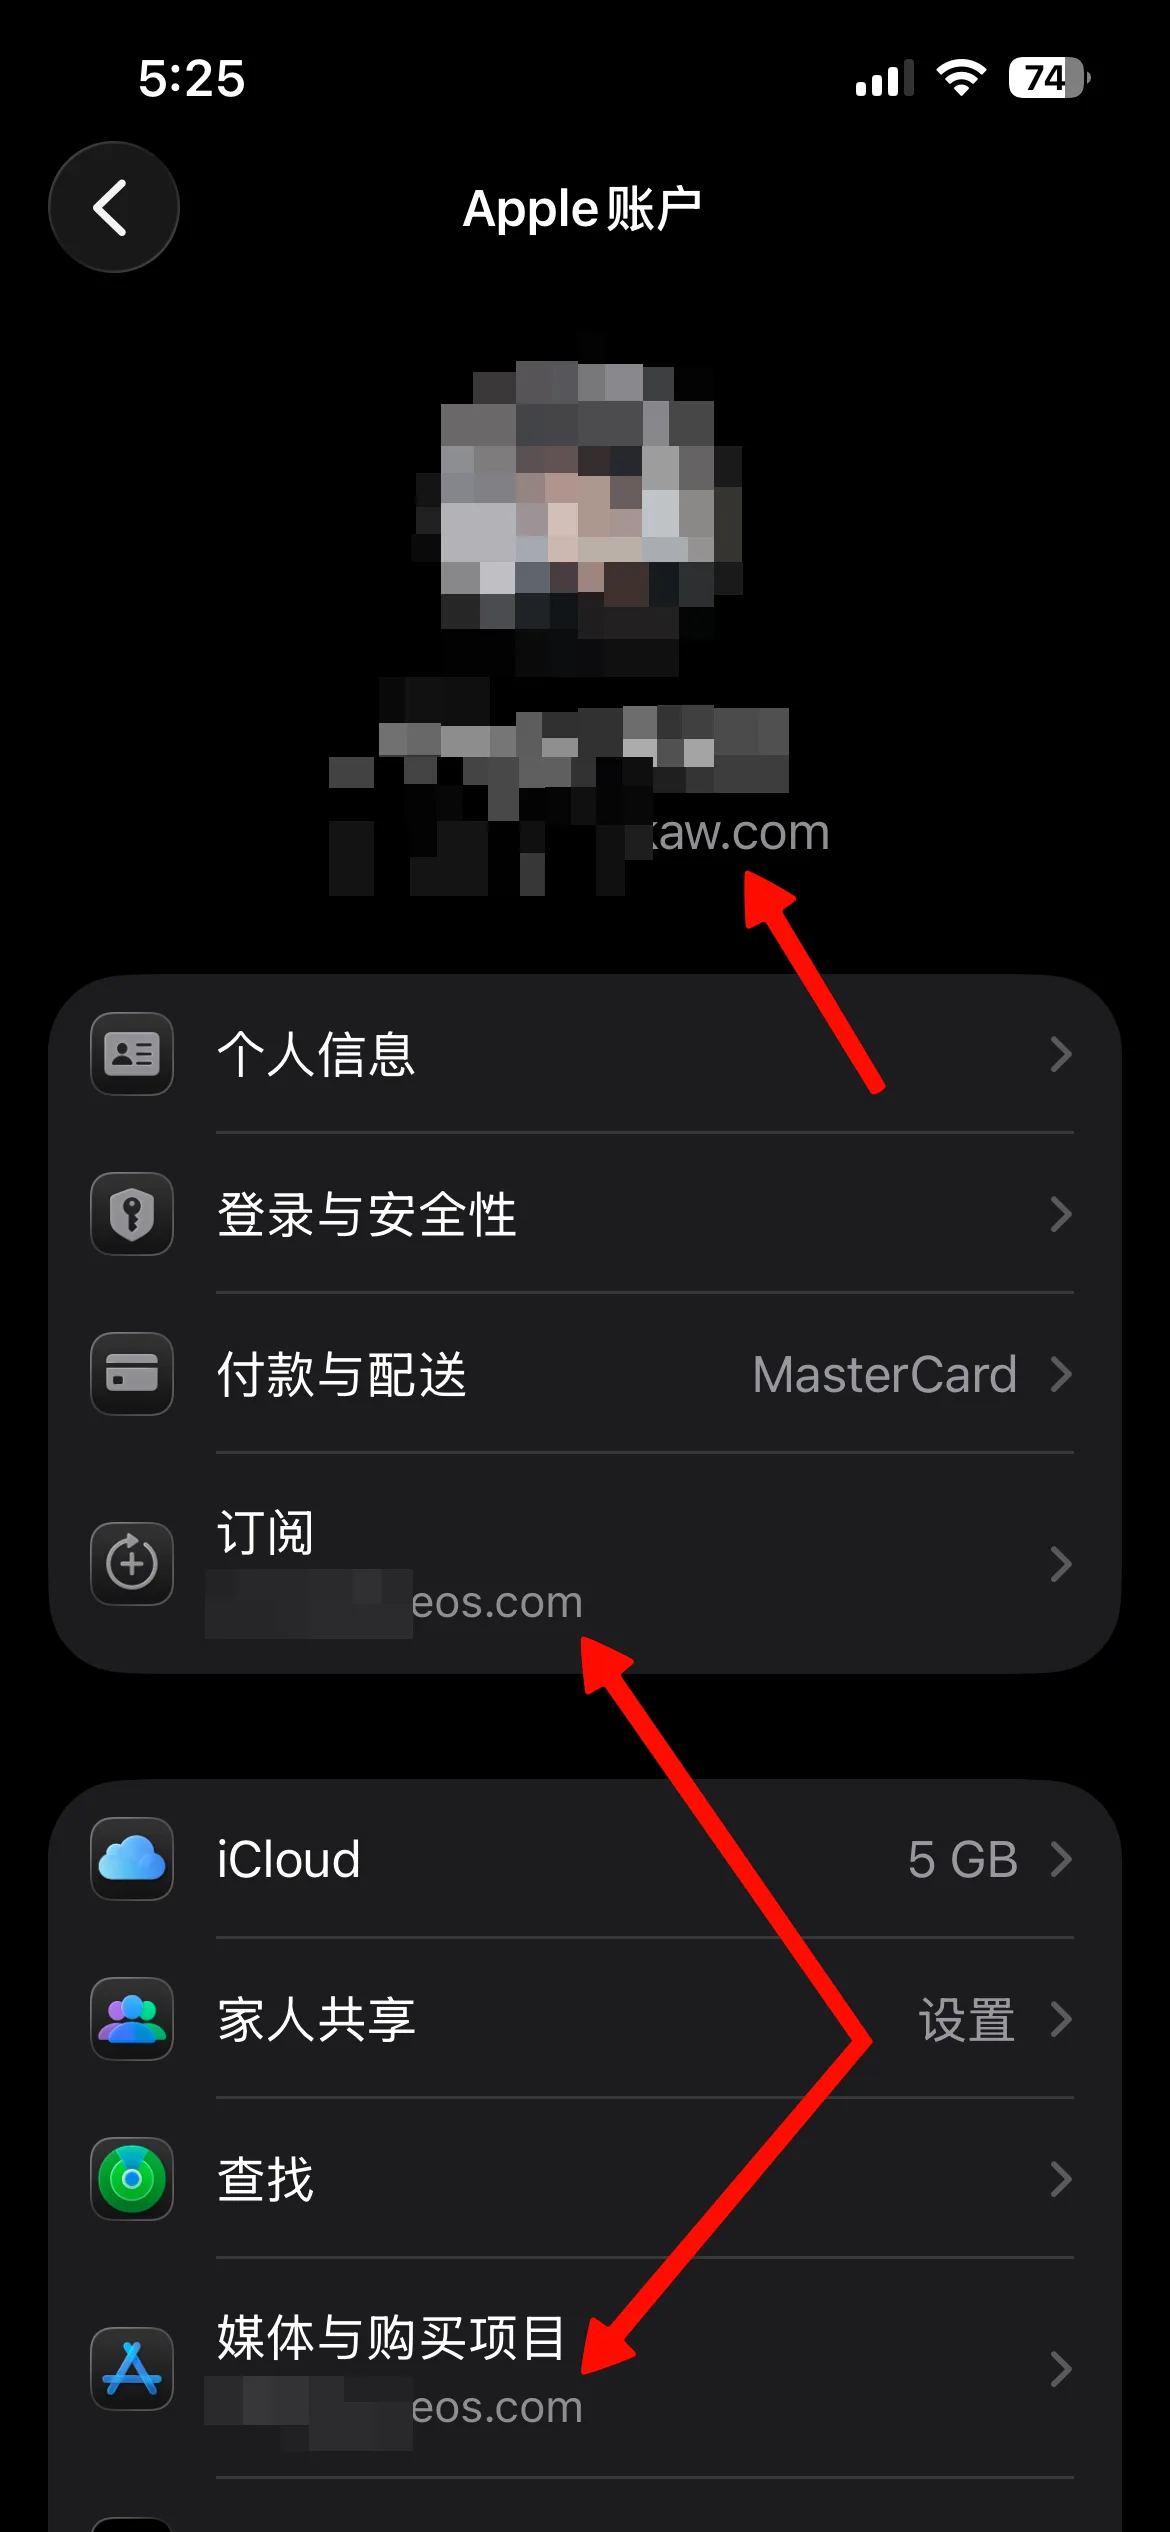
Confirm the switch, then retry
Media & Purchases should now show the new Apple ID's email. Reopen the App Store link above — ShadowRocket should be listed and installable.
2. Add a server via QR code
The fastest way in — scan the code your provider gave you.
-
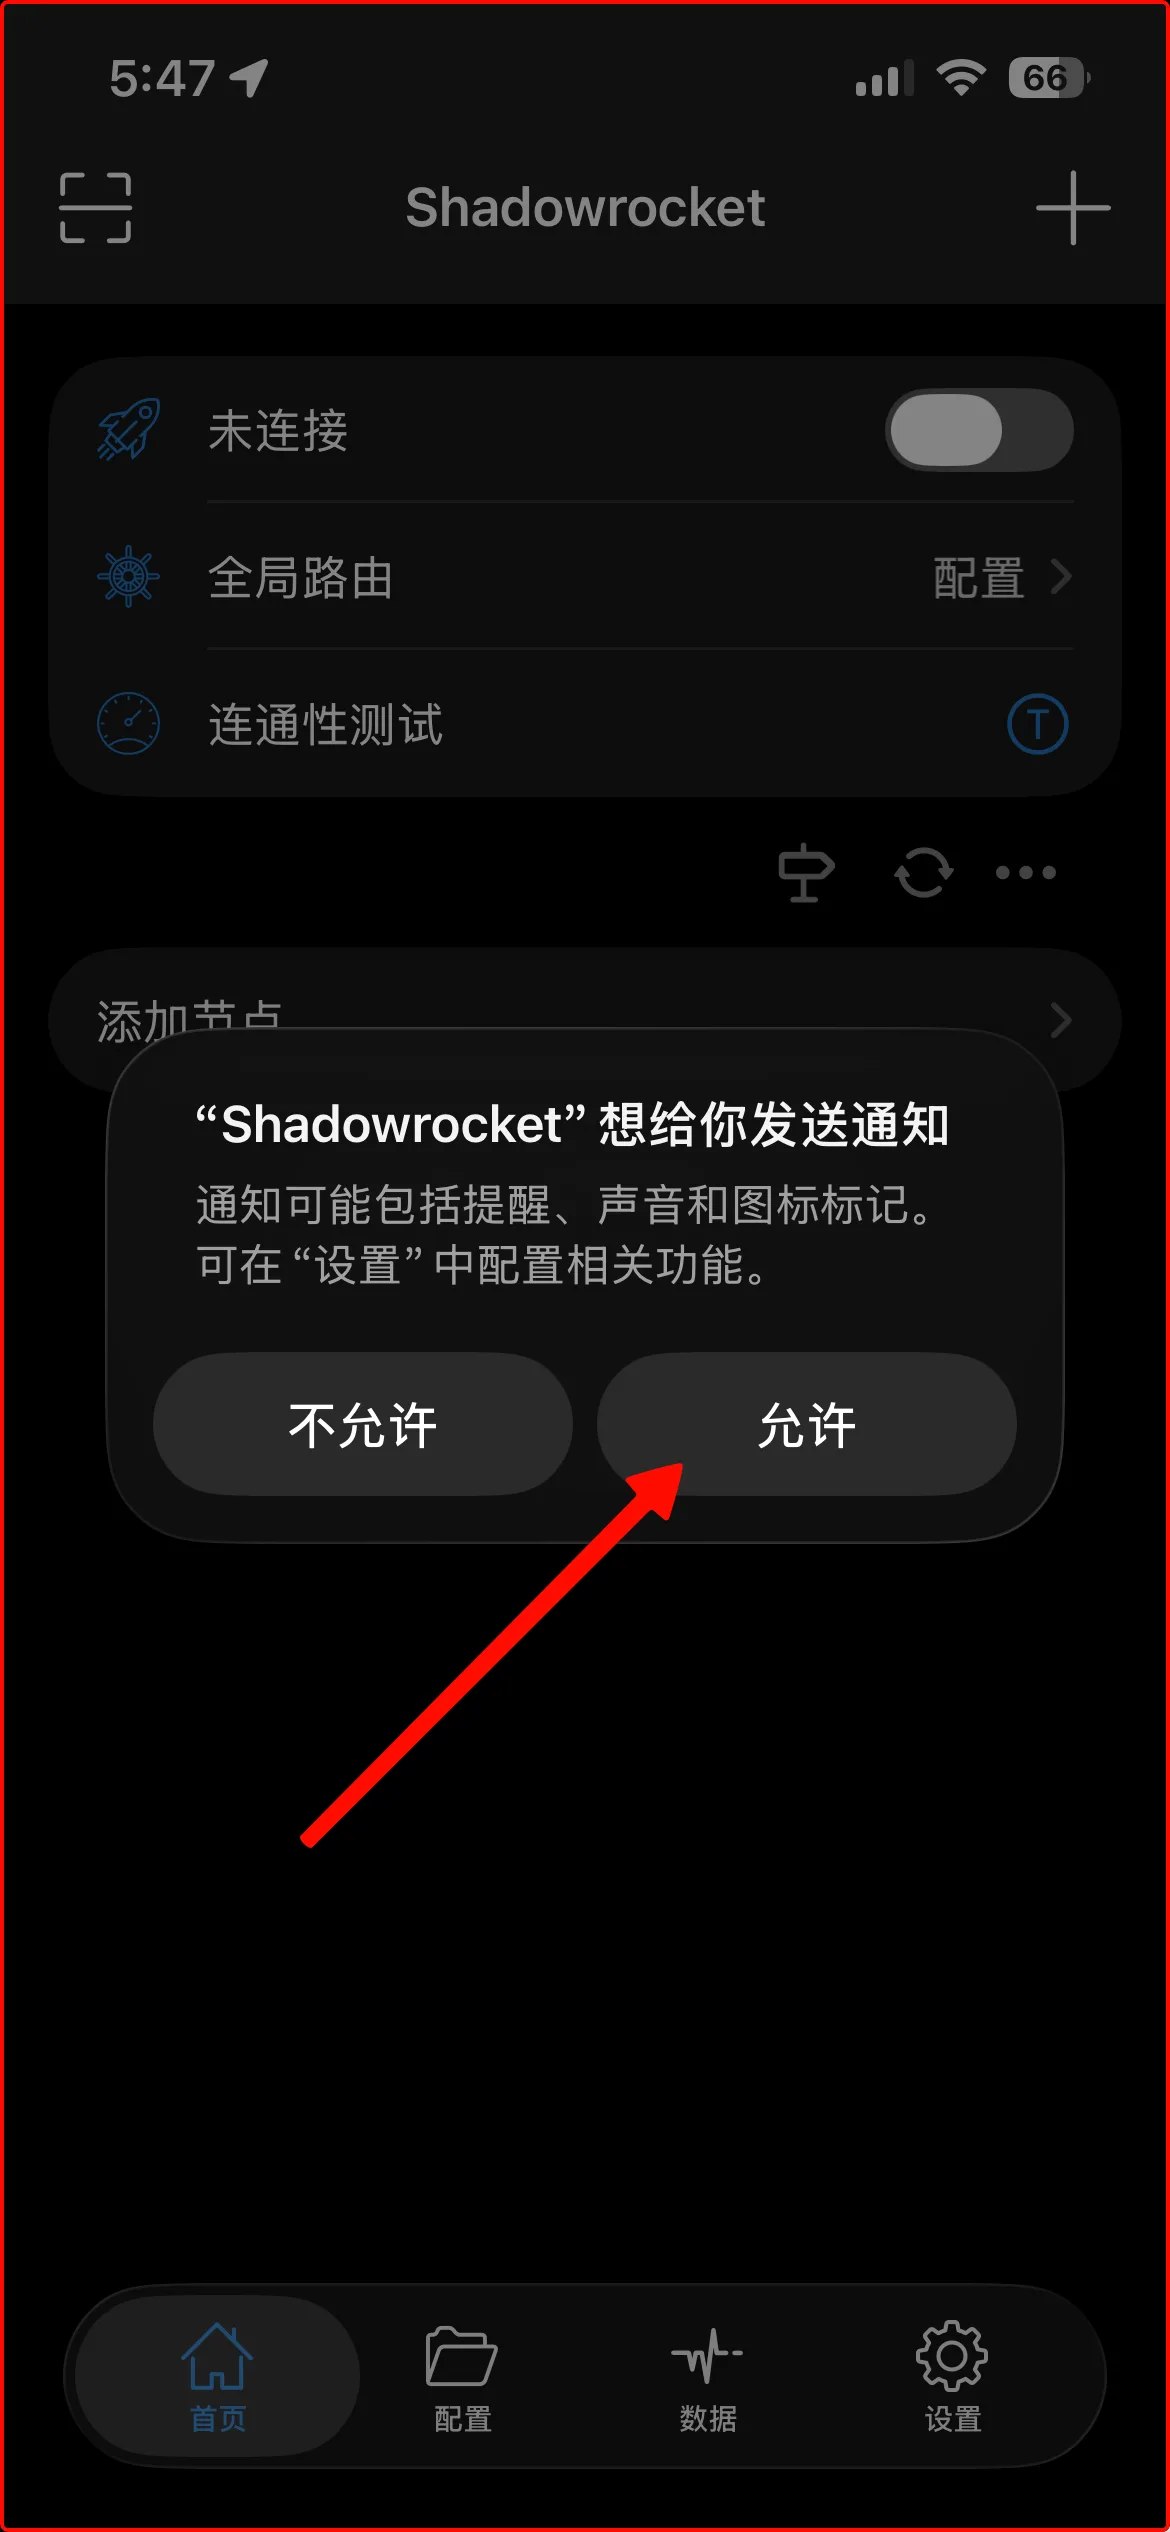
Open ShadowRocket
On first launch it may ask to send you notifications — allow it, it's just for connection status alerts.
-
Tap the QR-code icon, top-left
On the home screen, tap the QR-code icon in the top-left — it's faster than the
+in the top-right.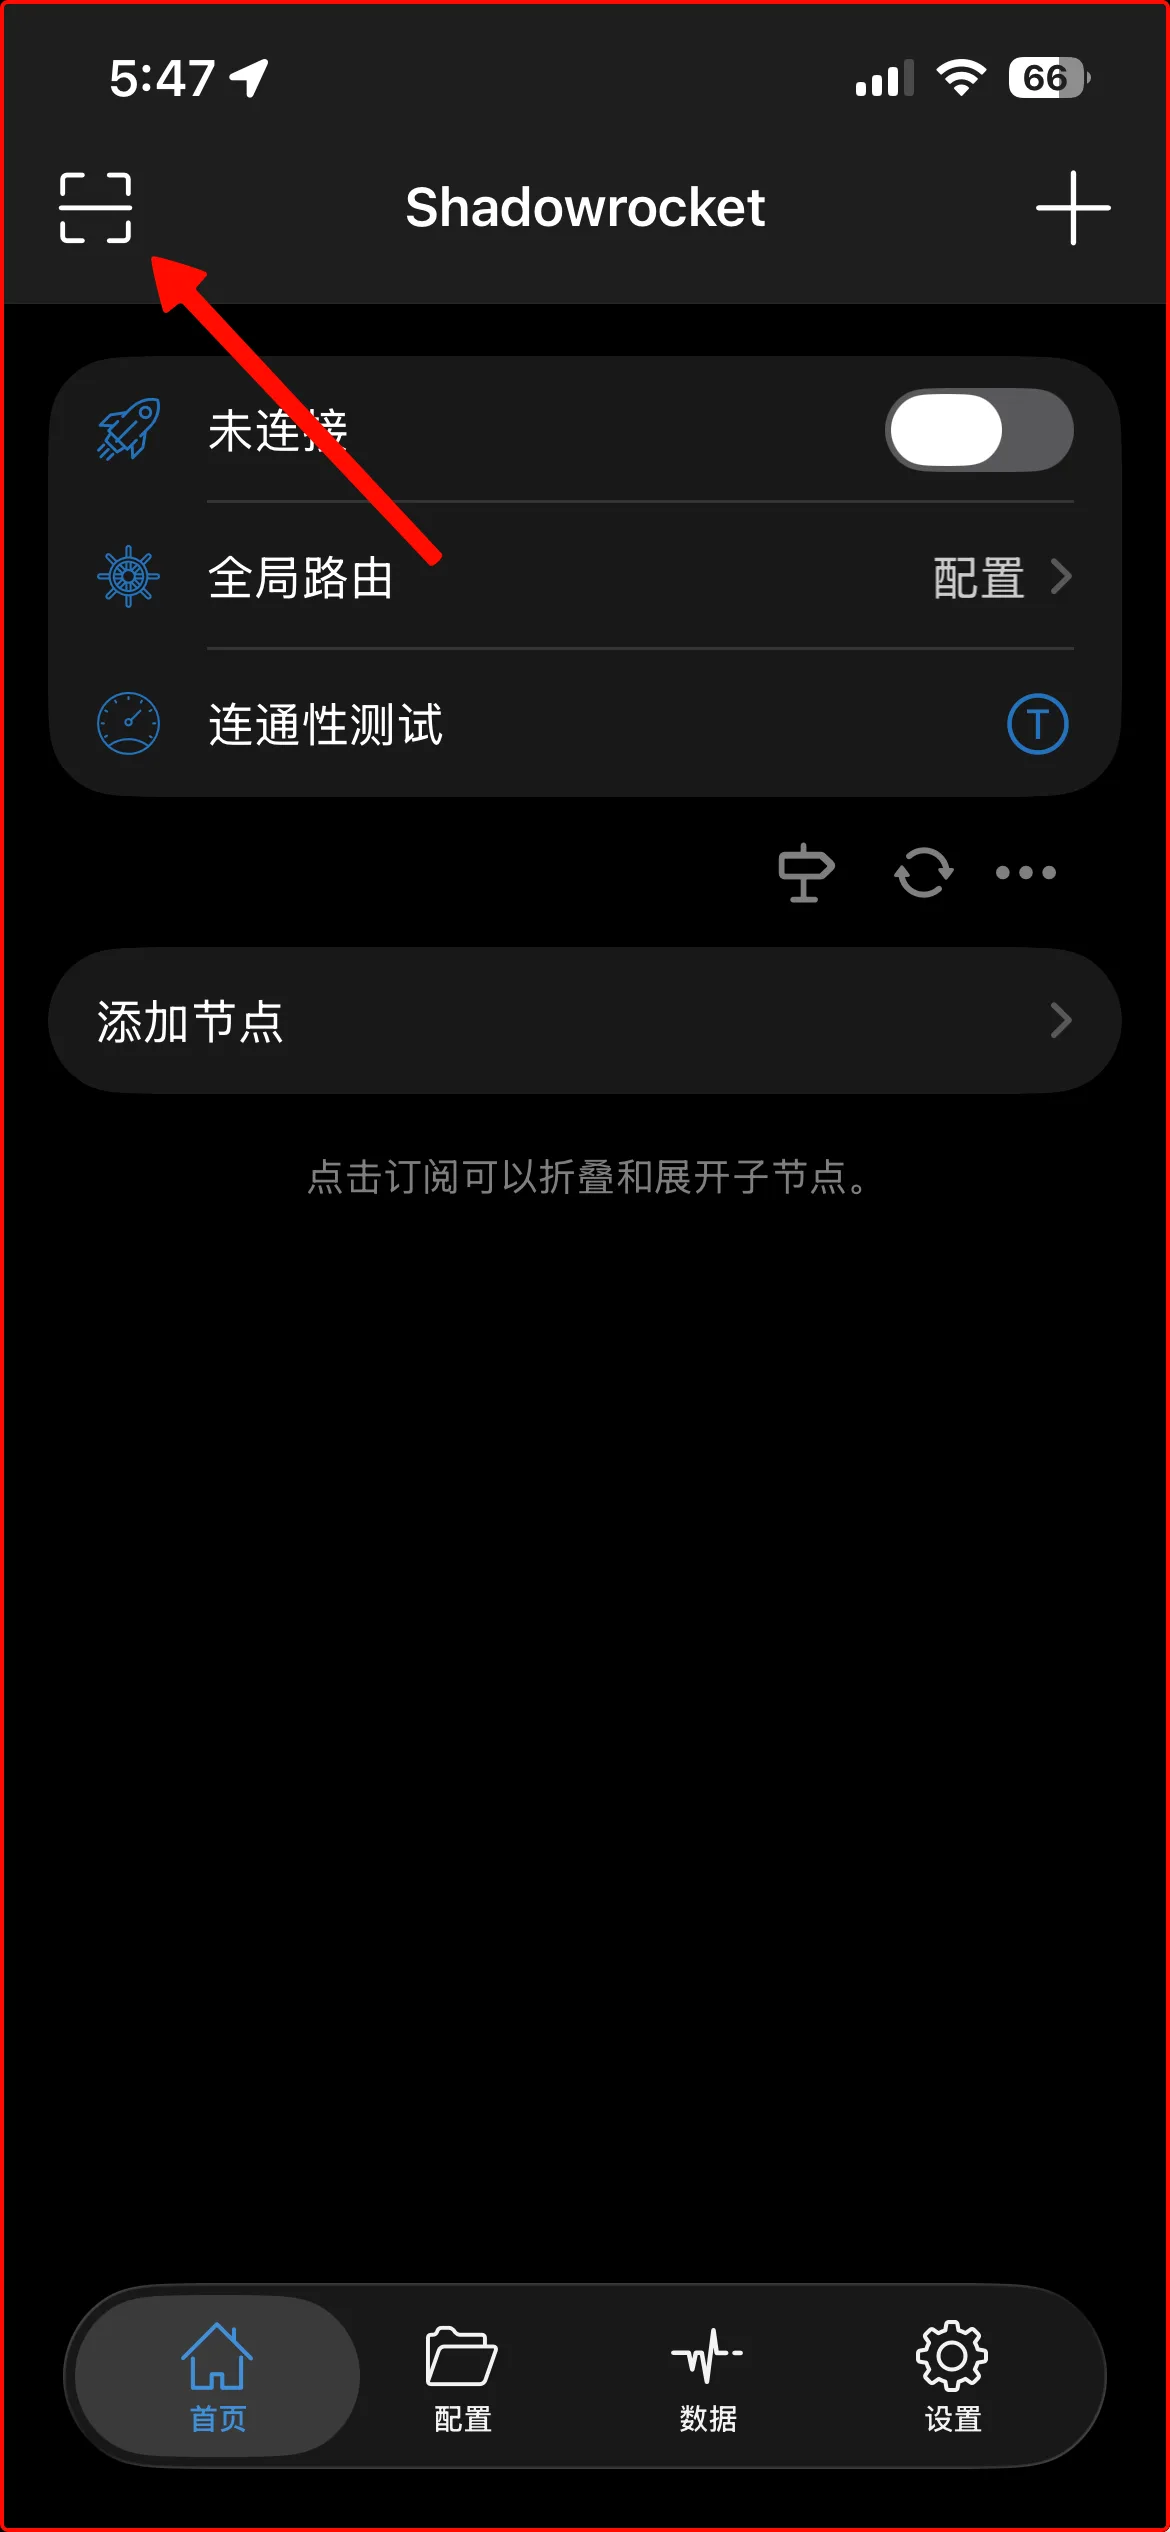
-
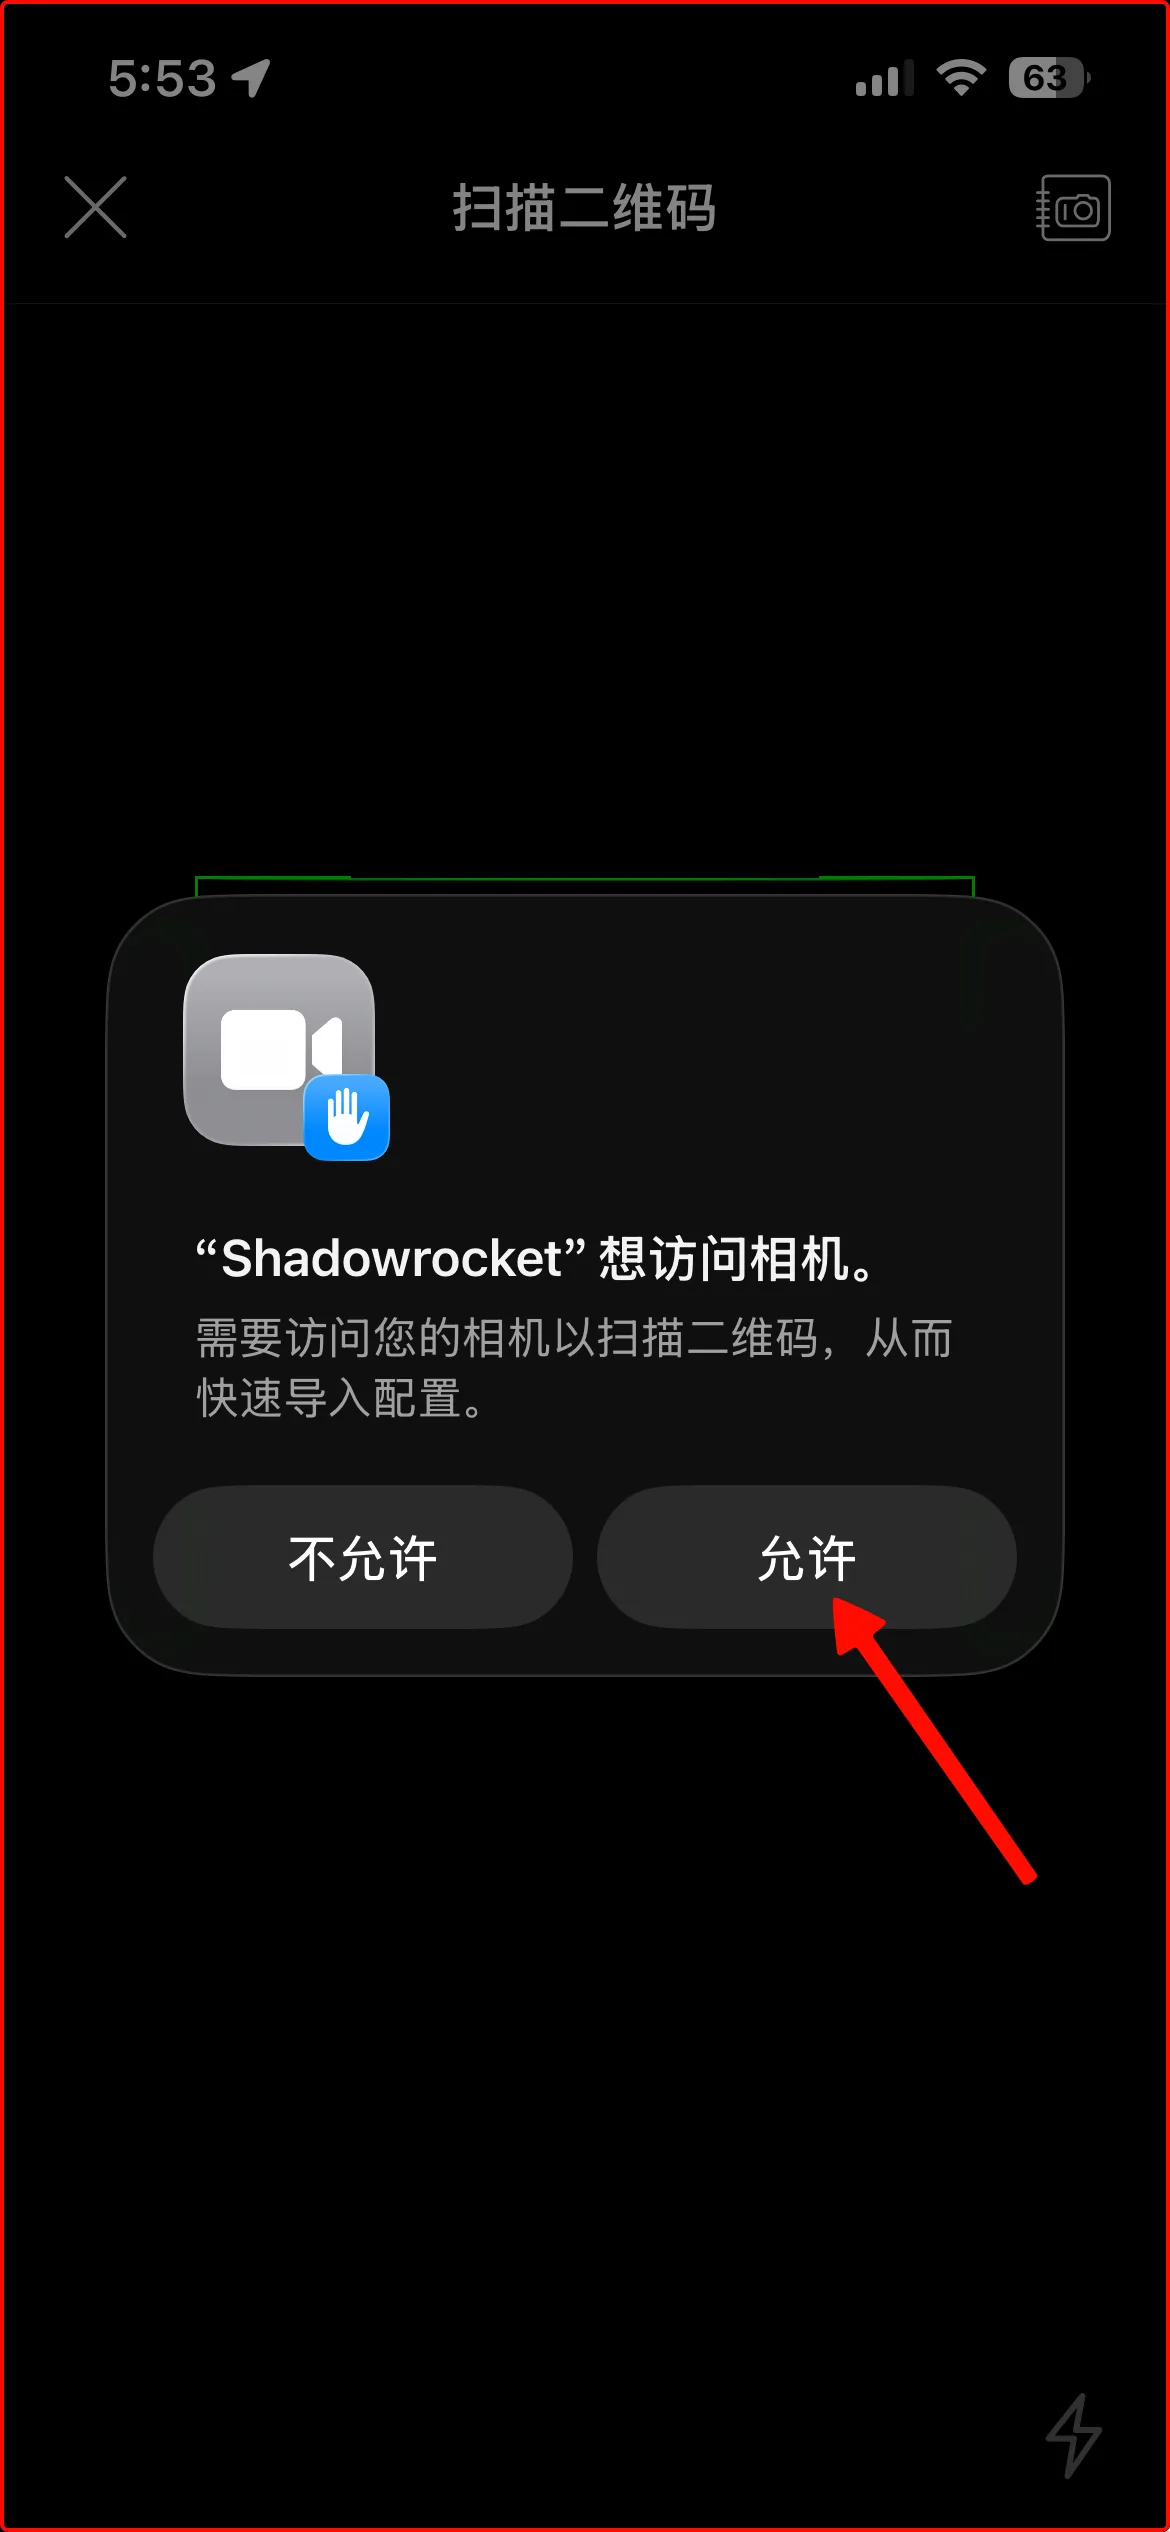
Allow camera access and scan
Allow camera access when prompted, then point the camera at the code your provider gave you.
-
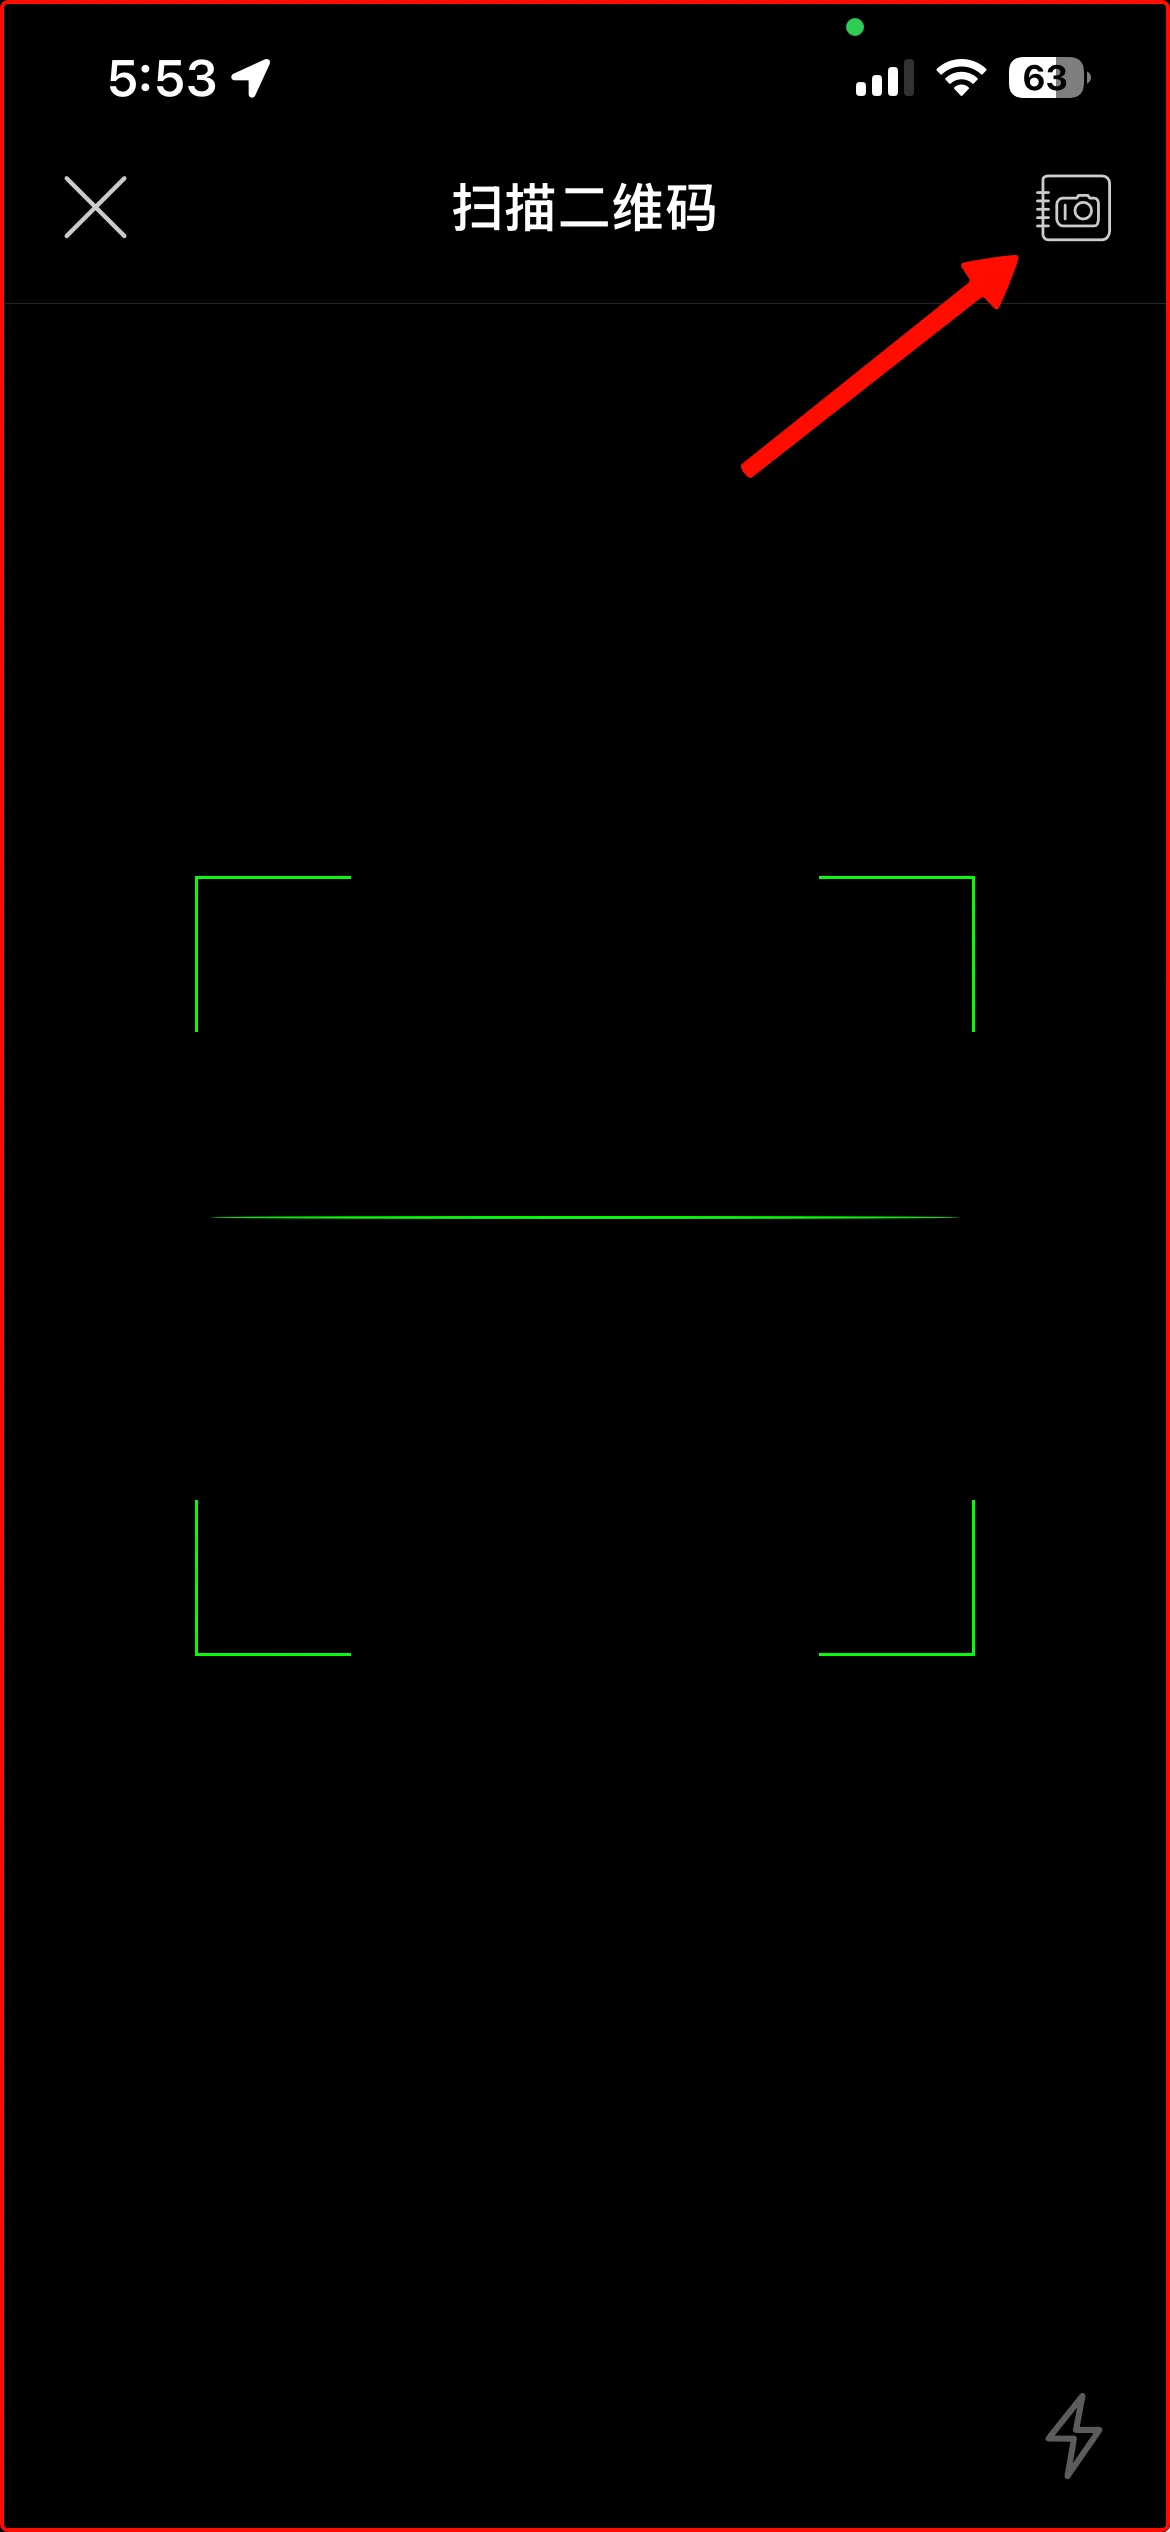
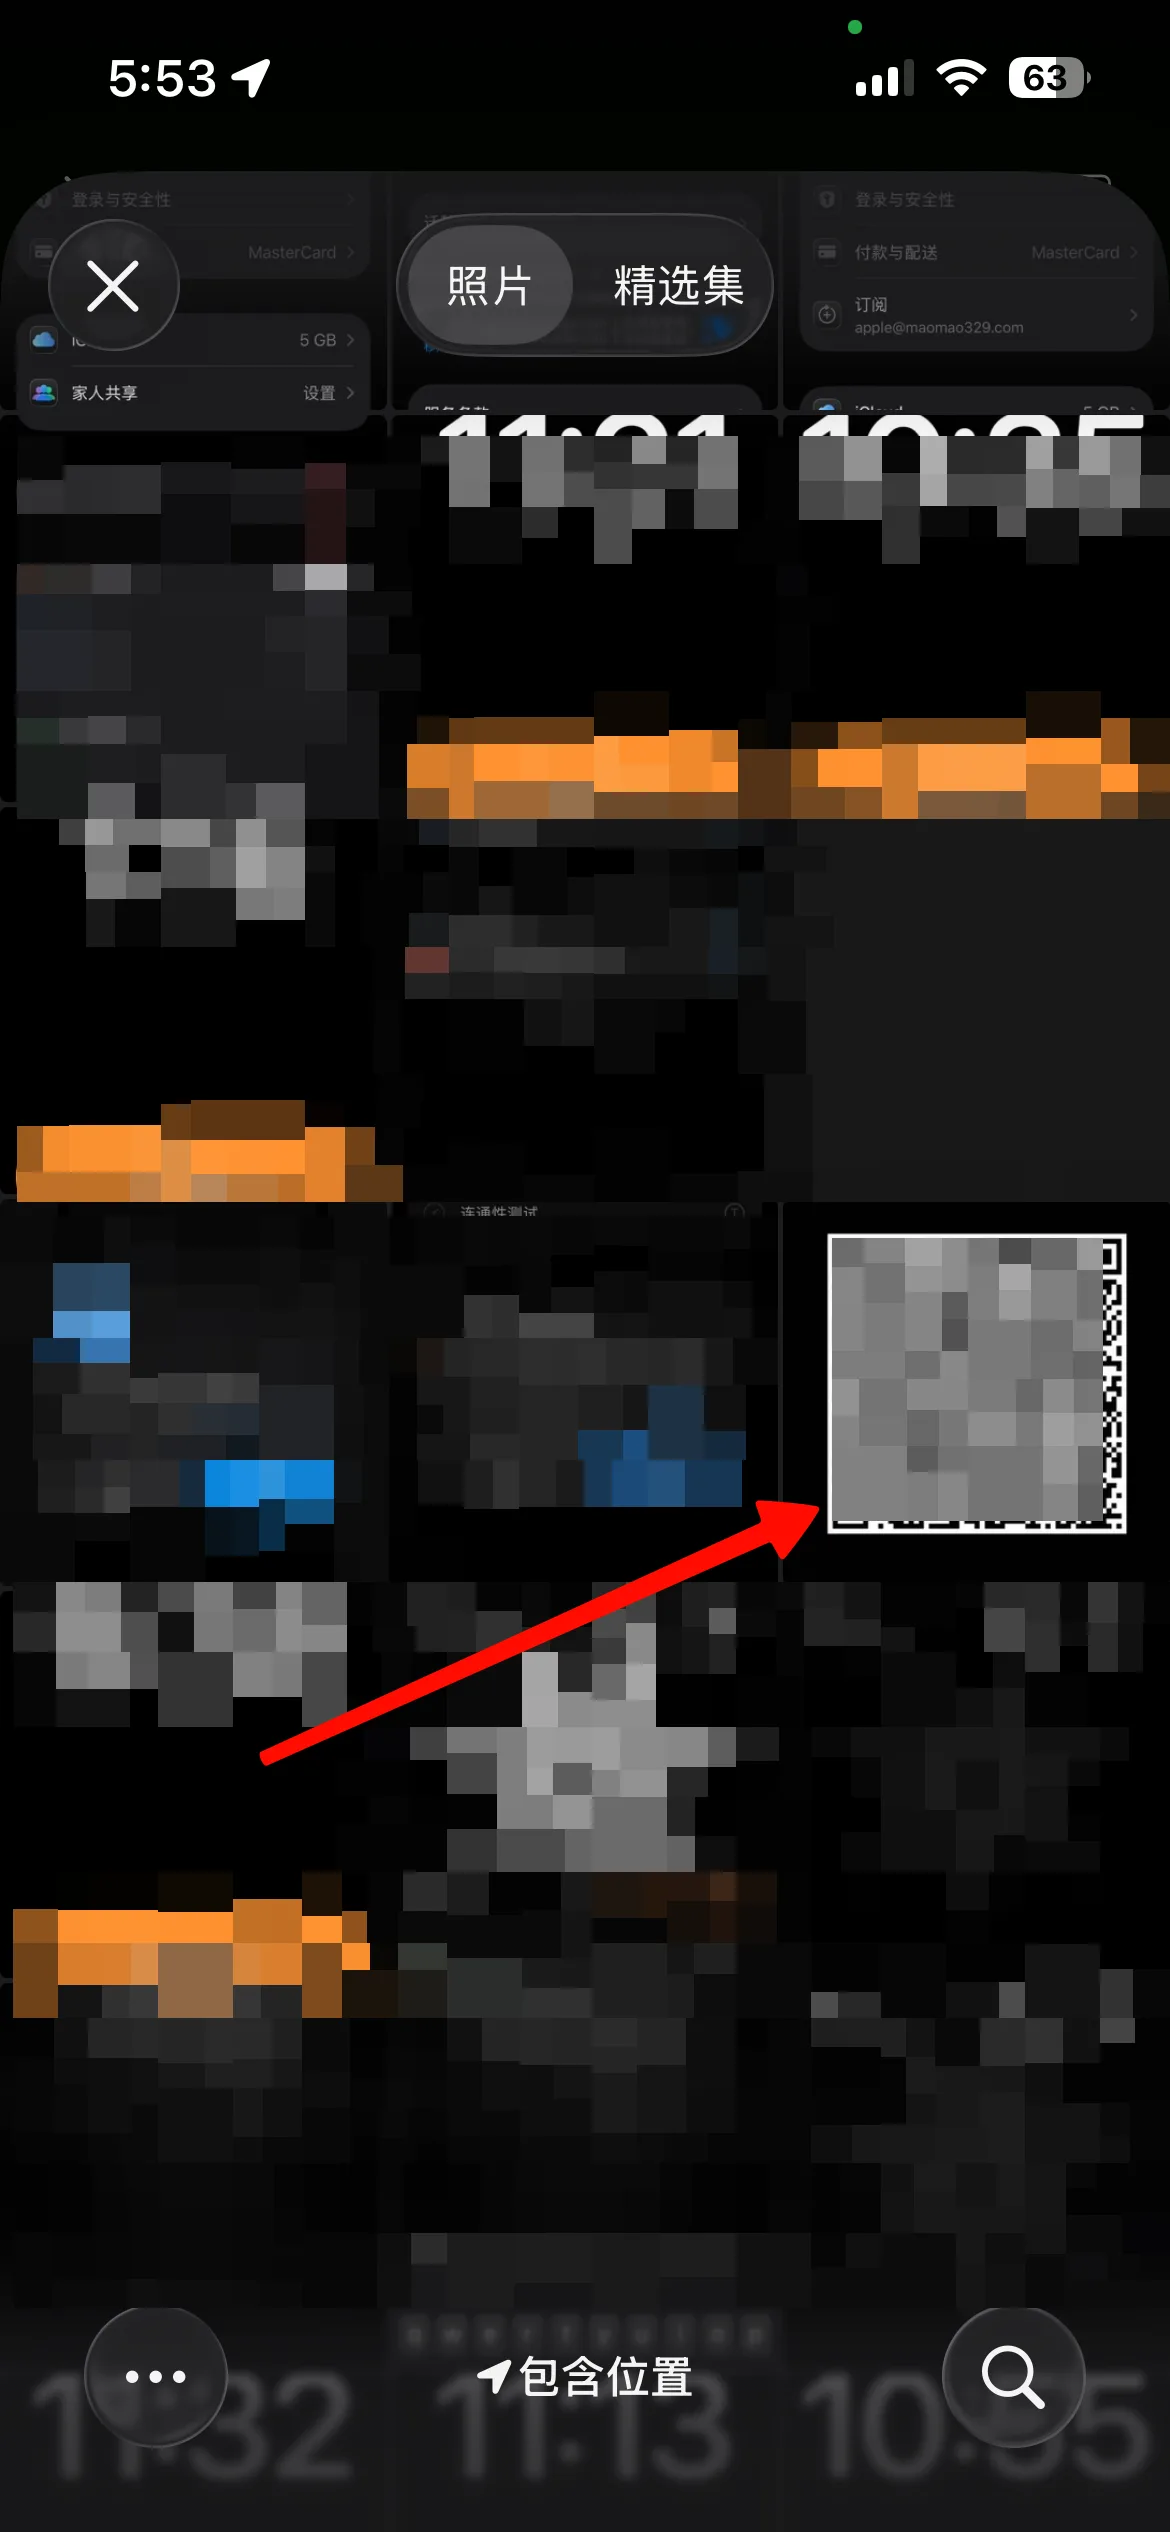
No code in front of you? Pick a saved screenshot
If the code is a saved screenshot rather than something in front of you, tap the album icon in the top-right of the scanner and pick it from Photos instead.
-
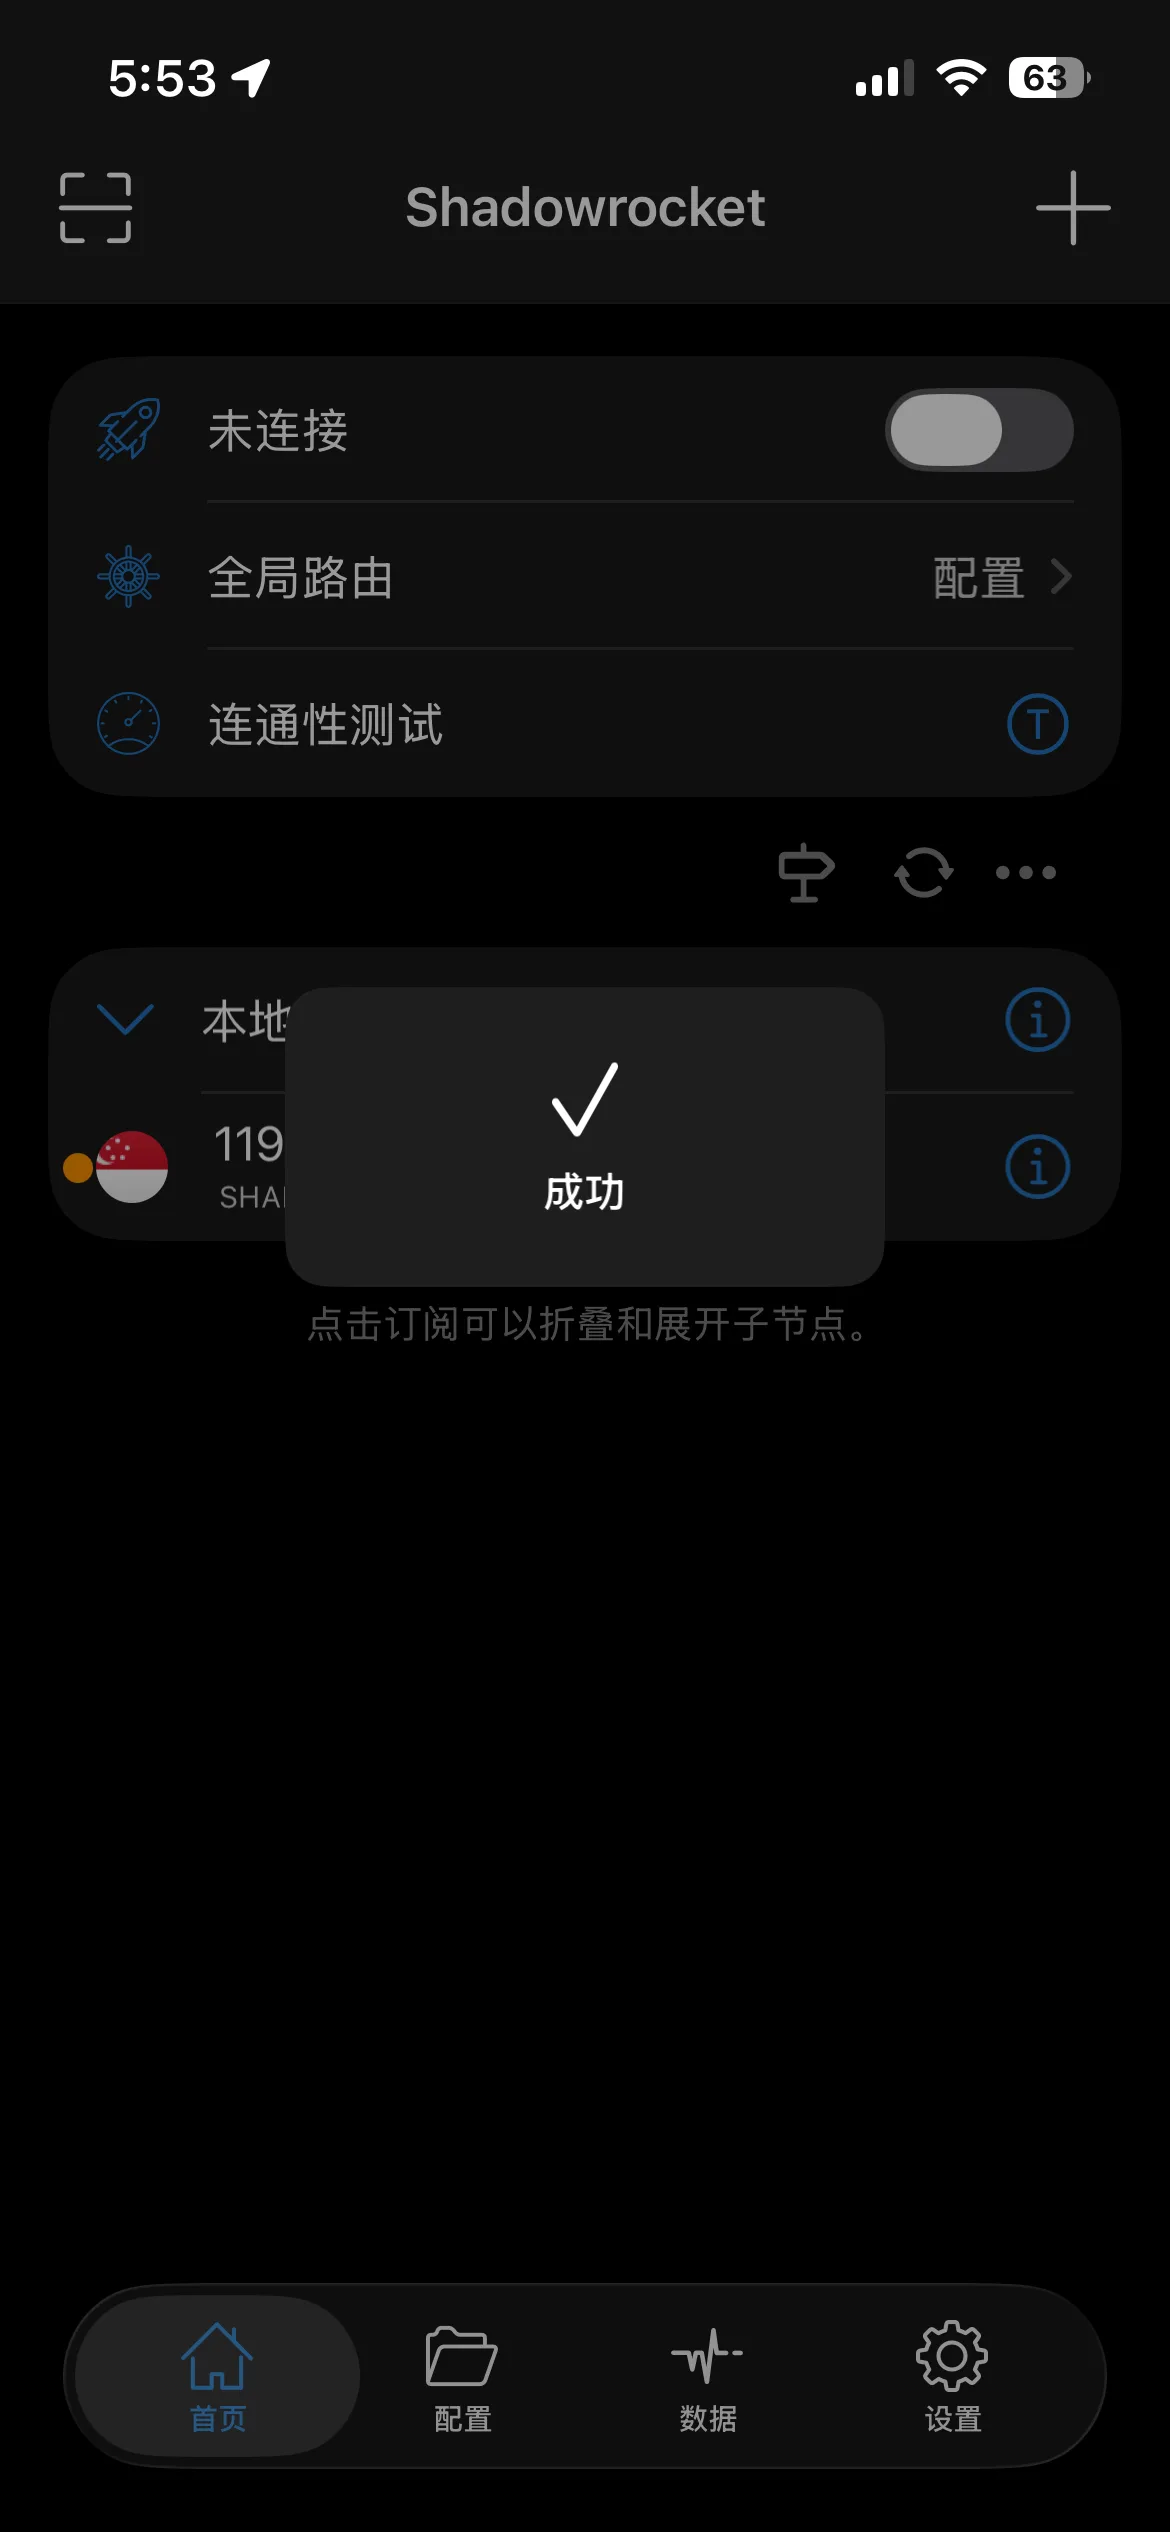
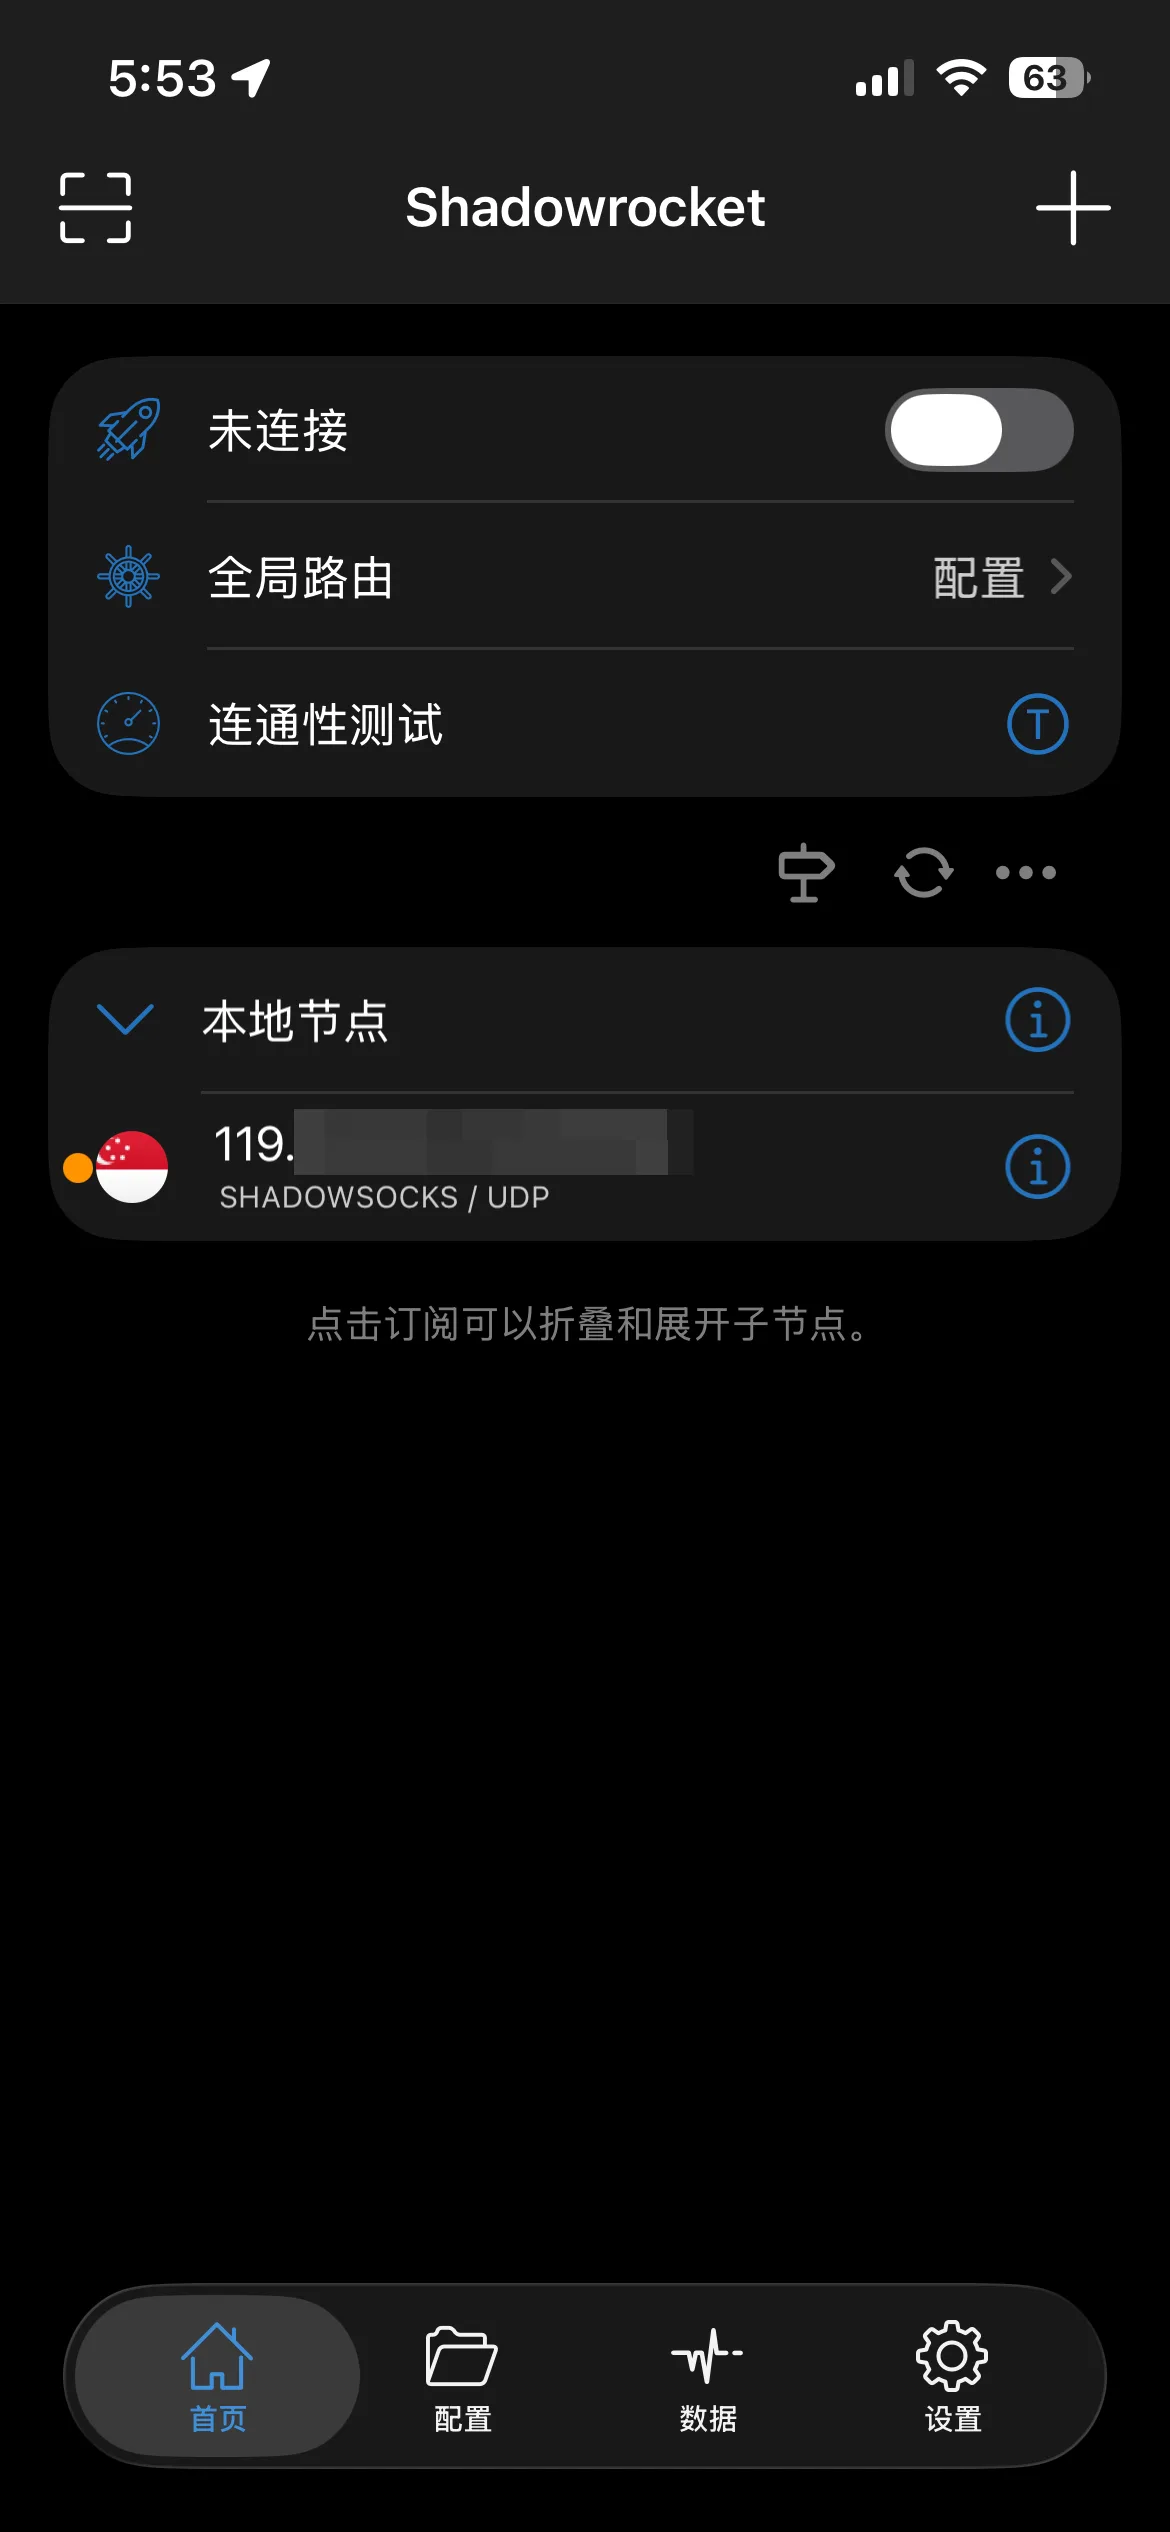
Confirm the server was added
A "成功" (Success) toast confirms the scan worked. Back on the home screen, your new server now shows up under 本地节点 (Local Nodes) with its address and protocol listed.
3. Import a rule set
This is what makes it "smart" instead of a blunt on/off VPN.
Start from a base config
| Module | Raw URL | What it does |
|---|---|---|
| Base config |
03.shadowsocks_tiny.conf
|
Add it under Config → Remote Config → the + in the top-right → Add config from URL. |
Same as any config: tap it in the list → Use Config, and confirm you see the orange dot and checkmark next to it before moving on.
-
Copy the link, then tap + in Config
Tap the copy icon next to the base config URL above, then open ShadowRocket → Config → the
+in the top-right.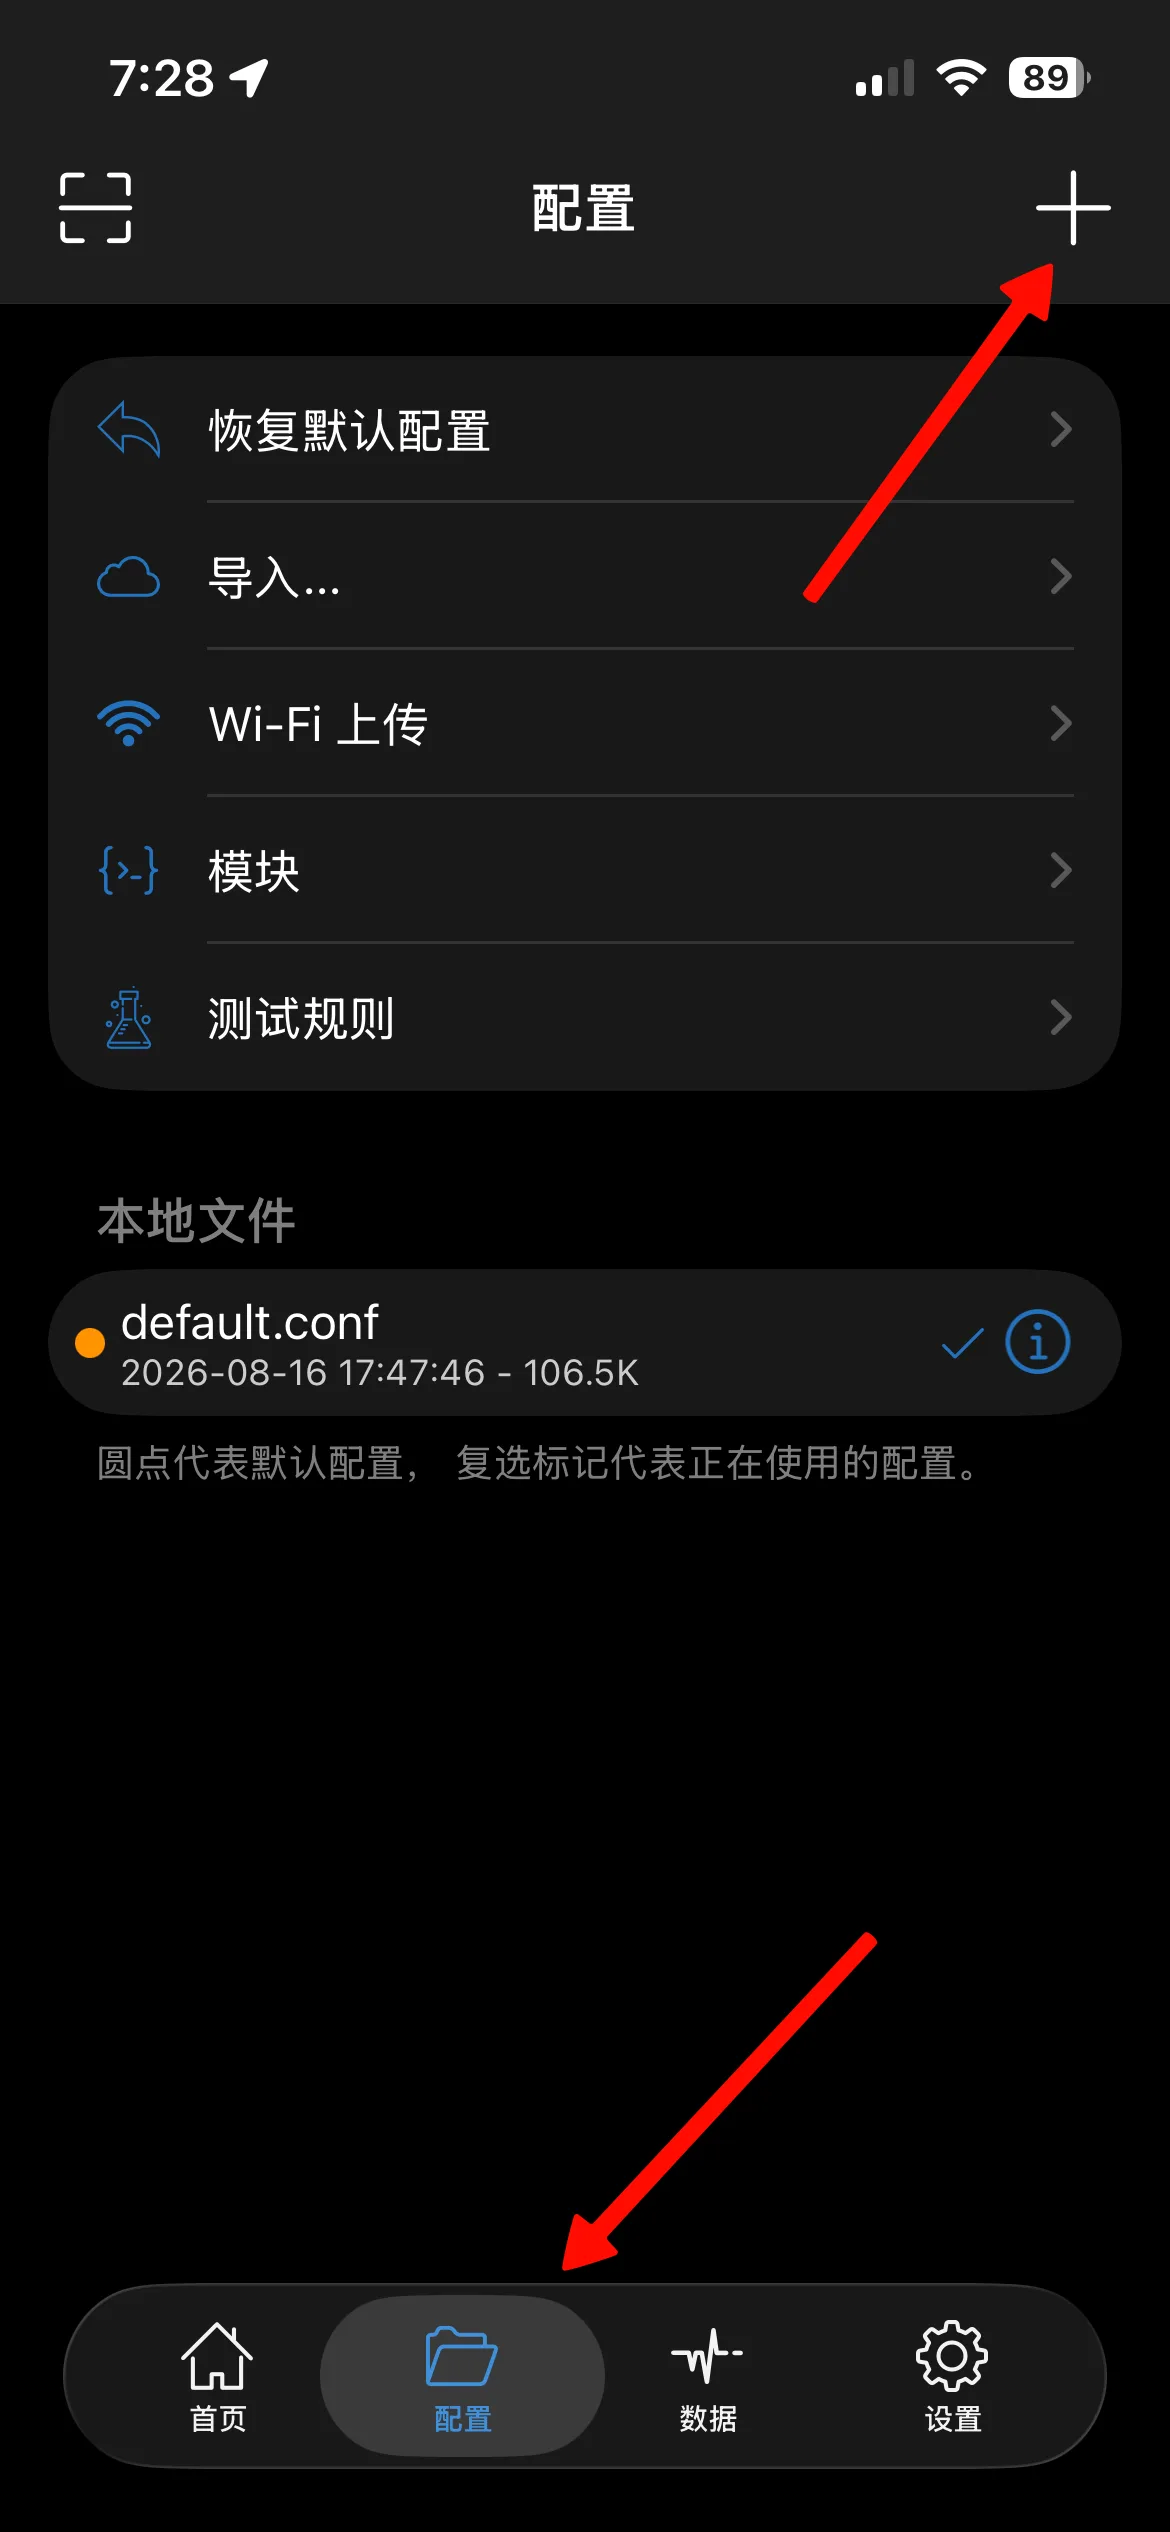
-
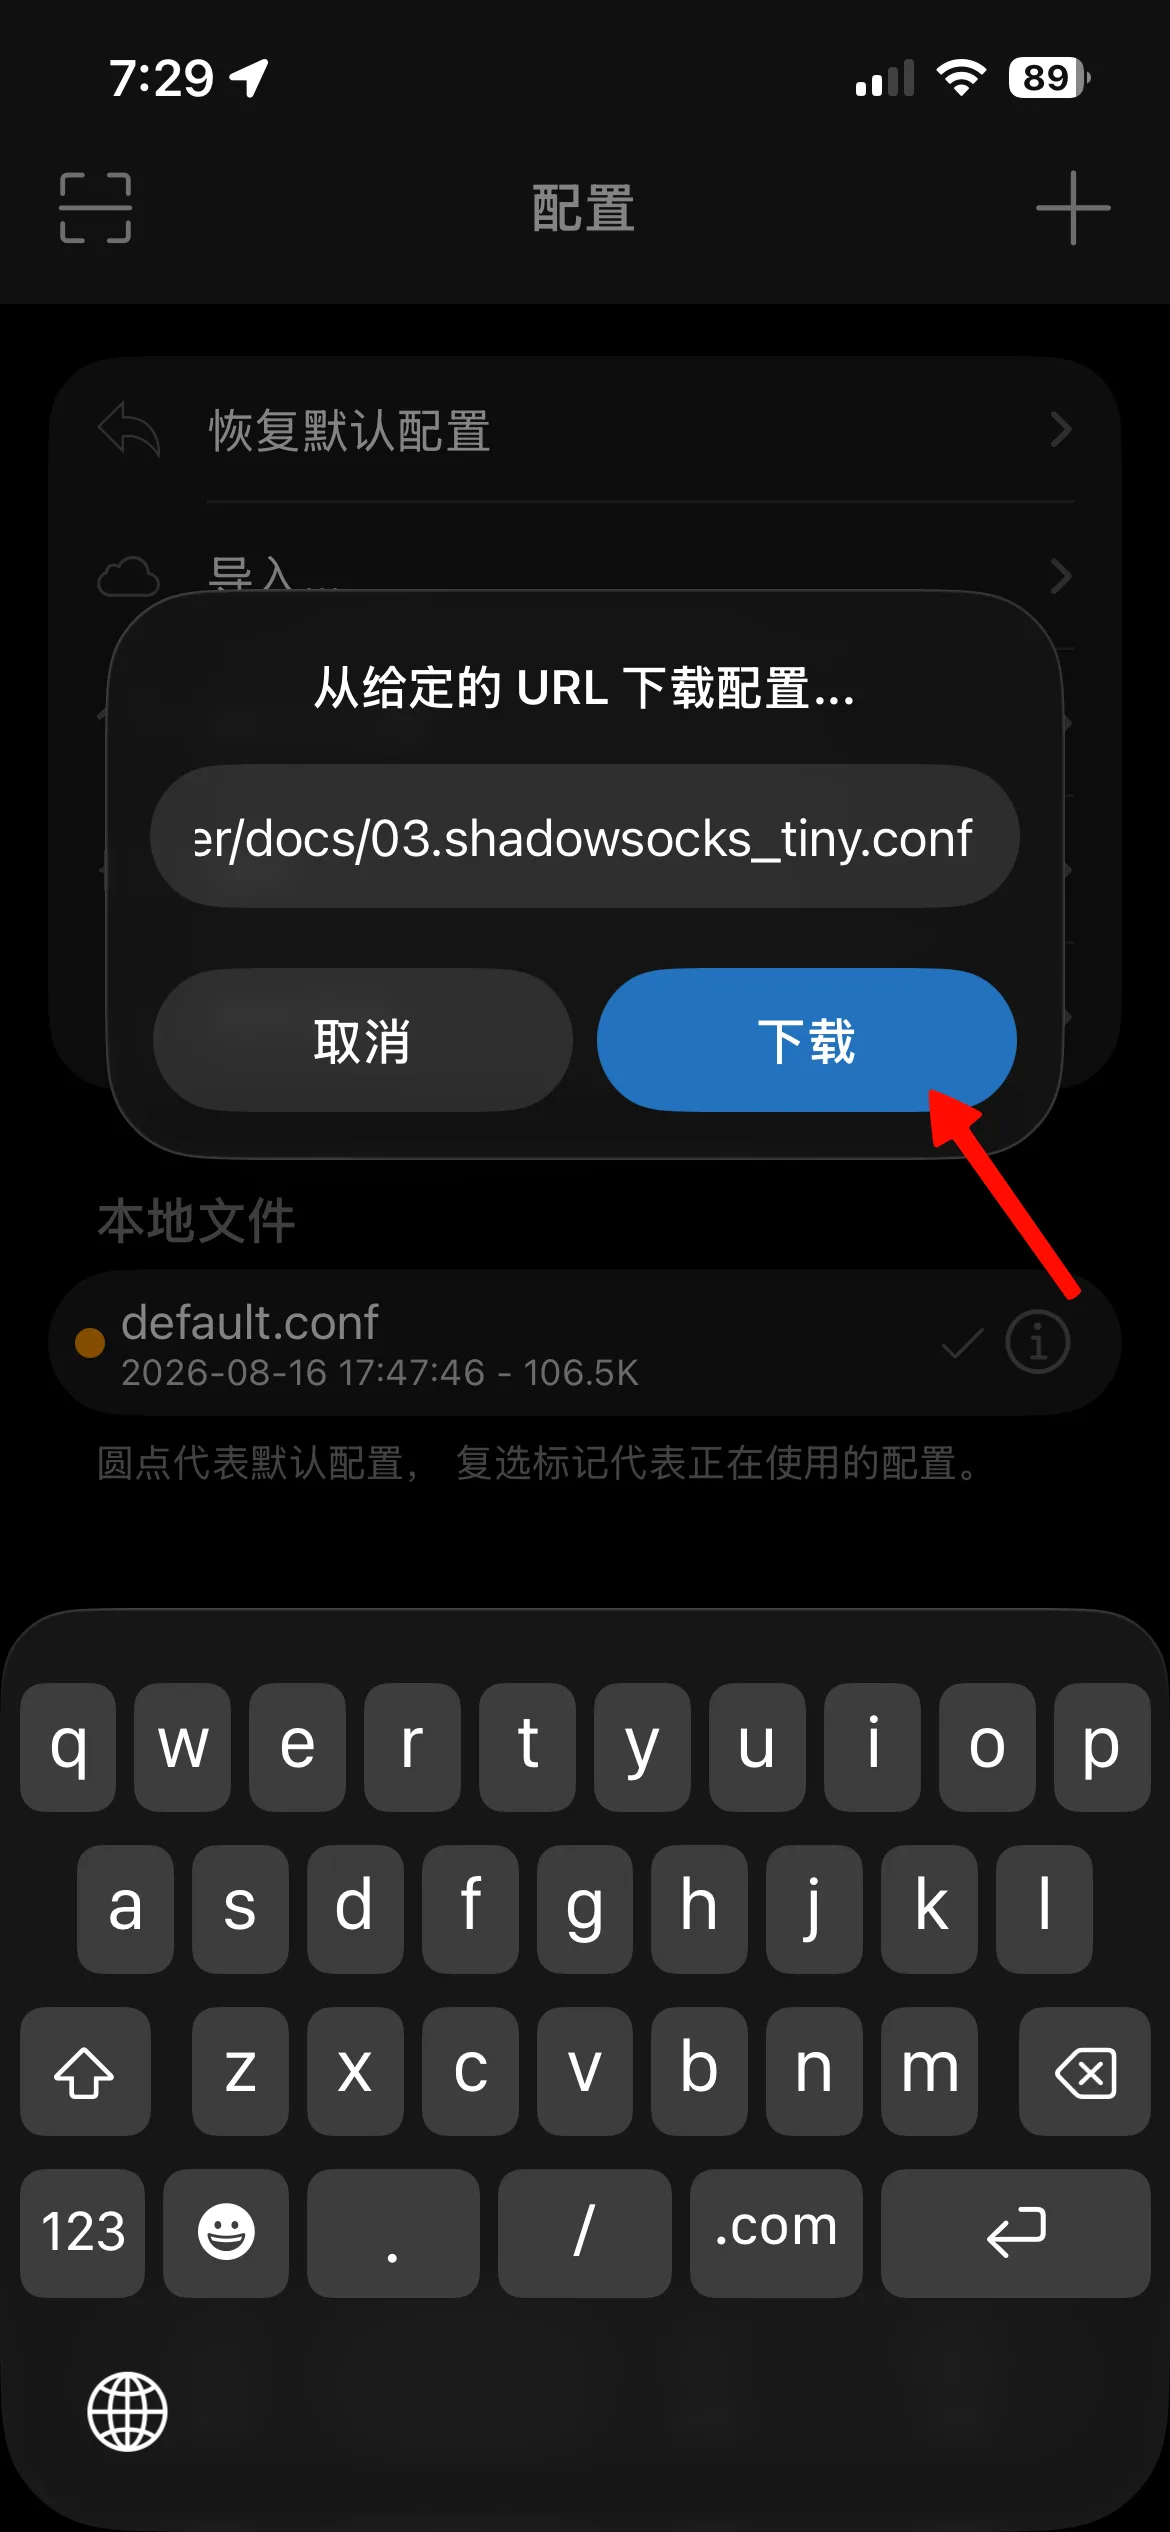
The URL field auto-fills — tap Download
Since you already copied the link, it's pasted in for you automatically. Tap Download.
-
Success — now tap it and choose Use Config
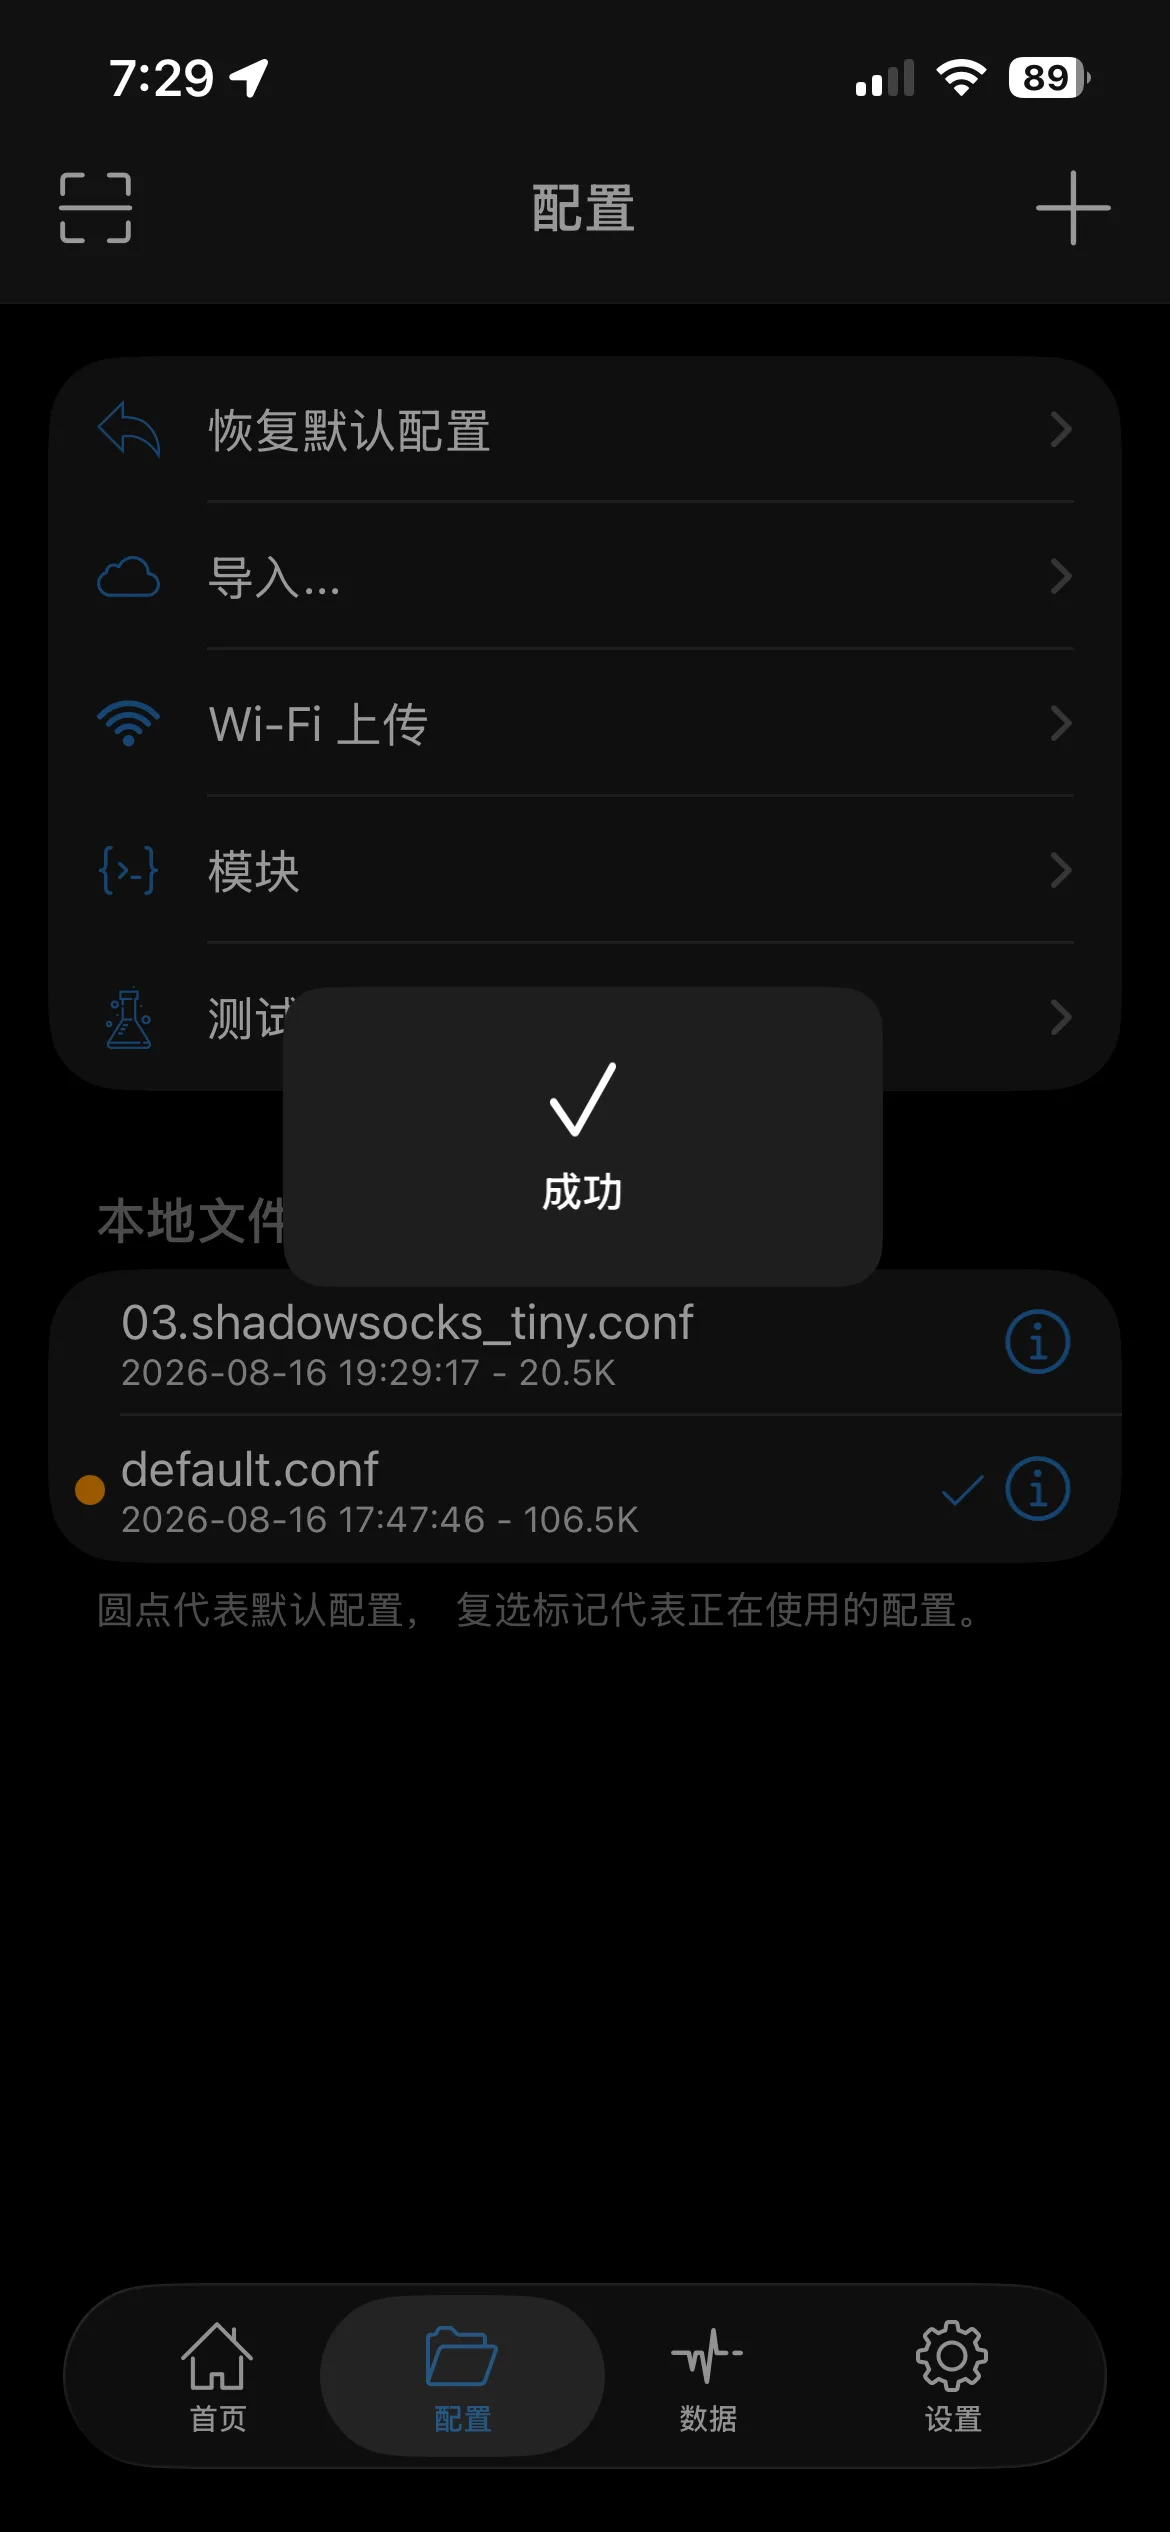
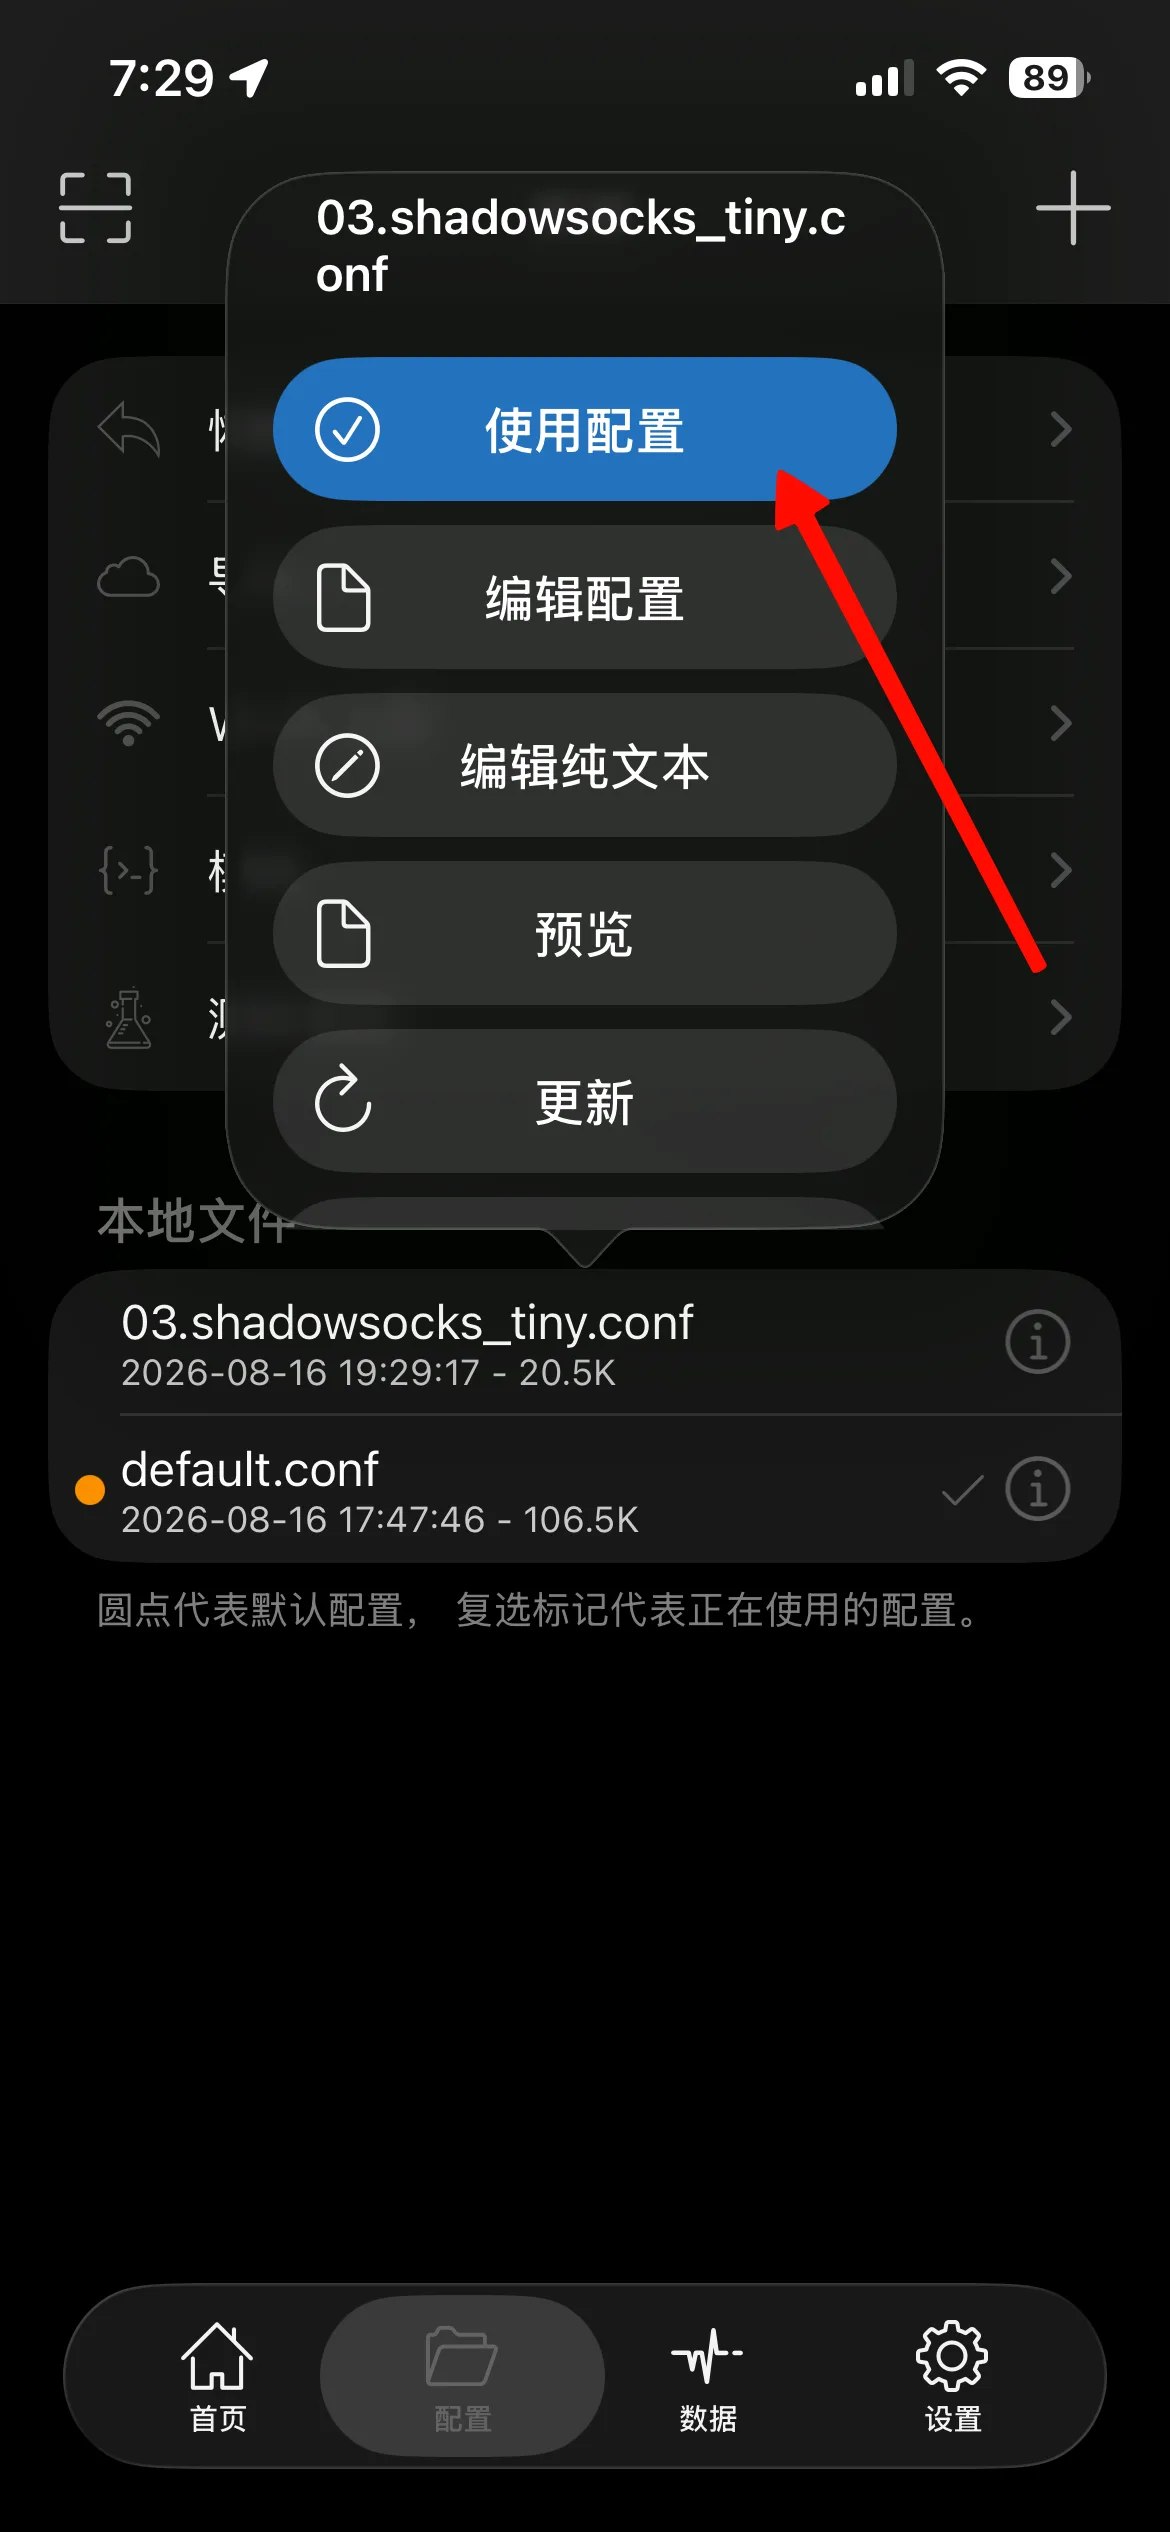
The new config appears in your local files. Tap it, then tap Use Config in the popup.
-
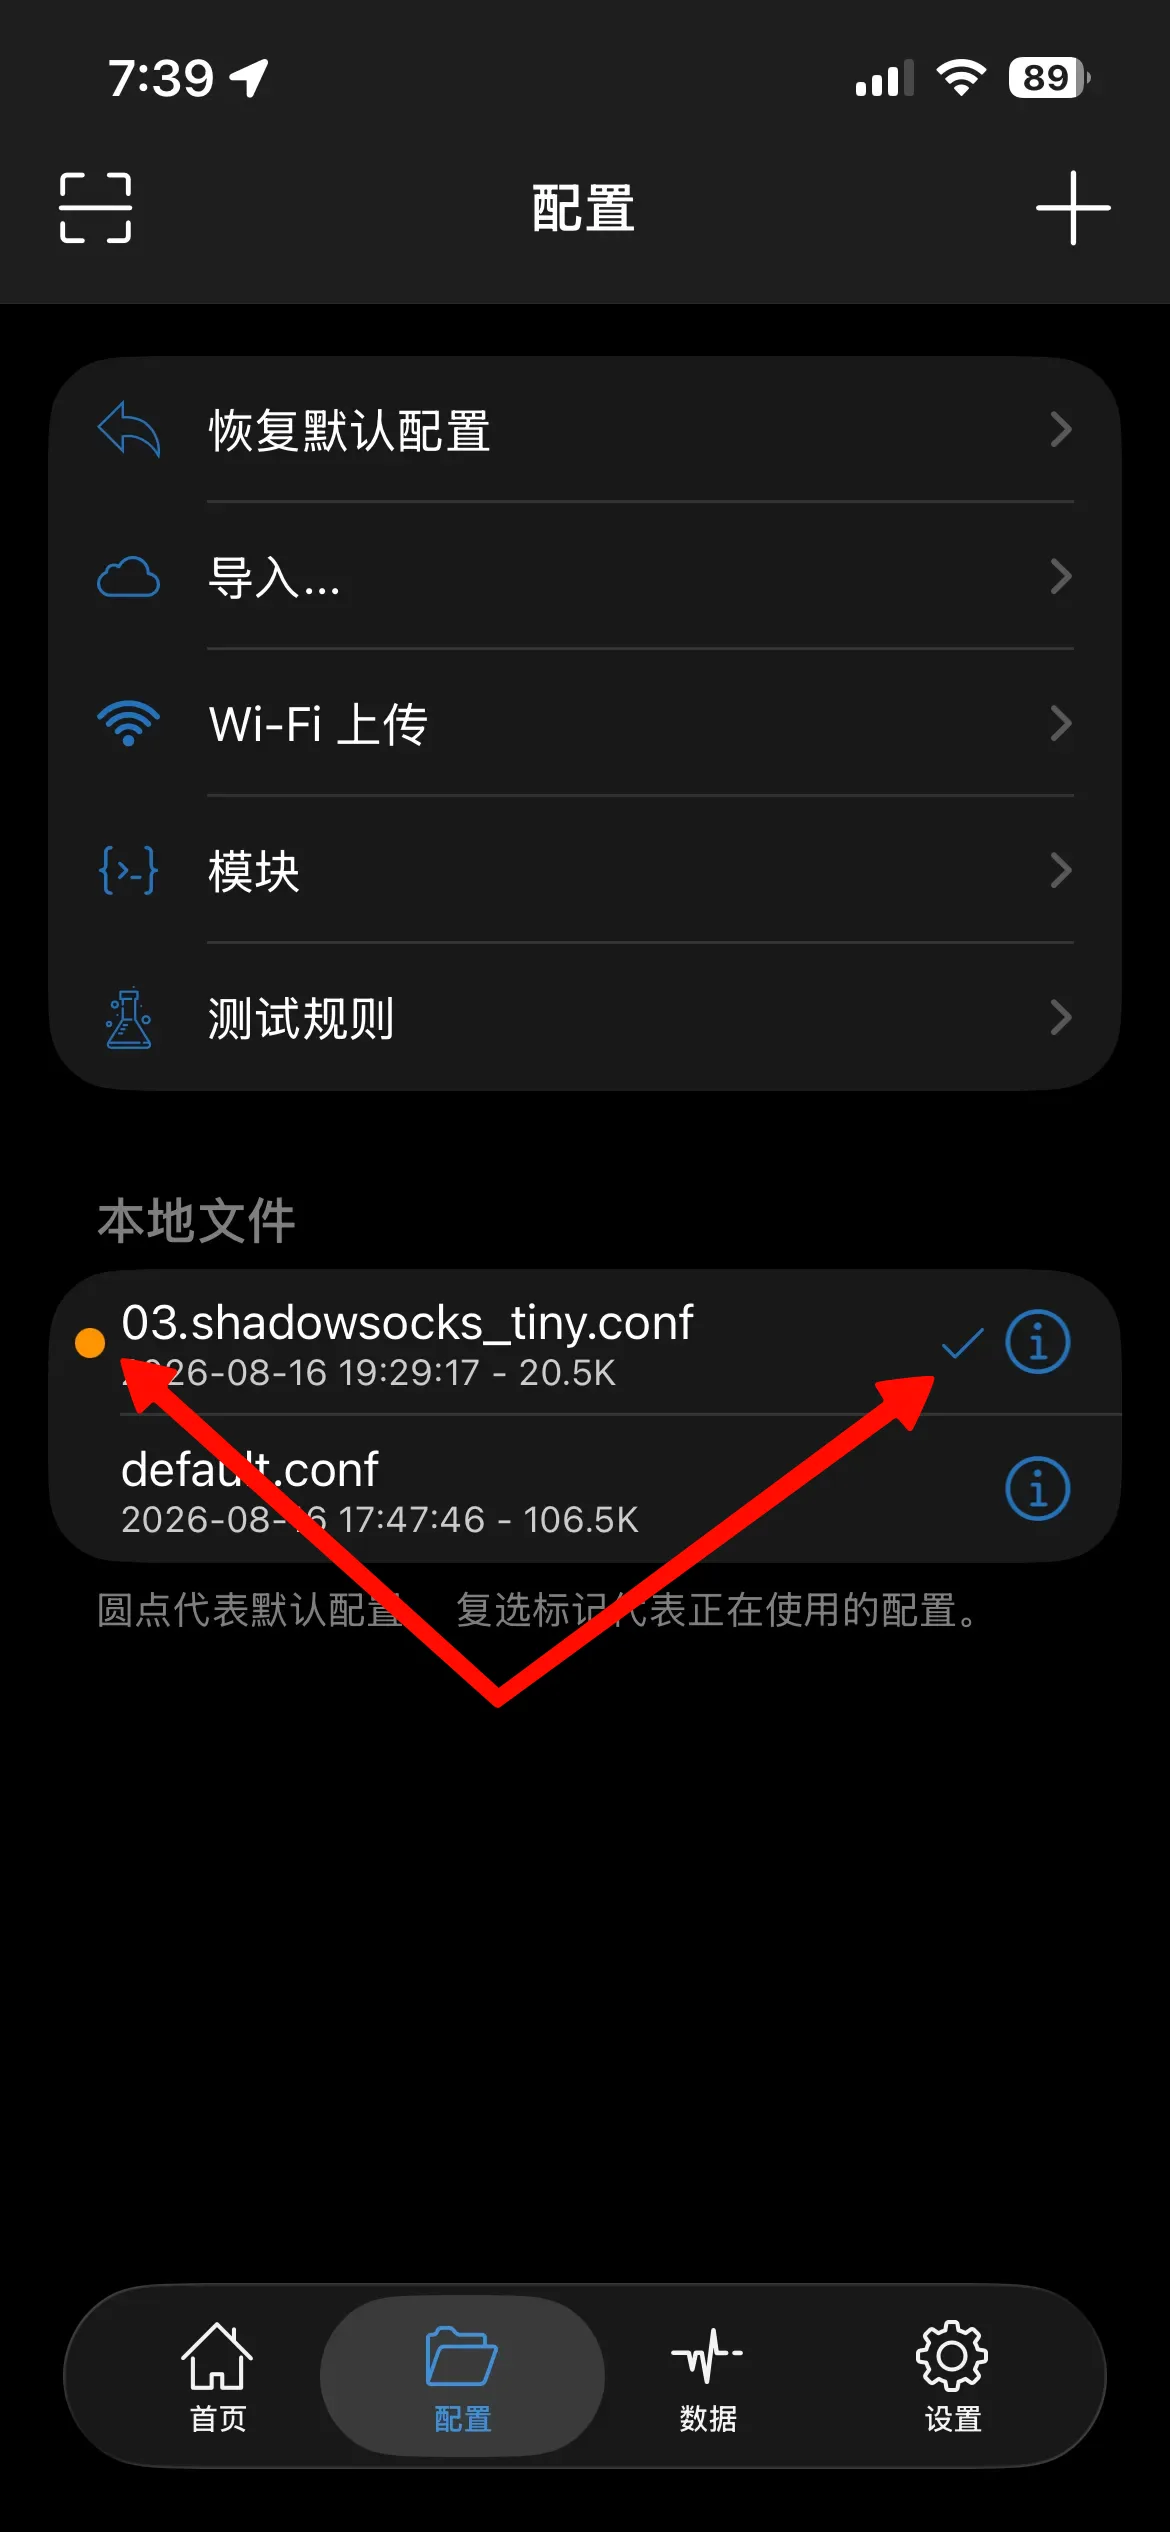
Confirm it's active
You should see the orange dot and checkmark next to the base config — that's what "active" looks like.
Want the rule modules below to auto-update via an iOS Shortcut instead of ShadowRocket's built-in refresh? See GMOogway's module auto-update guide.
GMOogway's repo publishes three ready-made module files — Direct, Proxy, and Reject — updated automatically. Import the raw URLs below directly; no need to click through to GitHub.
| Module | Raw URL | What it does |
|---|---|---|
| Direct |
sr_direct_list.module
|
Domains/IPs matched go straight to your real network — no proxy hop. Use for local/regional services that don't need to be tunneled. |
| Proxy |
sr_proxy_list.module
|
Matched traffic is routed through your configured proxy. This is the default bucket for anything blocked or geo-restricted. |
| Reject |
sr_reject_list.module
|
Matched traffic is dropped outright — used for ad/tracker domain lists. |
-
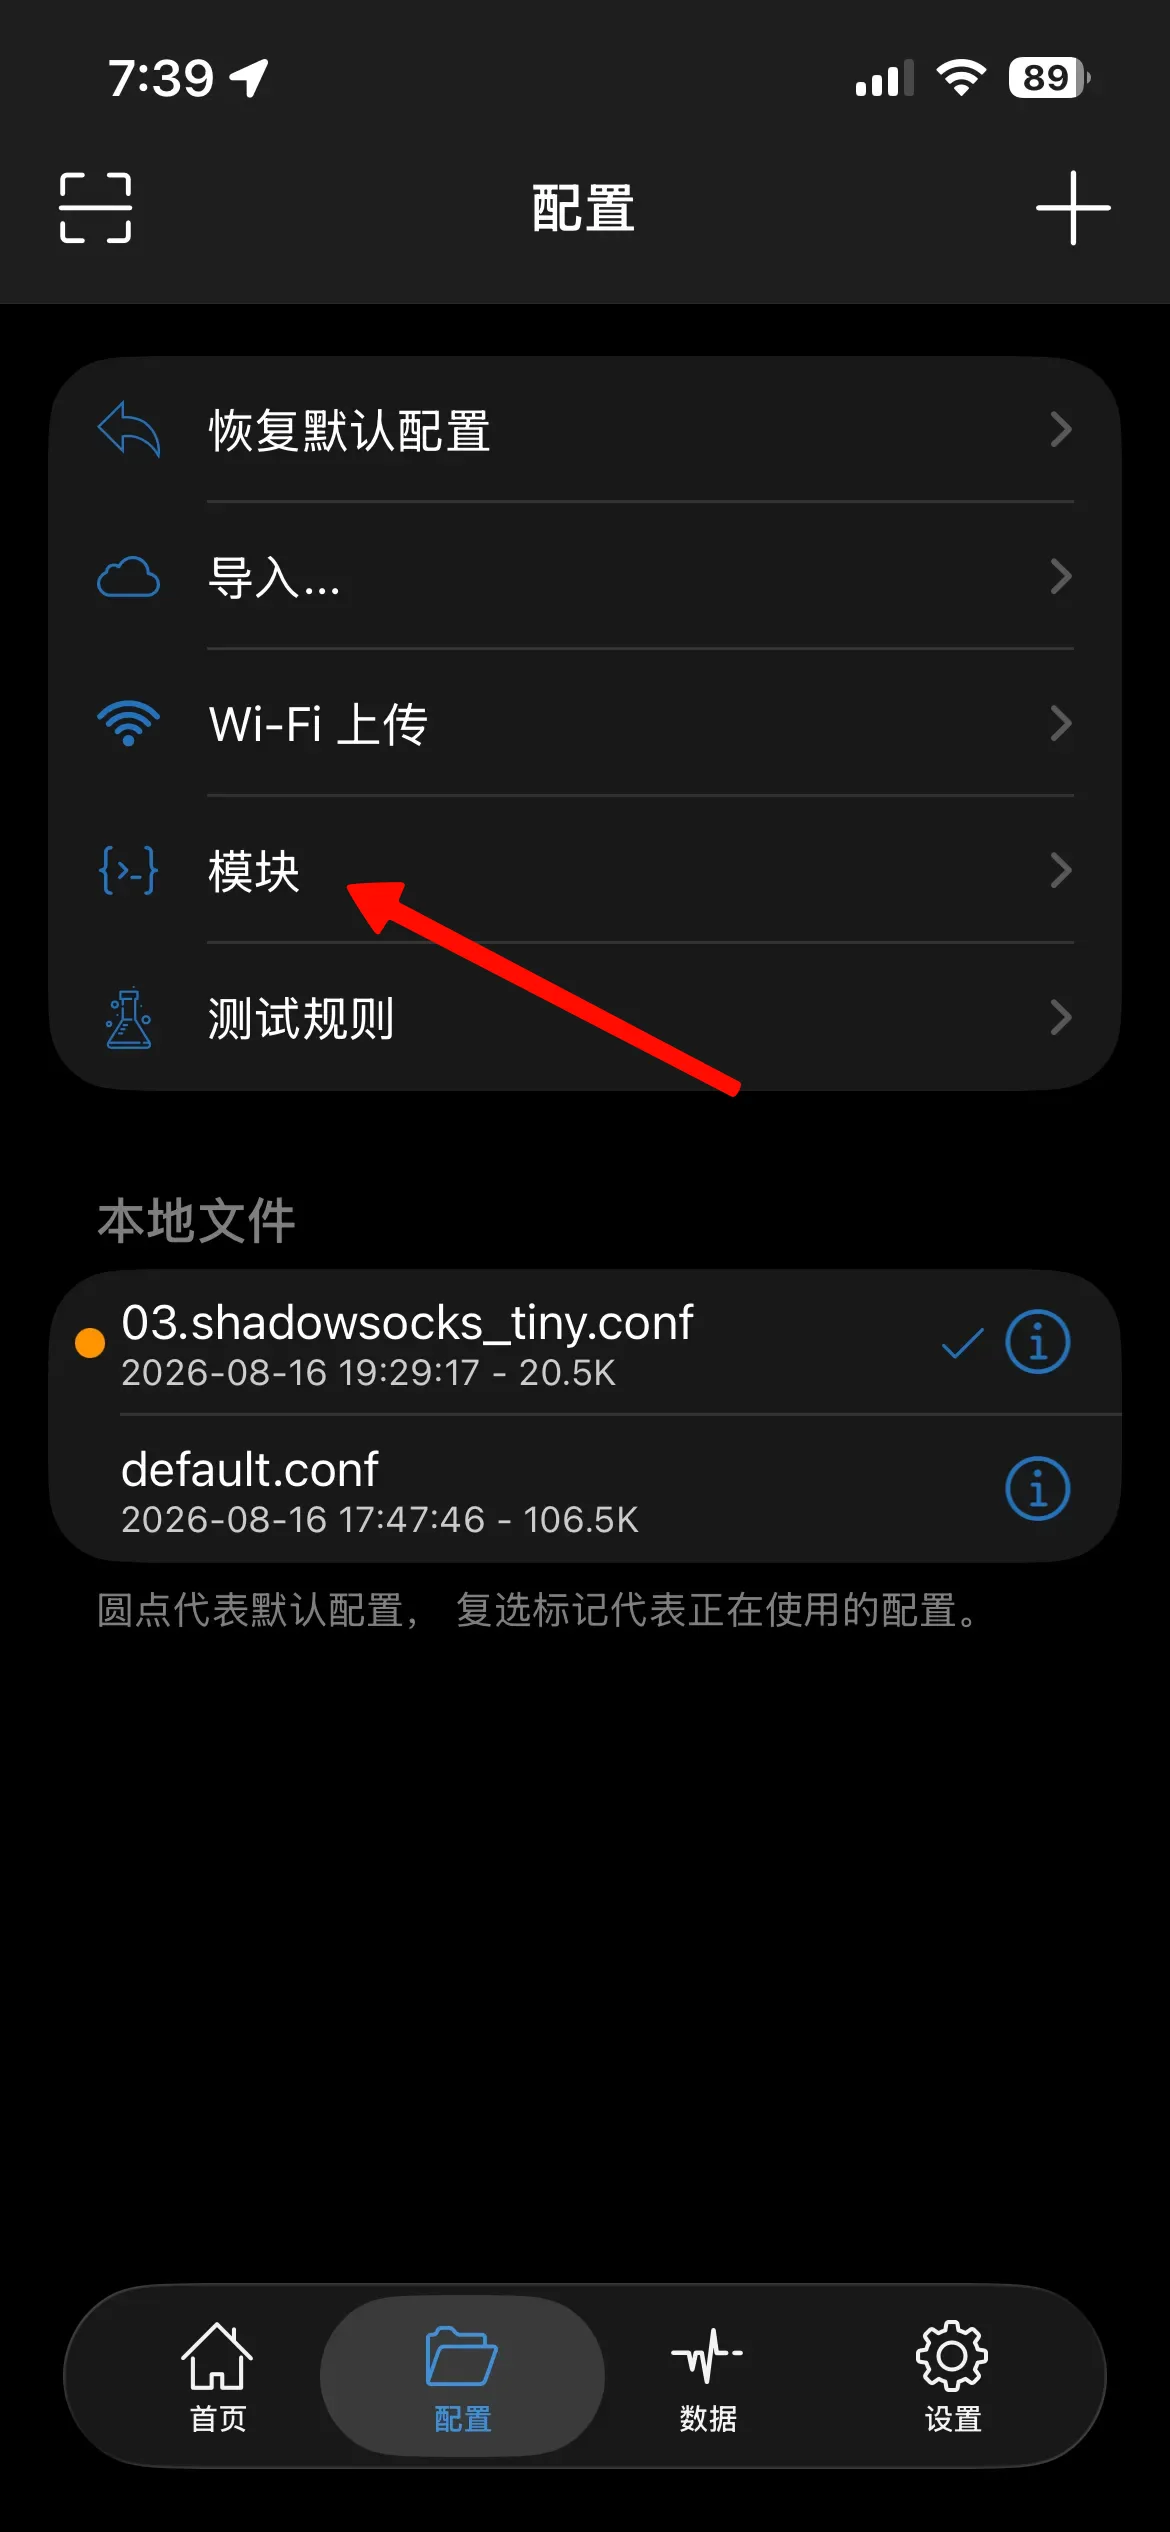
Go to Config → Modules
Back on the Config page, tap Modules.
-
Copy a module link, then tap + to add it
Tap the copy icon next to one of the three module URLs in the table above, then tap the
+in the top-right of the Modules page — same auto-fill trick as the base config.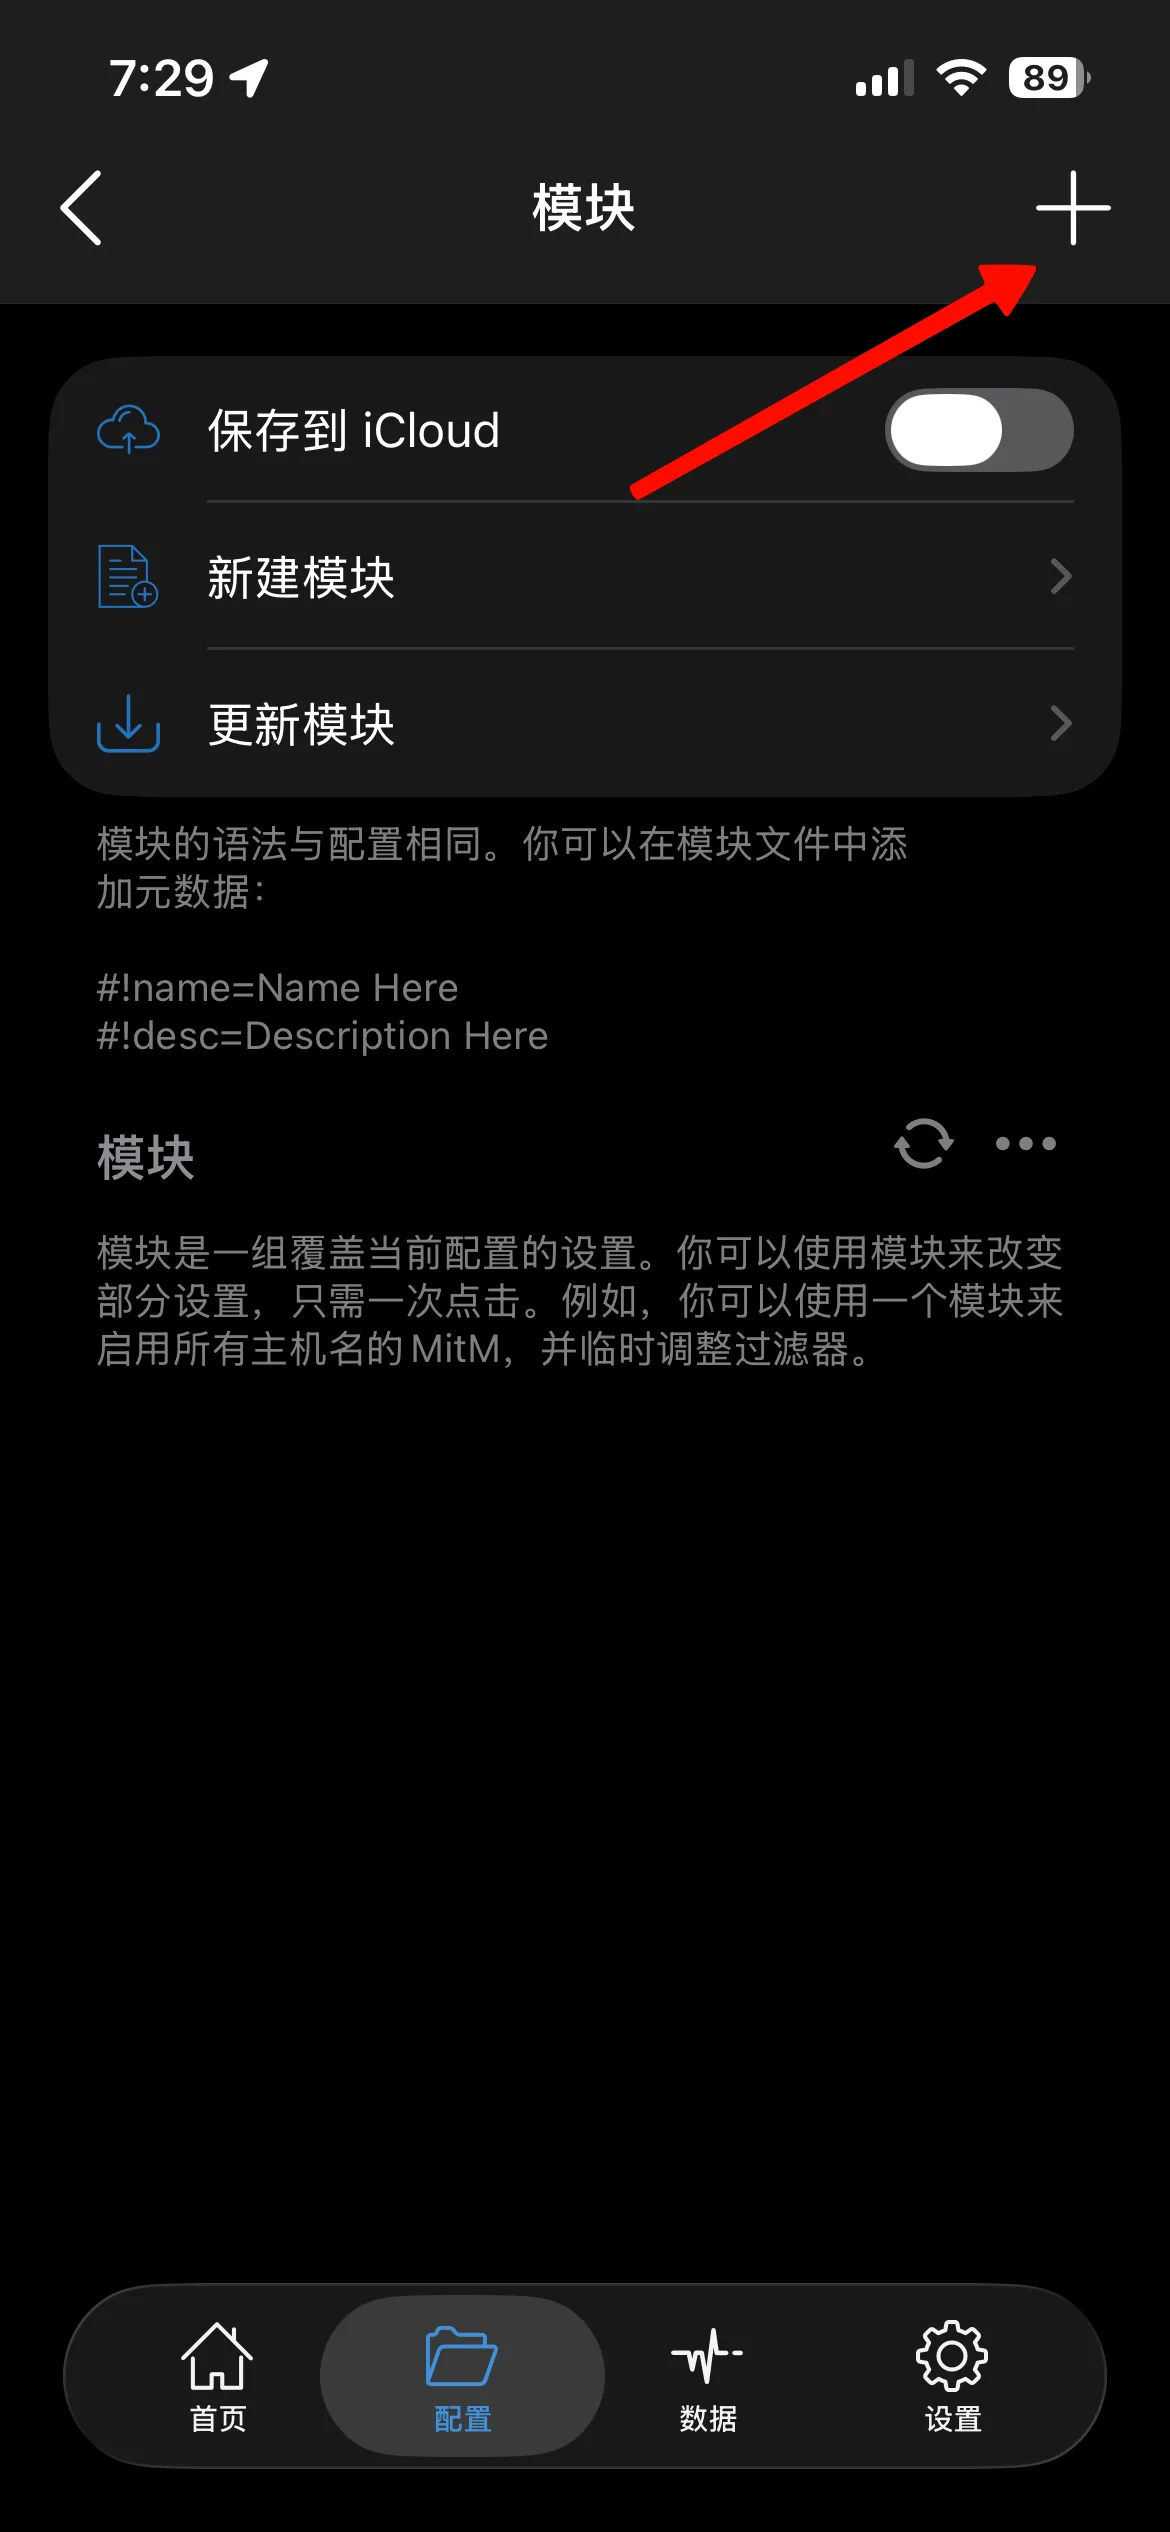
-
Tap Download, then repeat for the other two
The URL field is already filled in from your clipboard — tap Download. Repeat this same copy-link-then-add step for all three module URLs (Direct, Proxy, Reject).
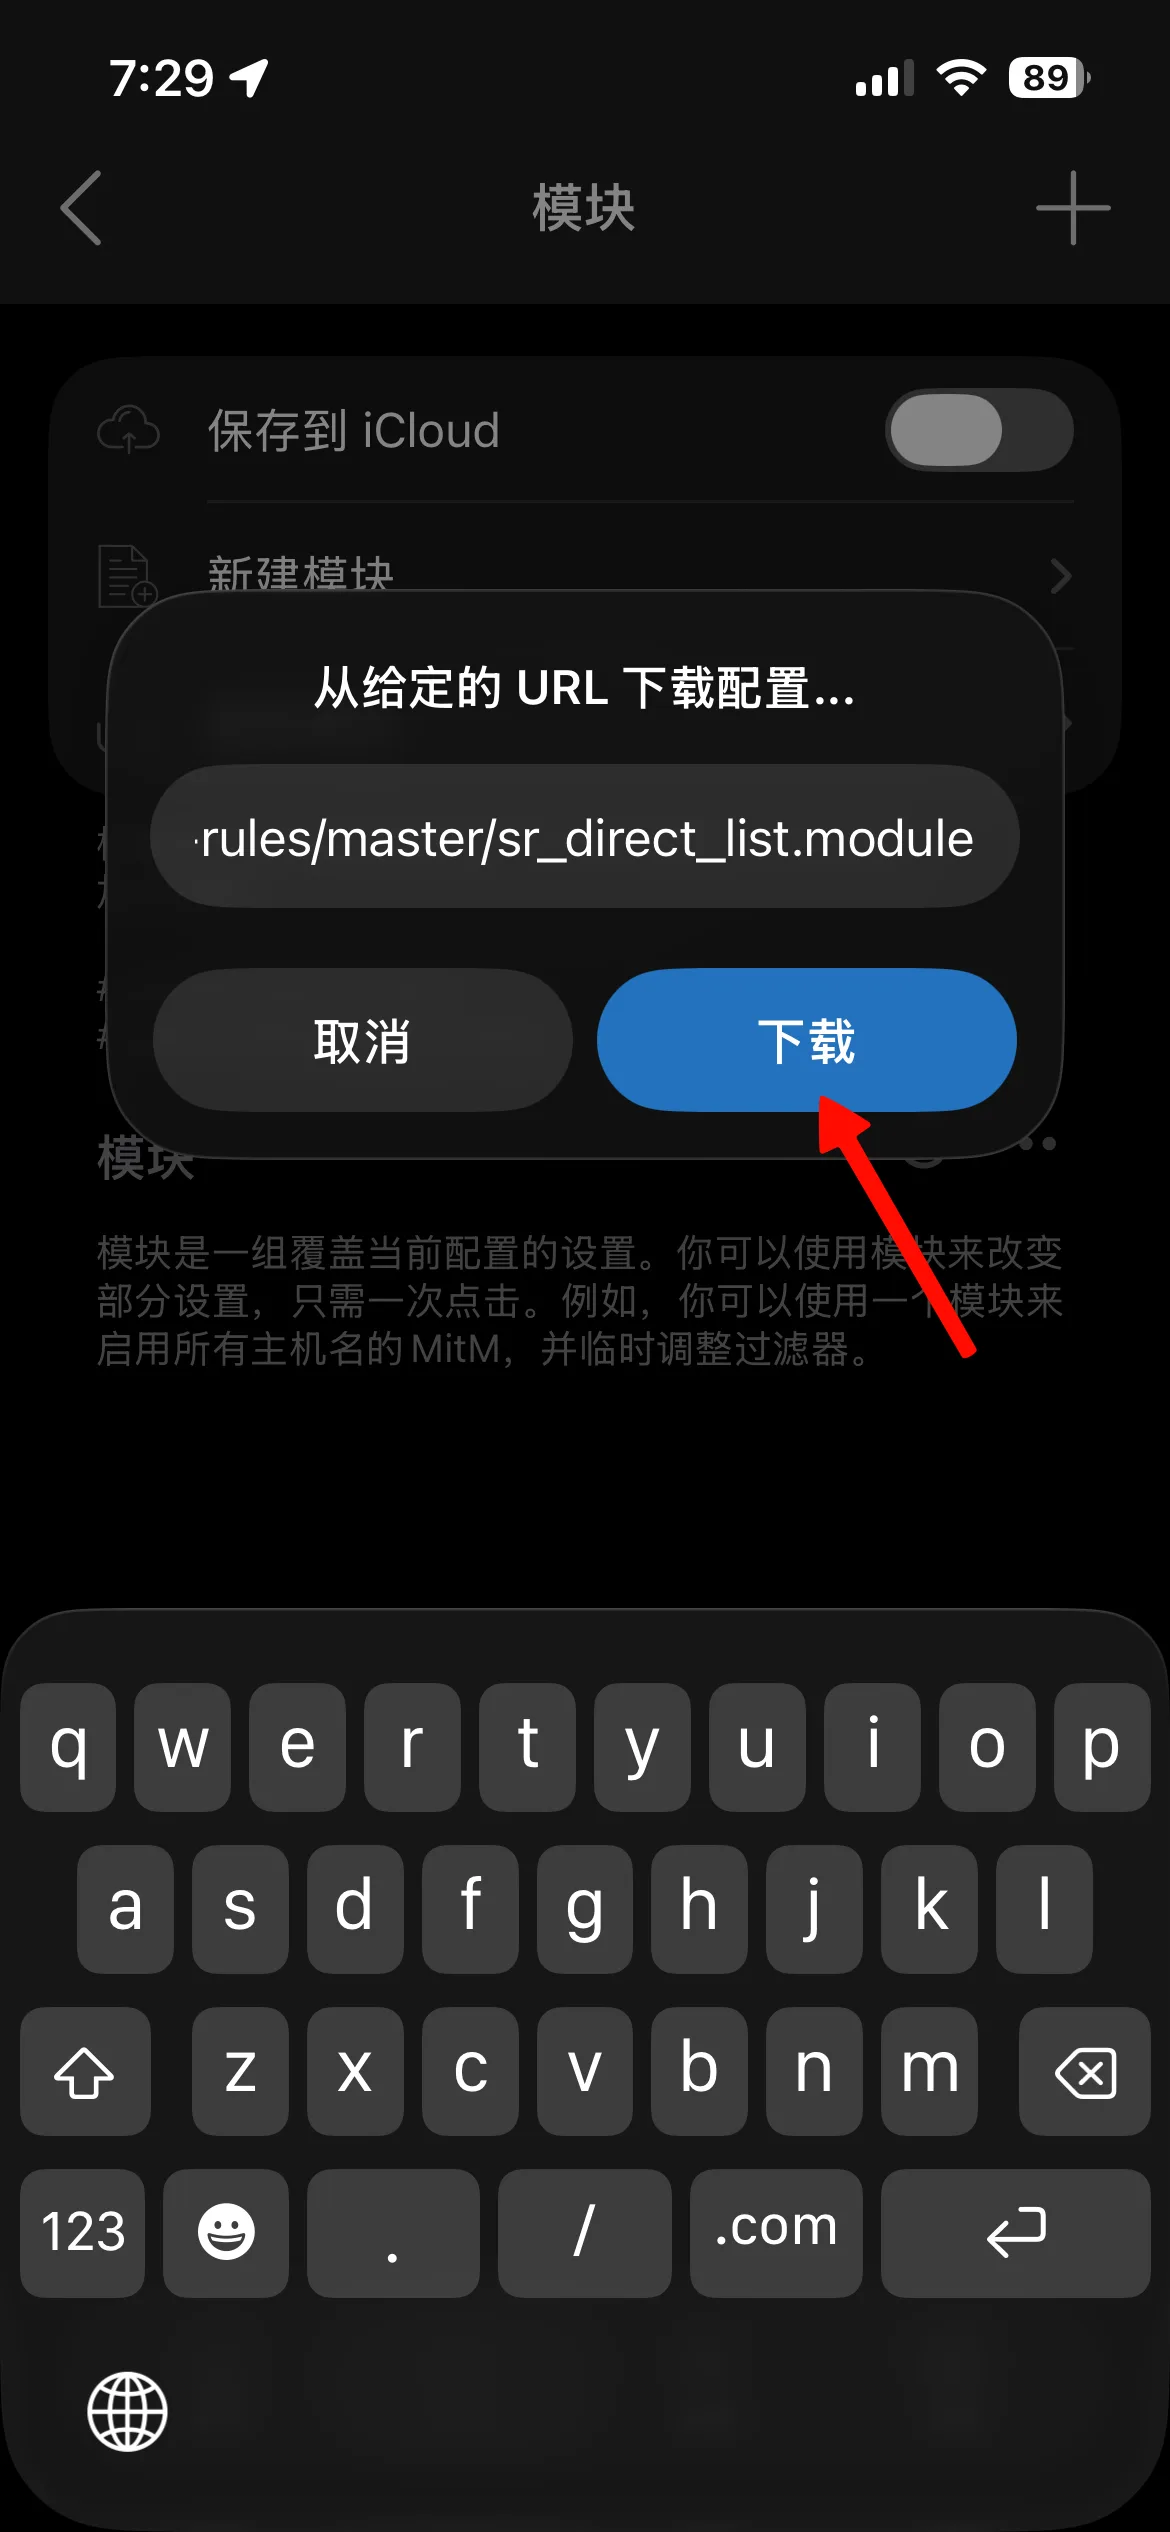
-
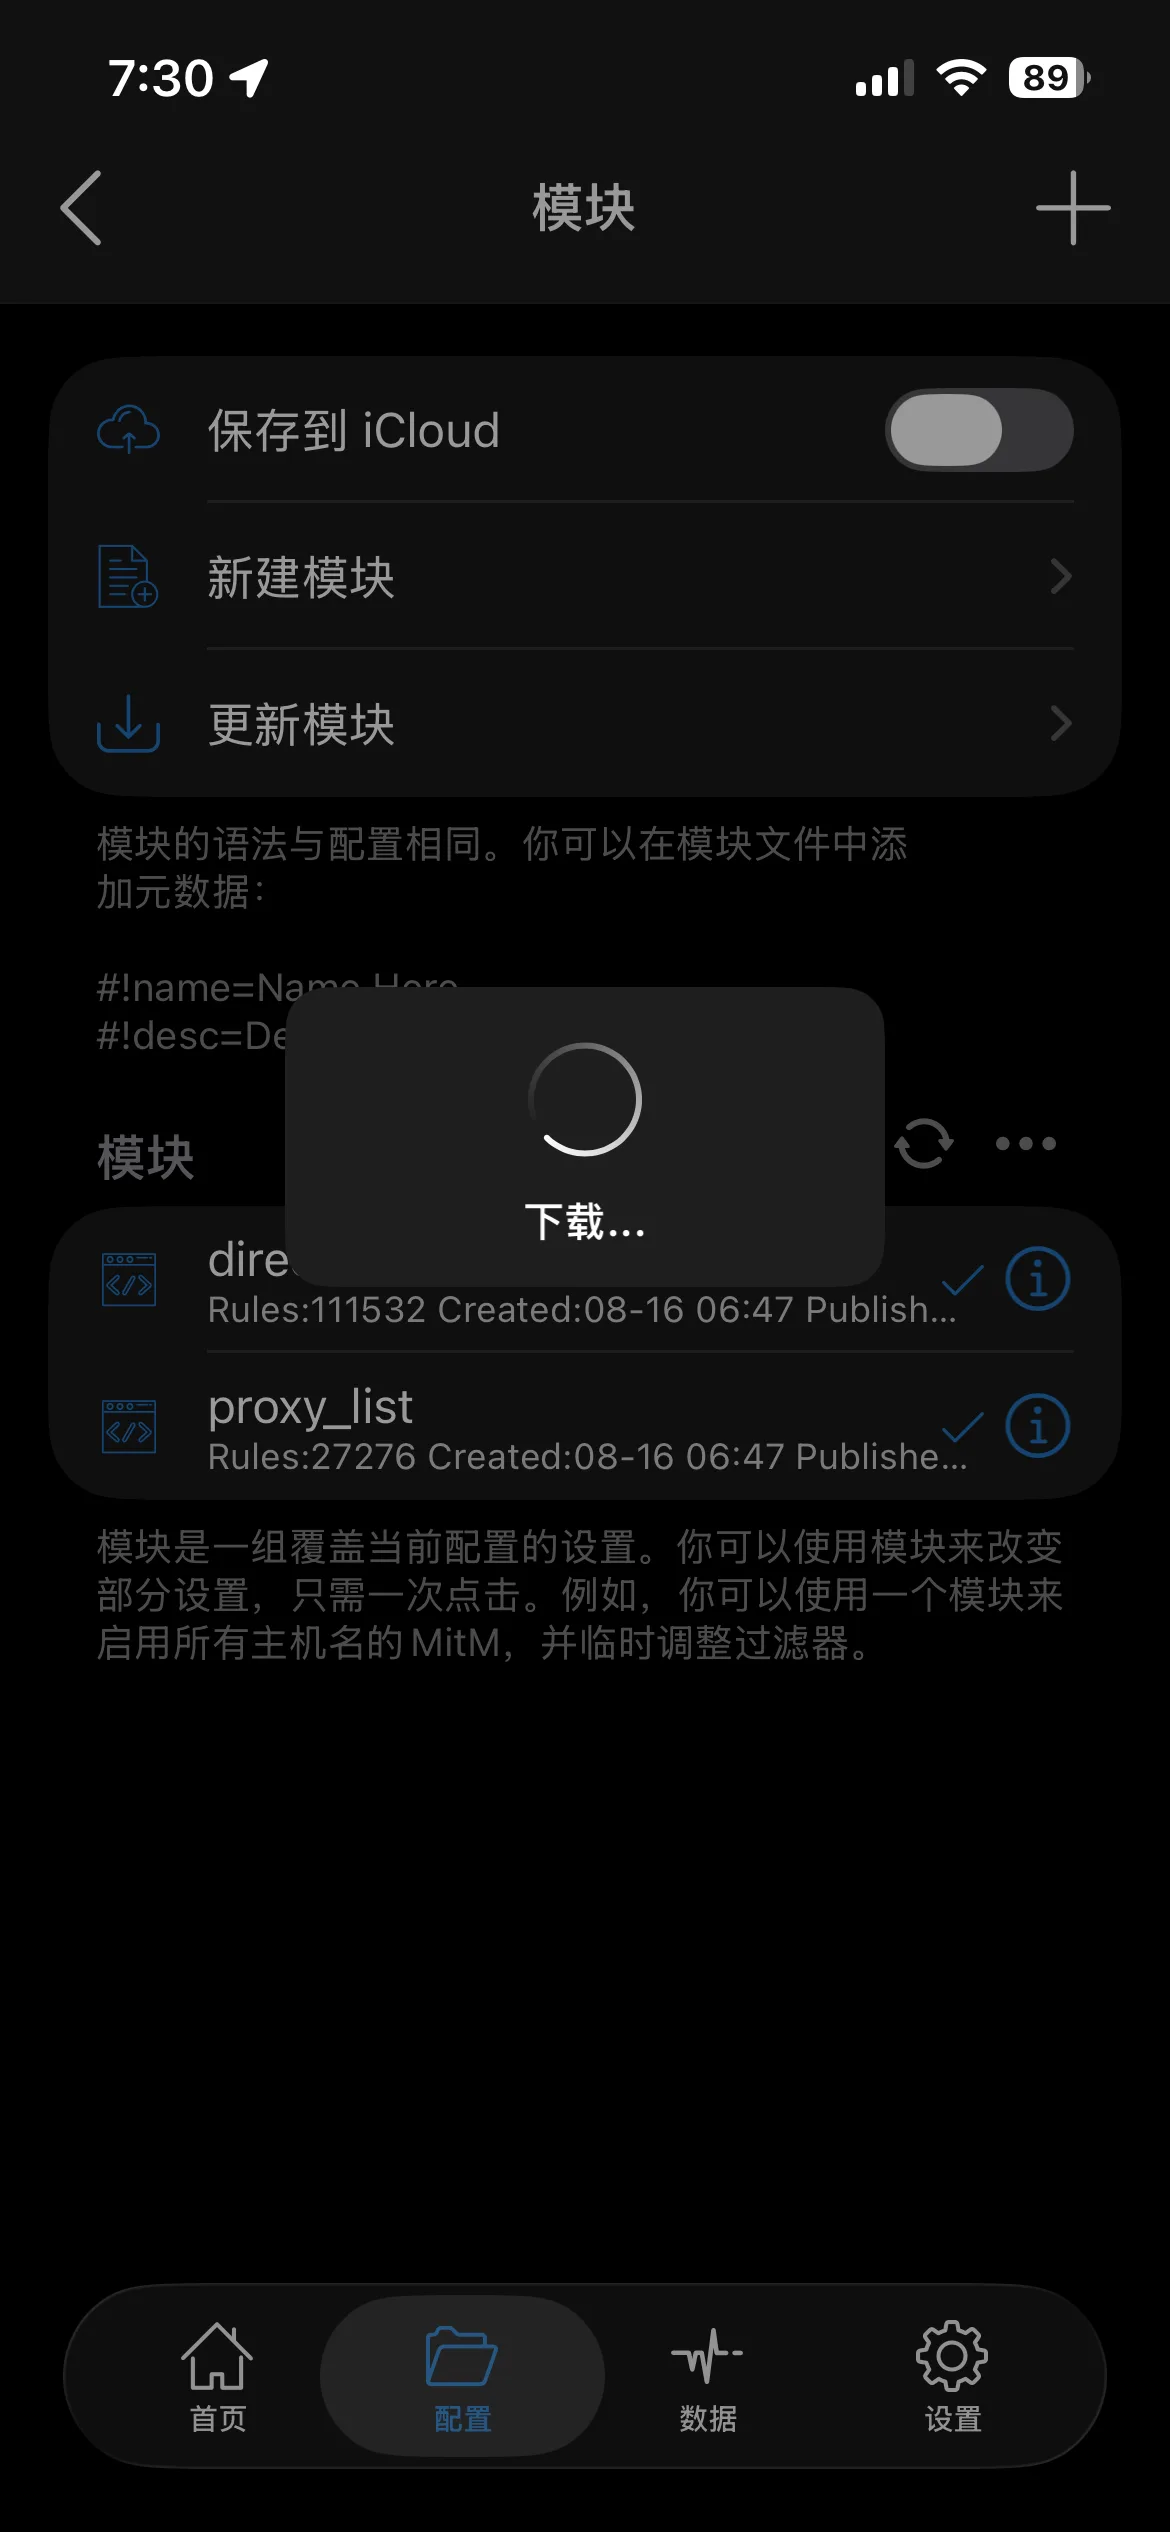
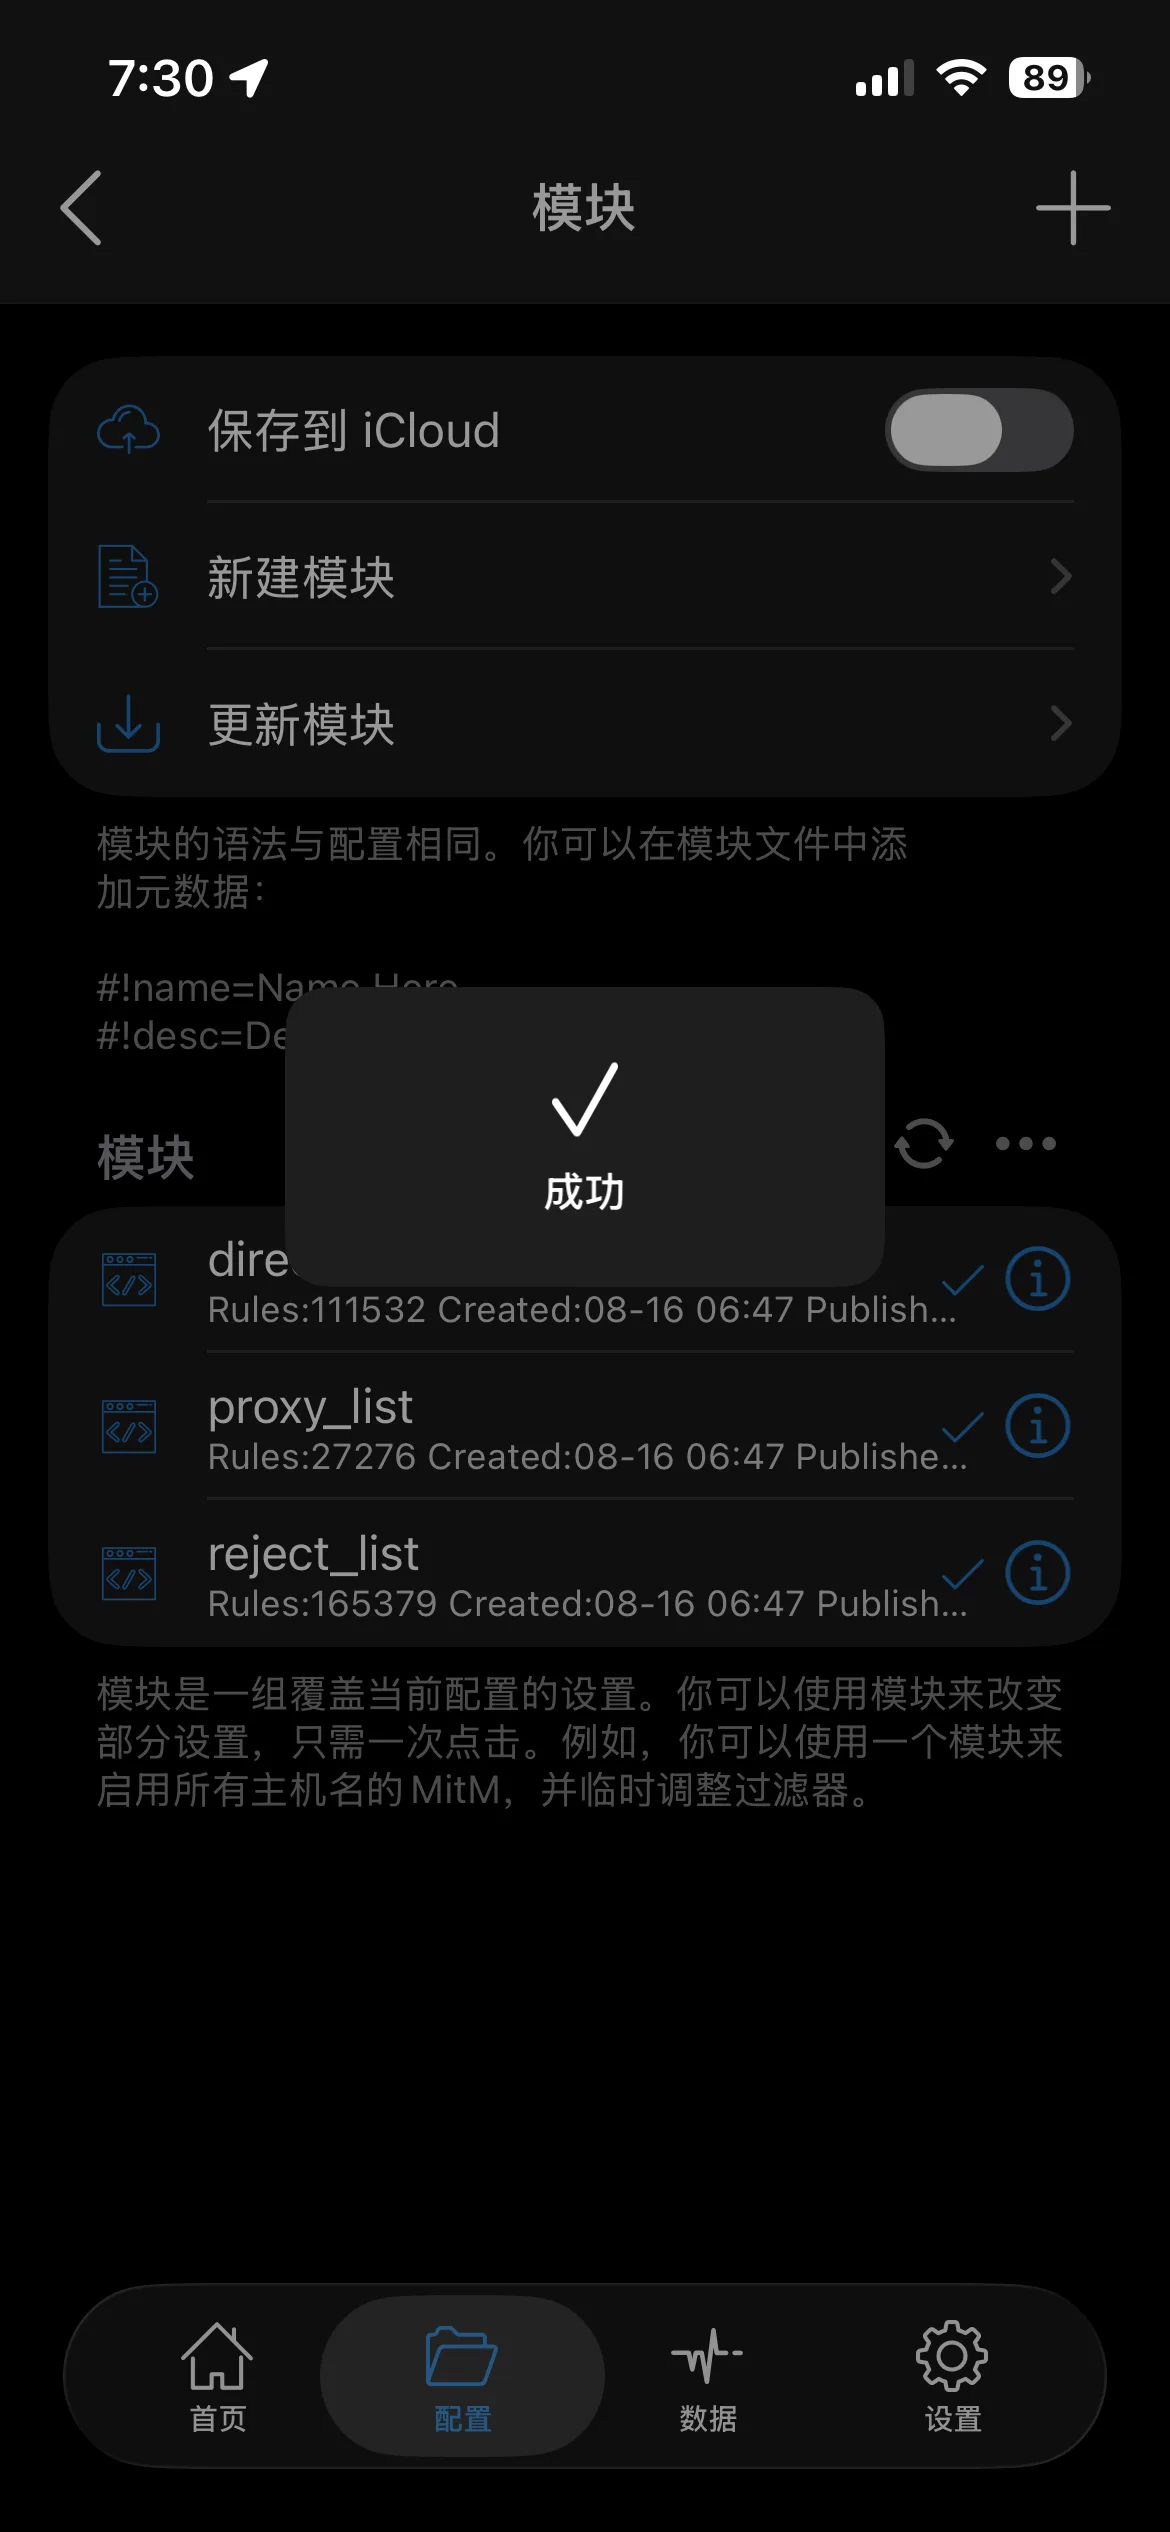
It applies automatically
Each module briefly shows "Applying" then "Success" — modules activate as soon as they're added, no extra toggle needed.
-
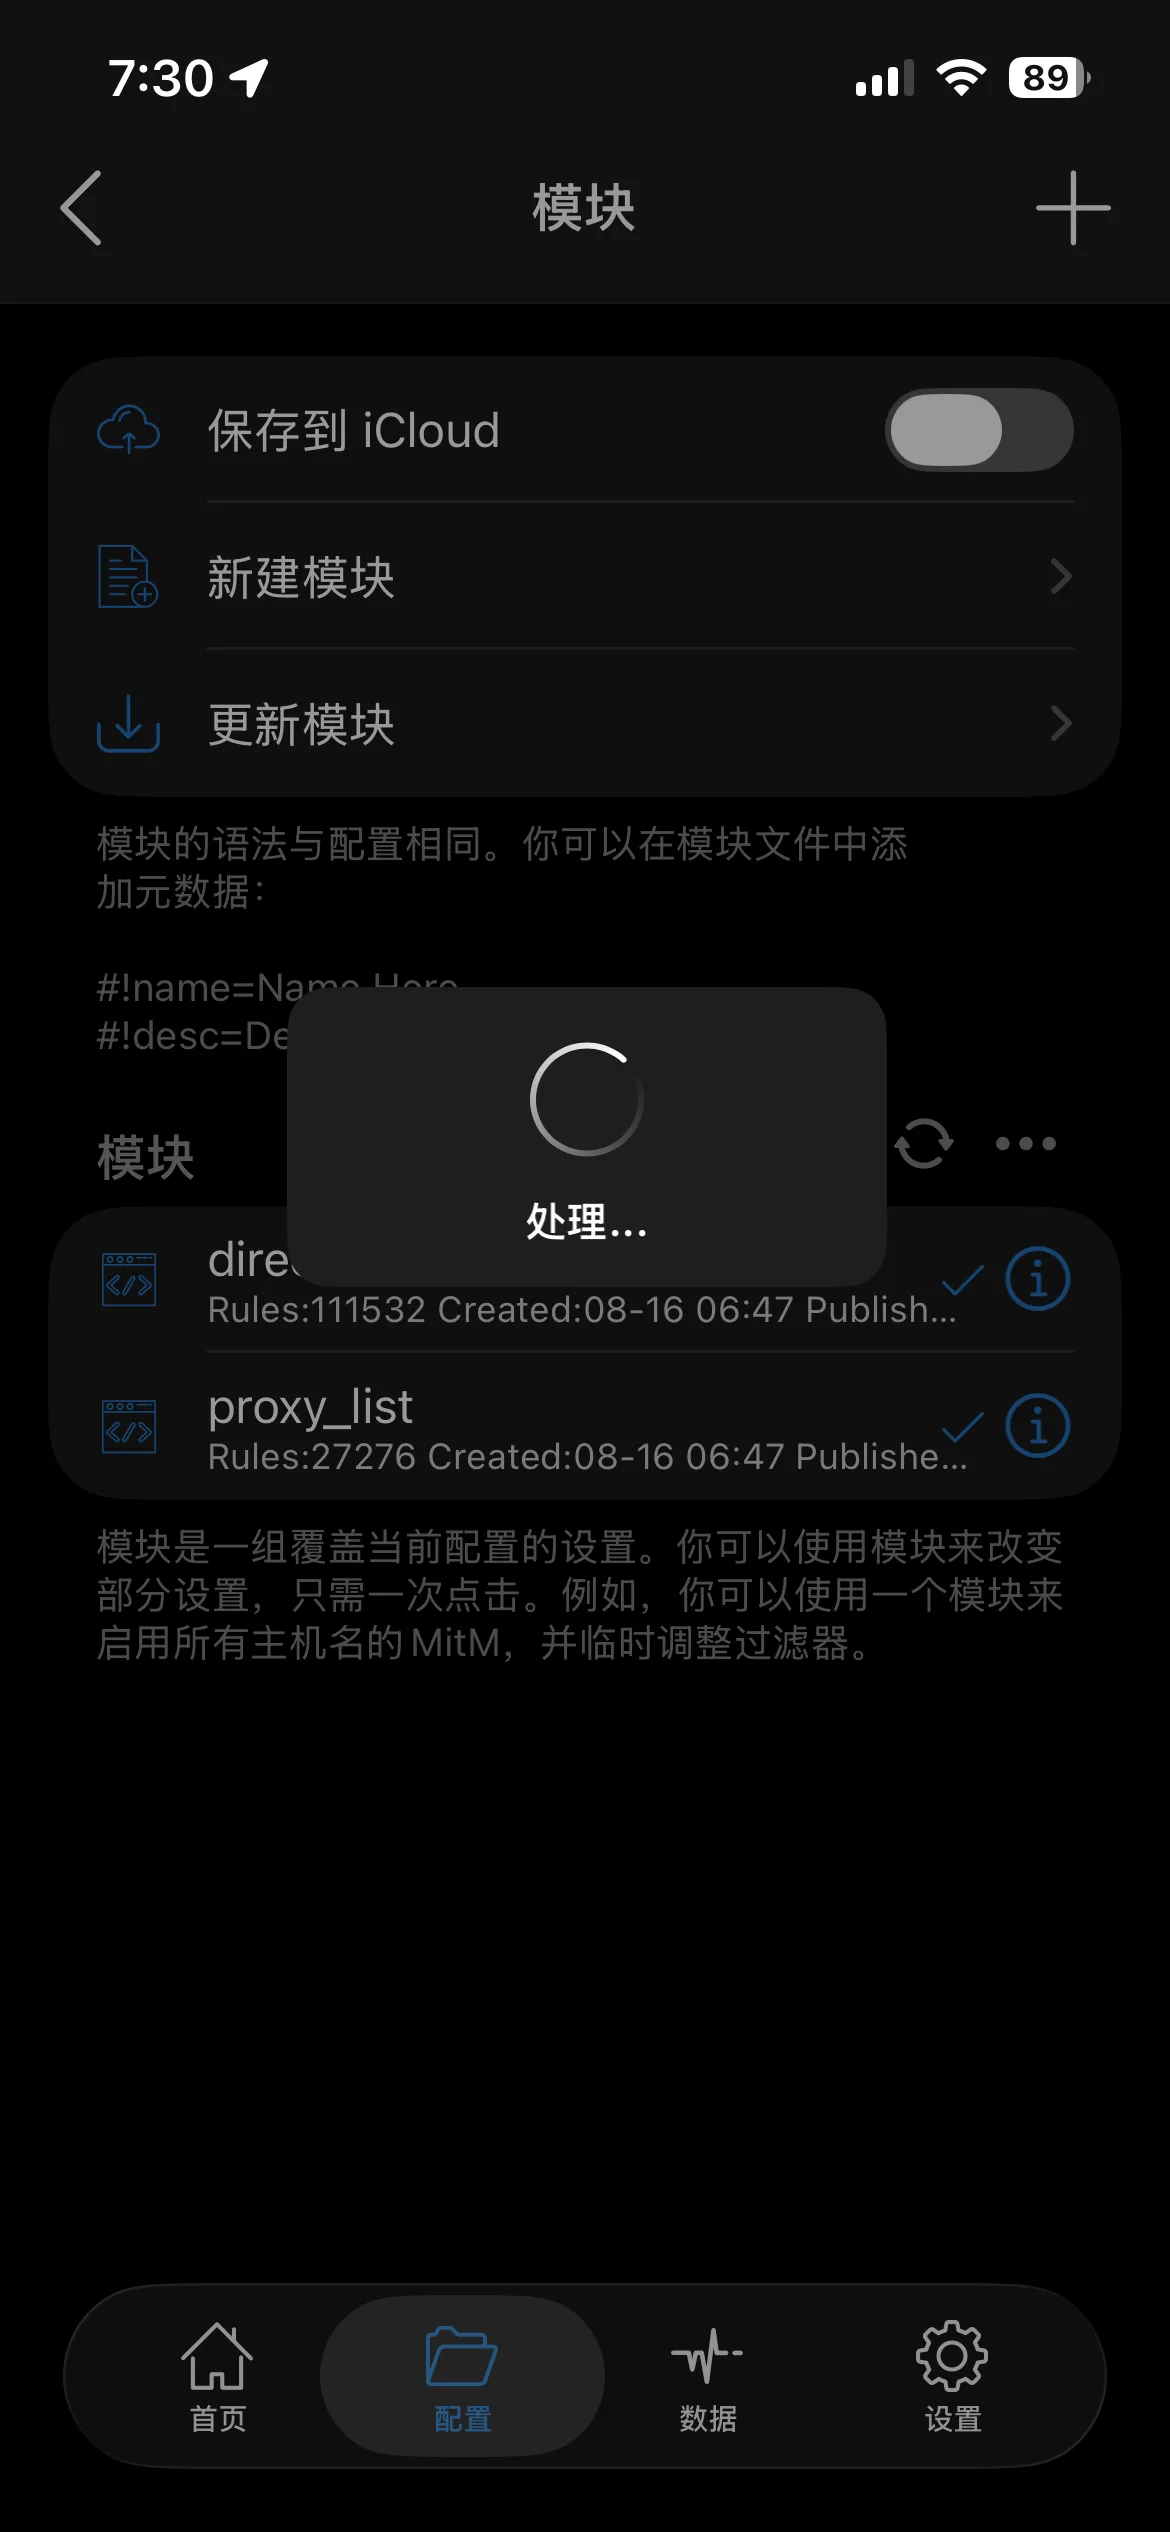
Confirm all three are ticked and active
Once you've repeated the add step for all three, you should see
direct_list,proxy_list, andreject_listin the Modules list, each with a checkmark next to it.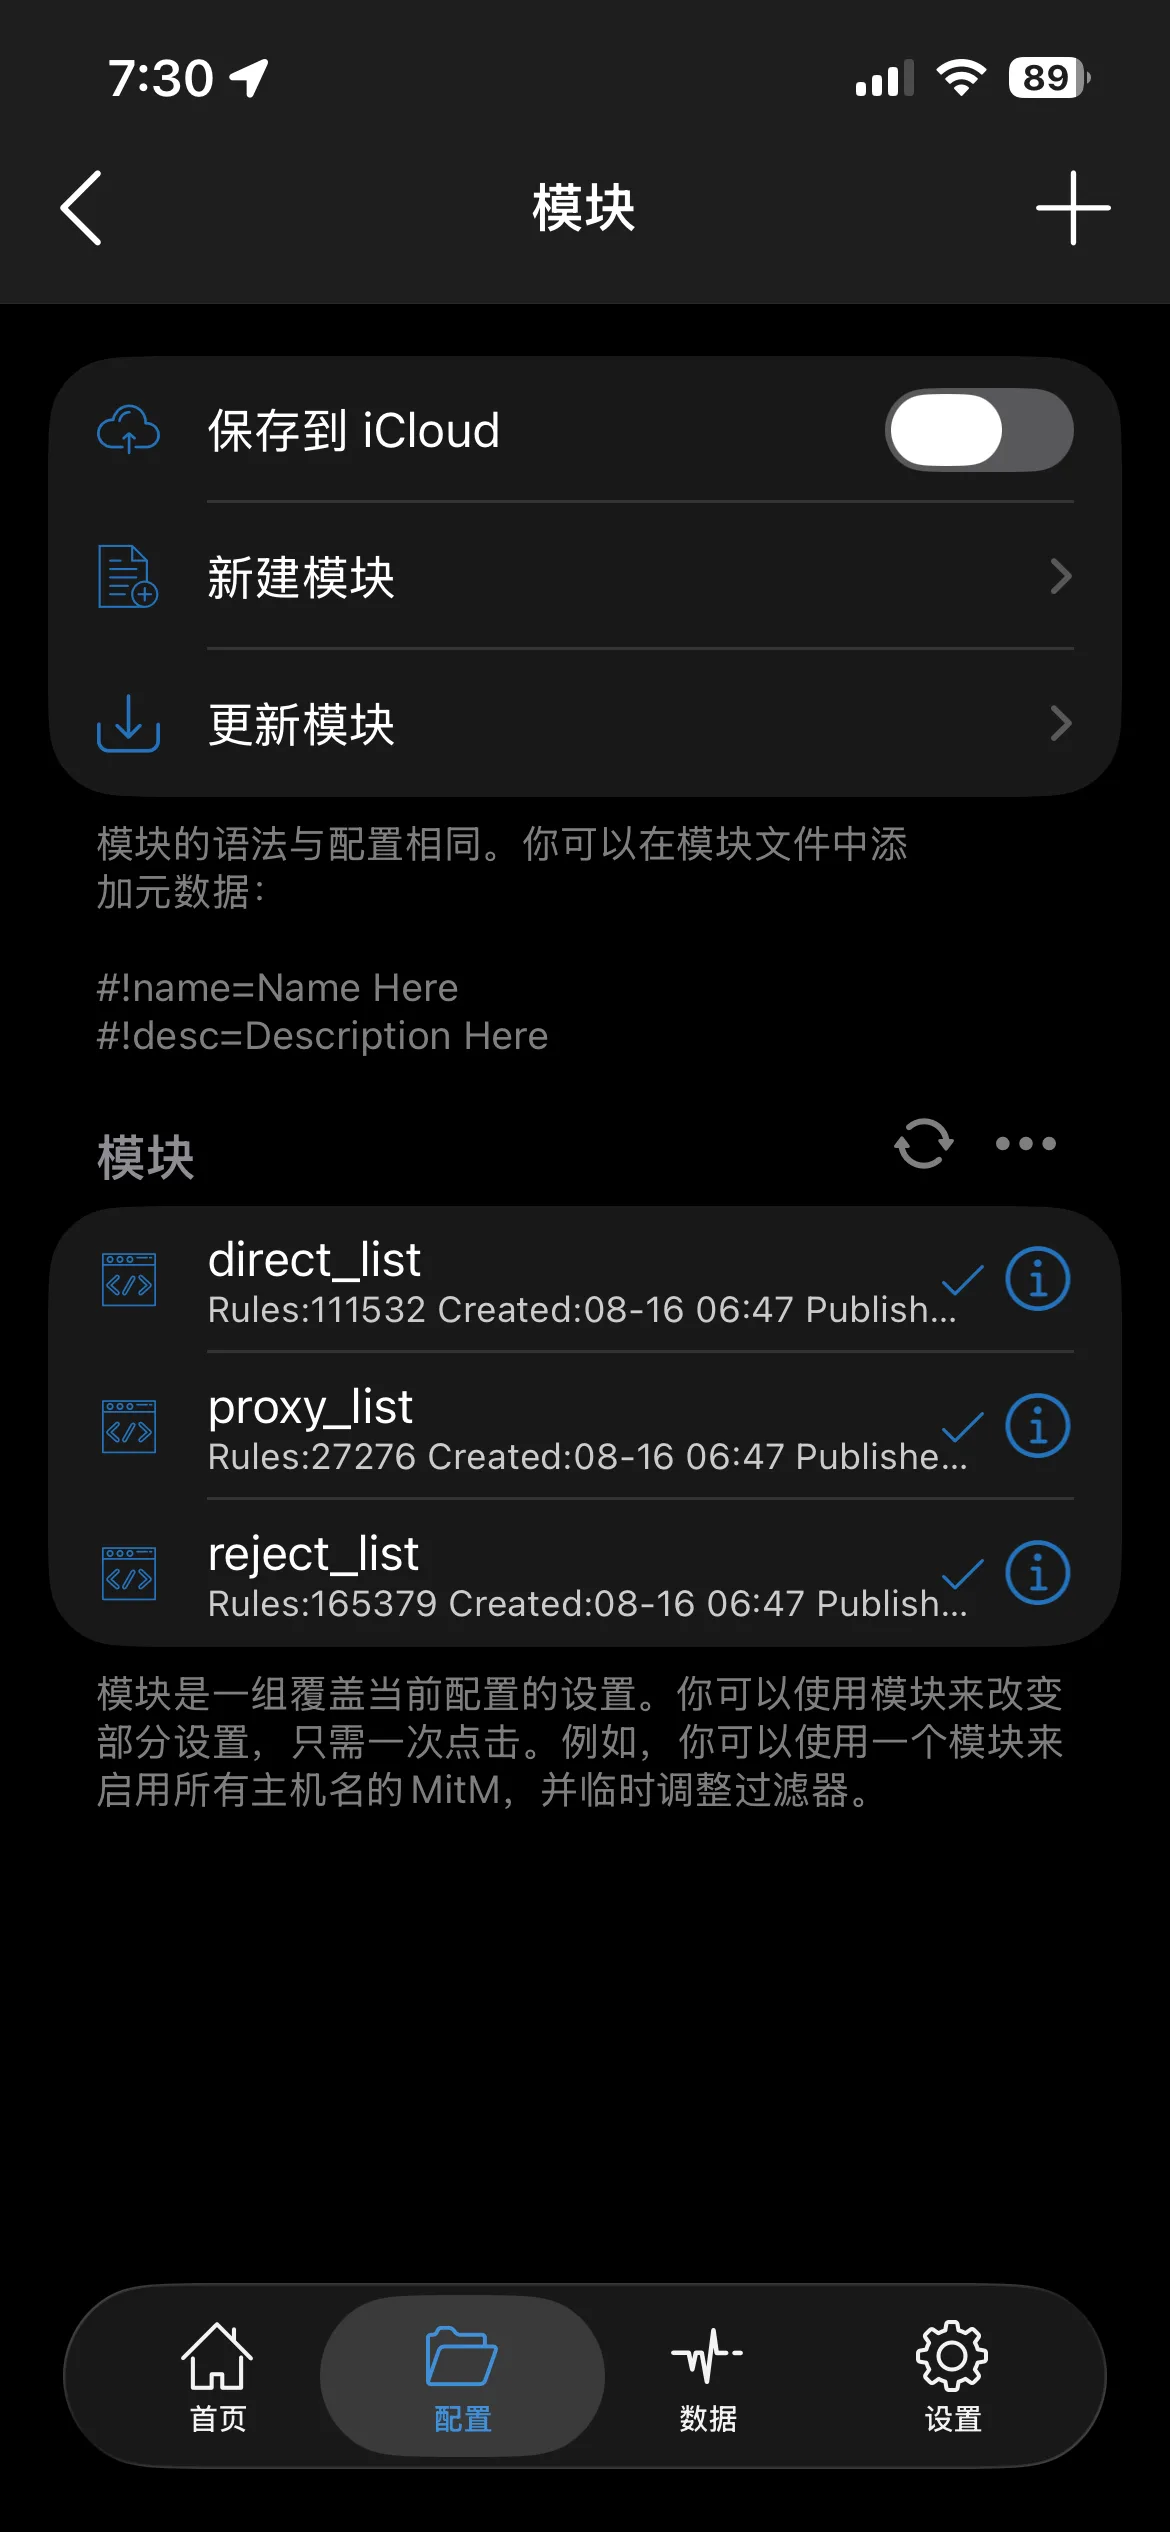
Rule order matters. ShadowRocket evaluates rules top-to-bottom and stops at the first match. If a broad rule sits above a specific one, the specific rule never fires. Keep more specific domain rules above broader/final catch-all rules.
4. Verify it's actually working
Don't assume — check.
-
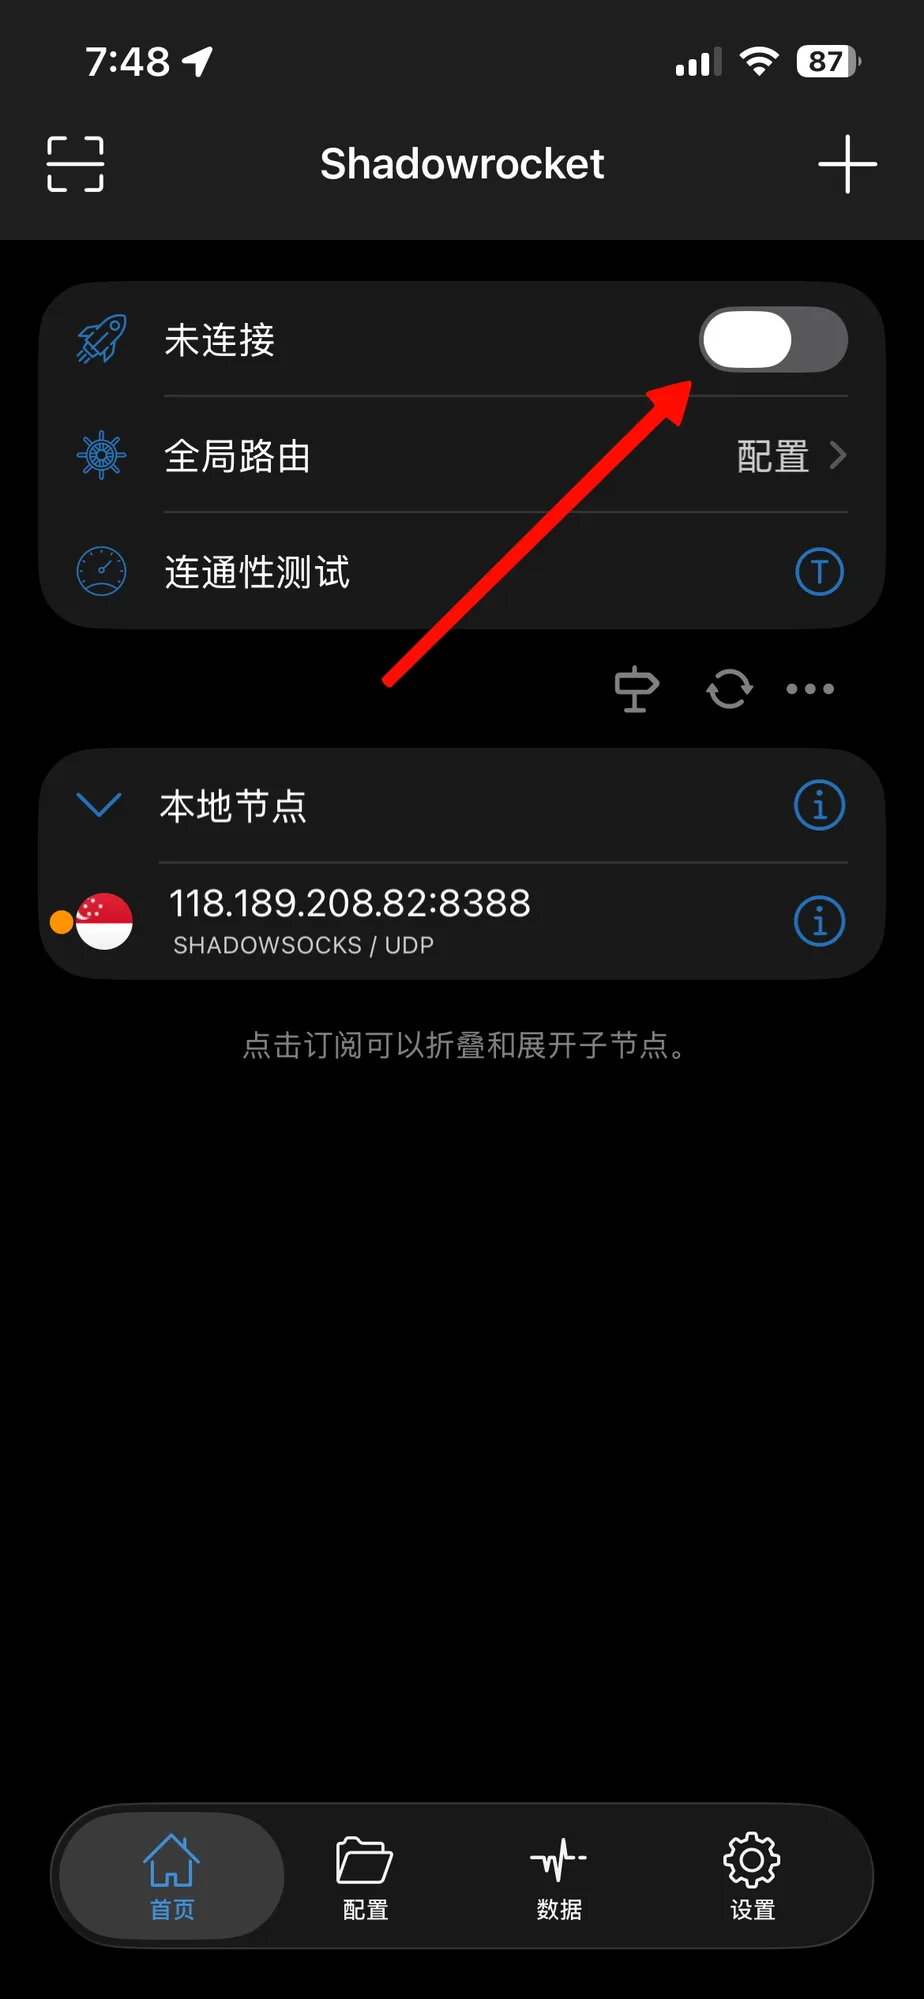
Tap the connect toggle
On the Home tab, tap the toggle next to your active node to connect.
-
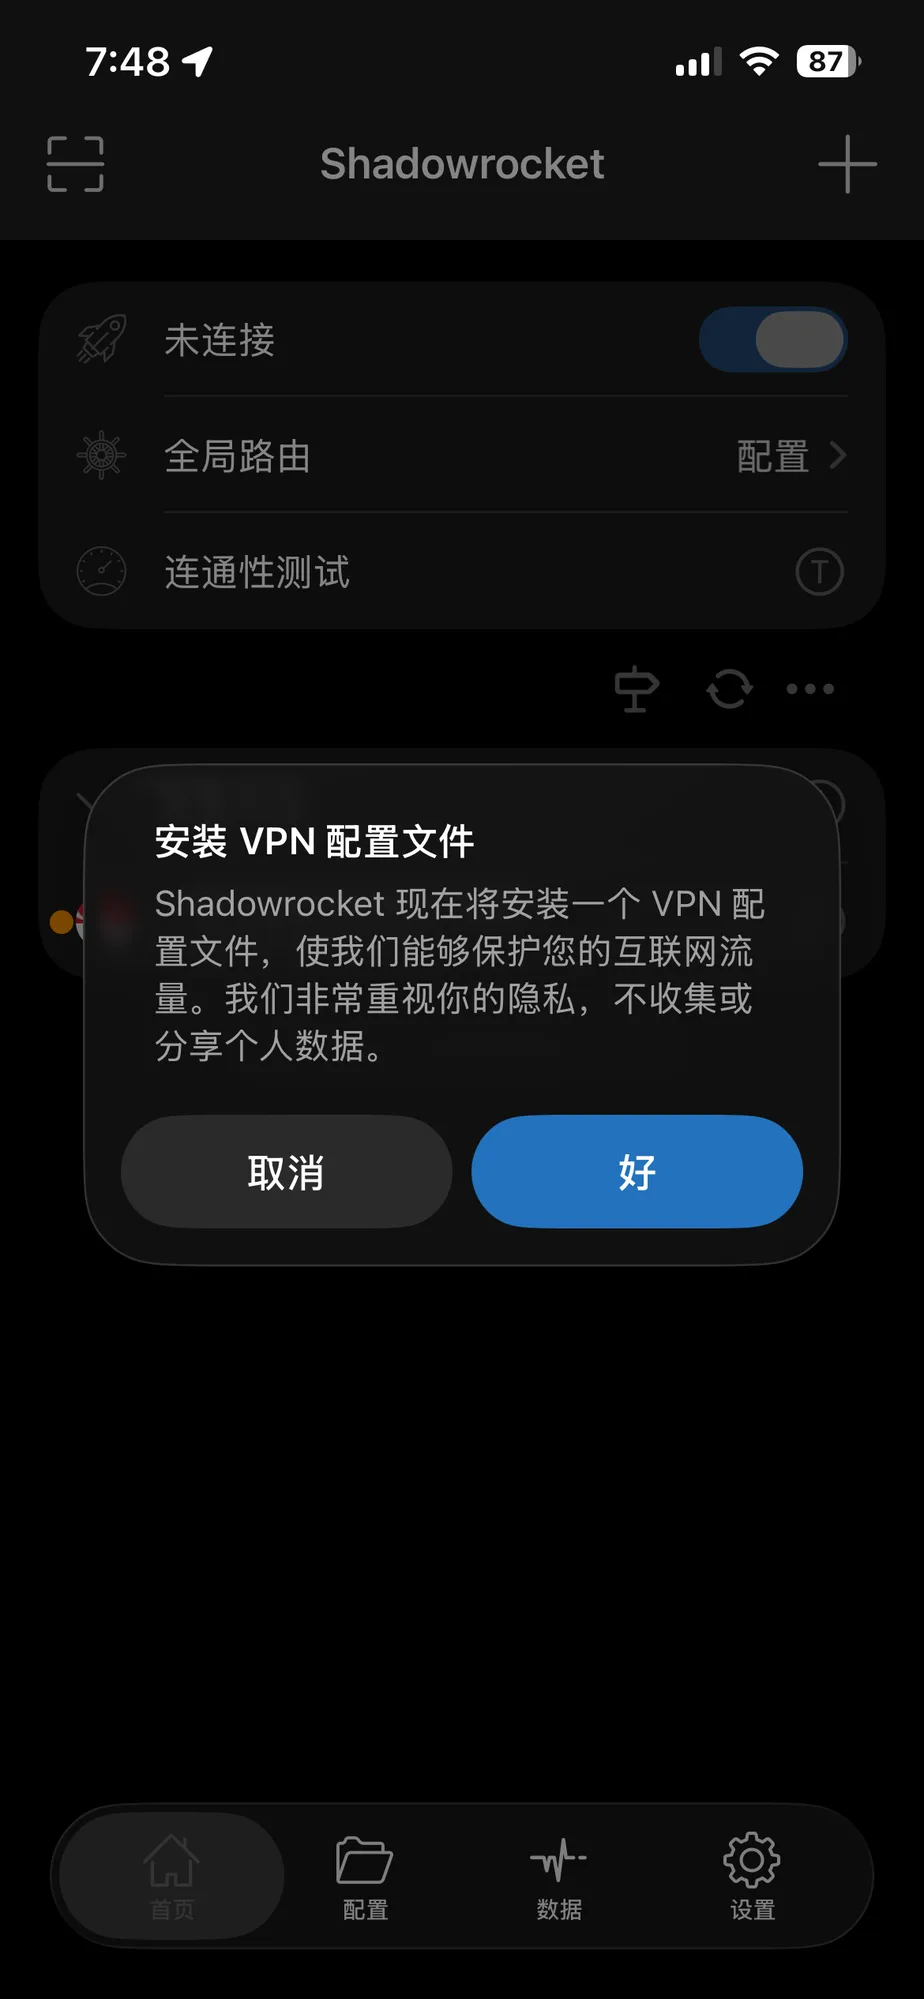
Install the VPN profile
The first time, ShadowRocket explains it needs to install a VPN profile to route your traffic — tap OK to continue.
-
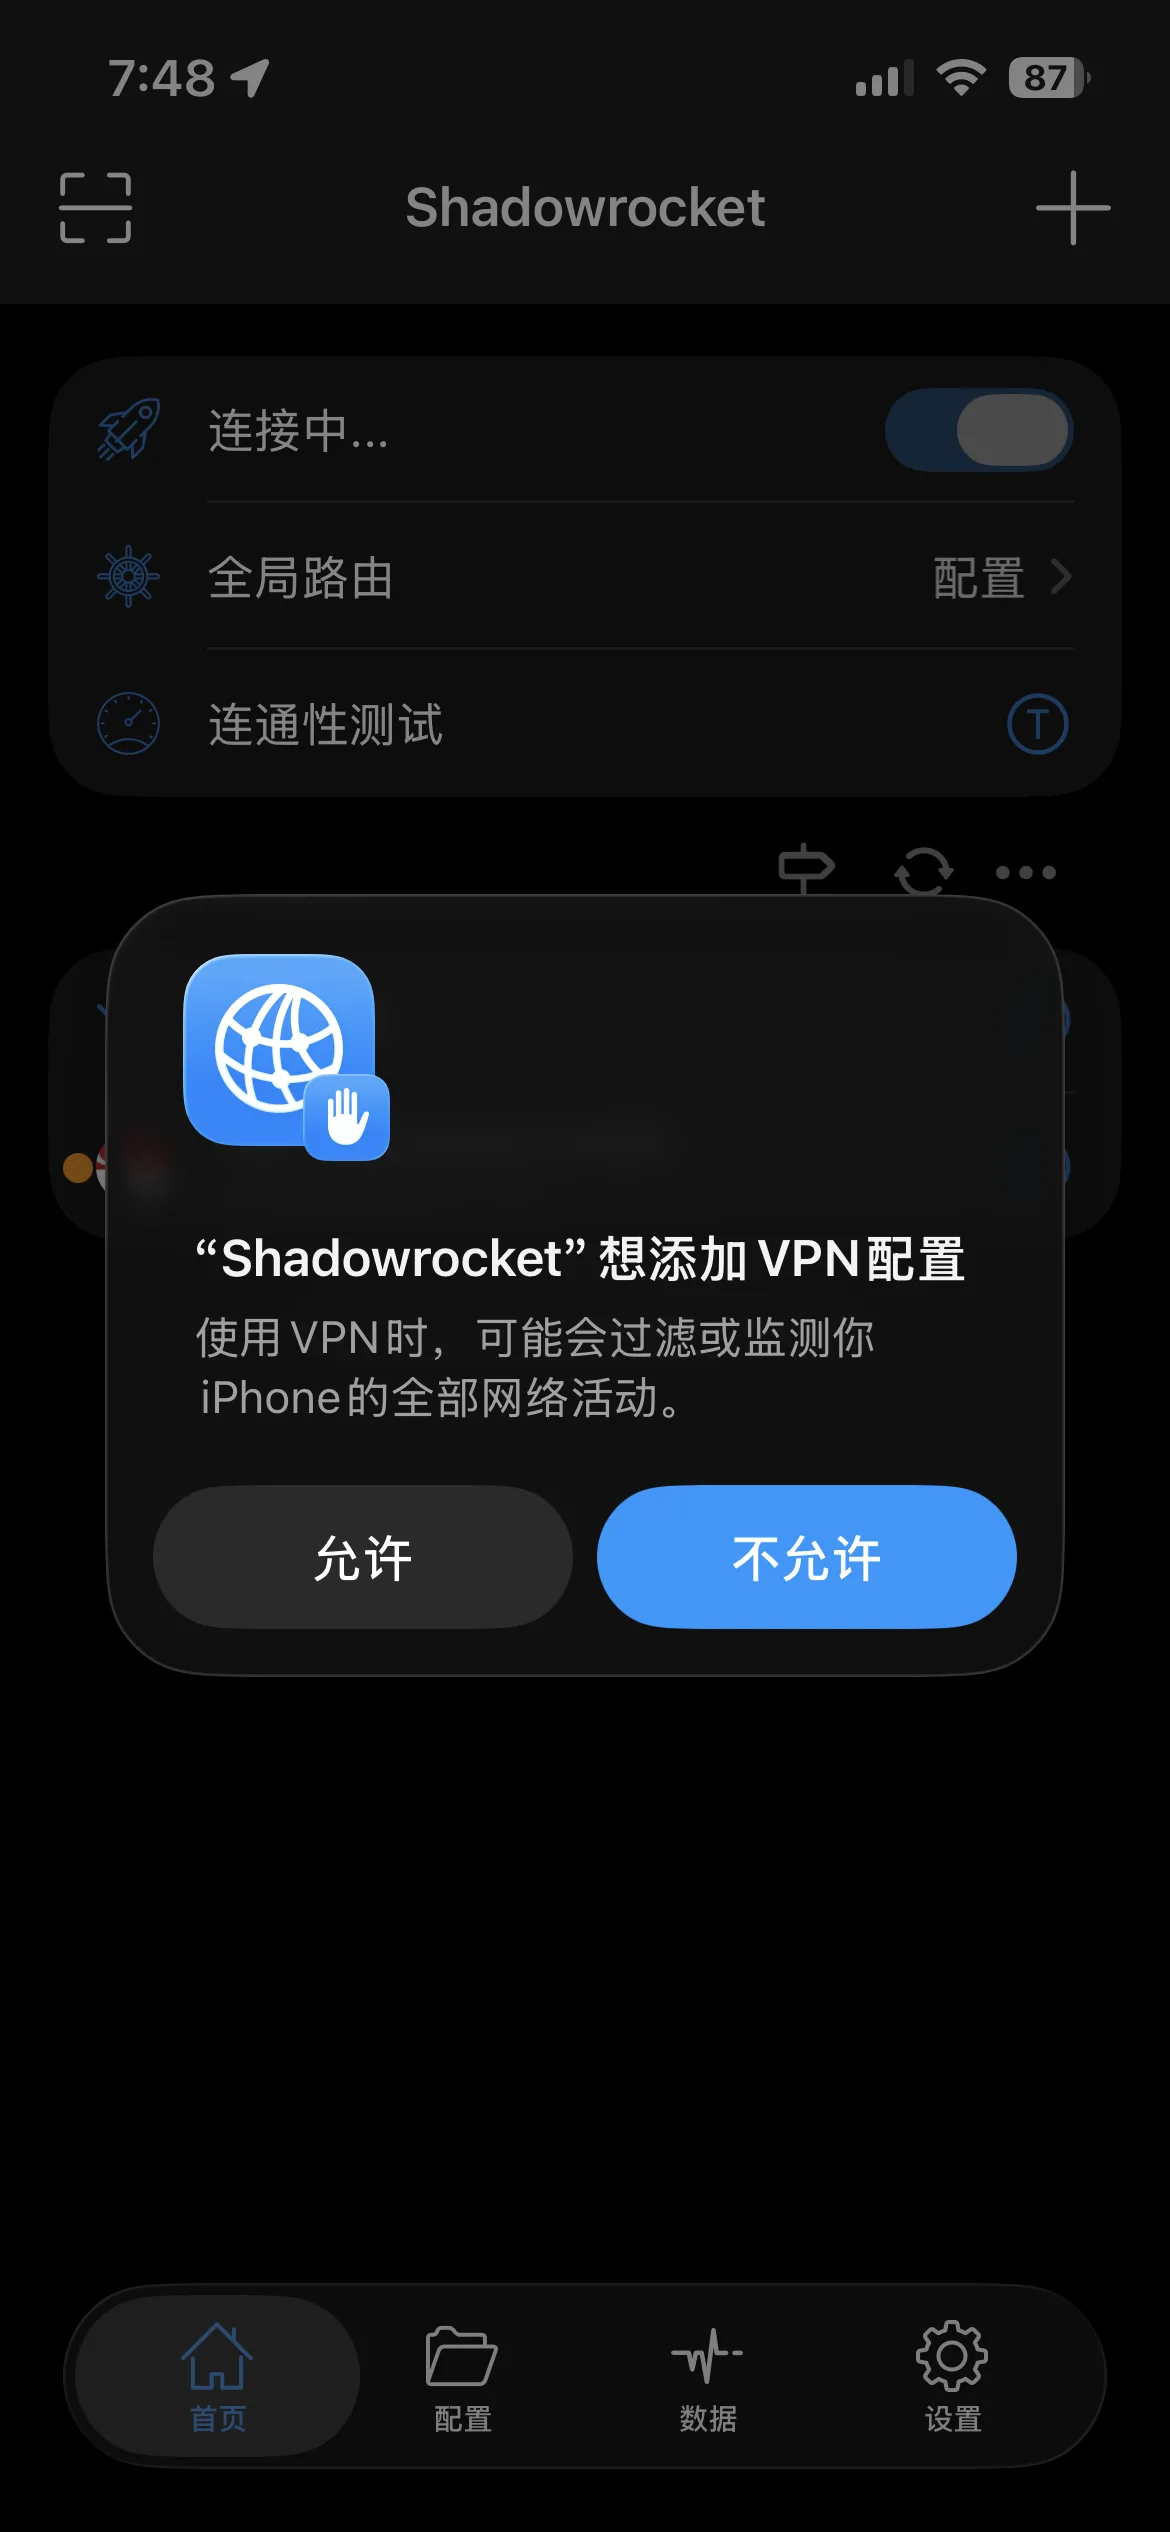
Allow the VPN configuration
iOS asks you to confirm — tap Allow.
-
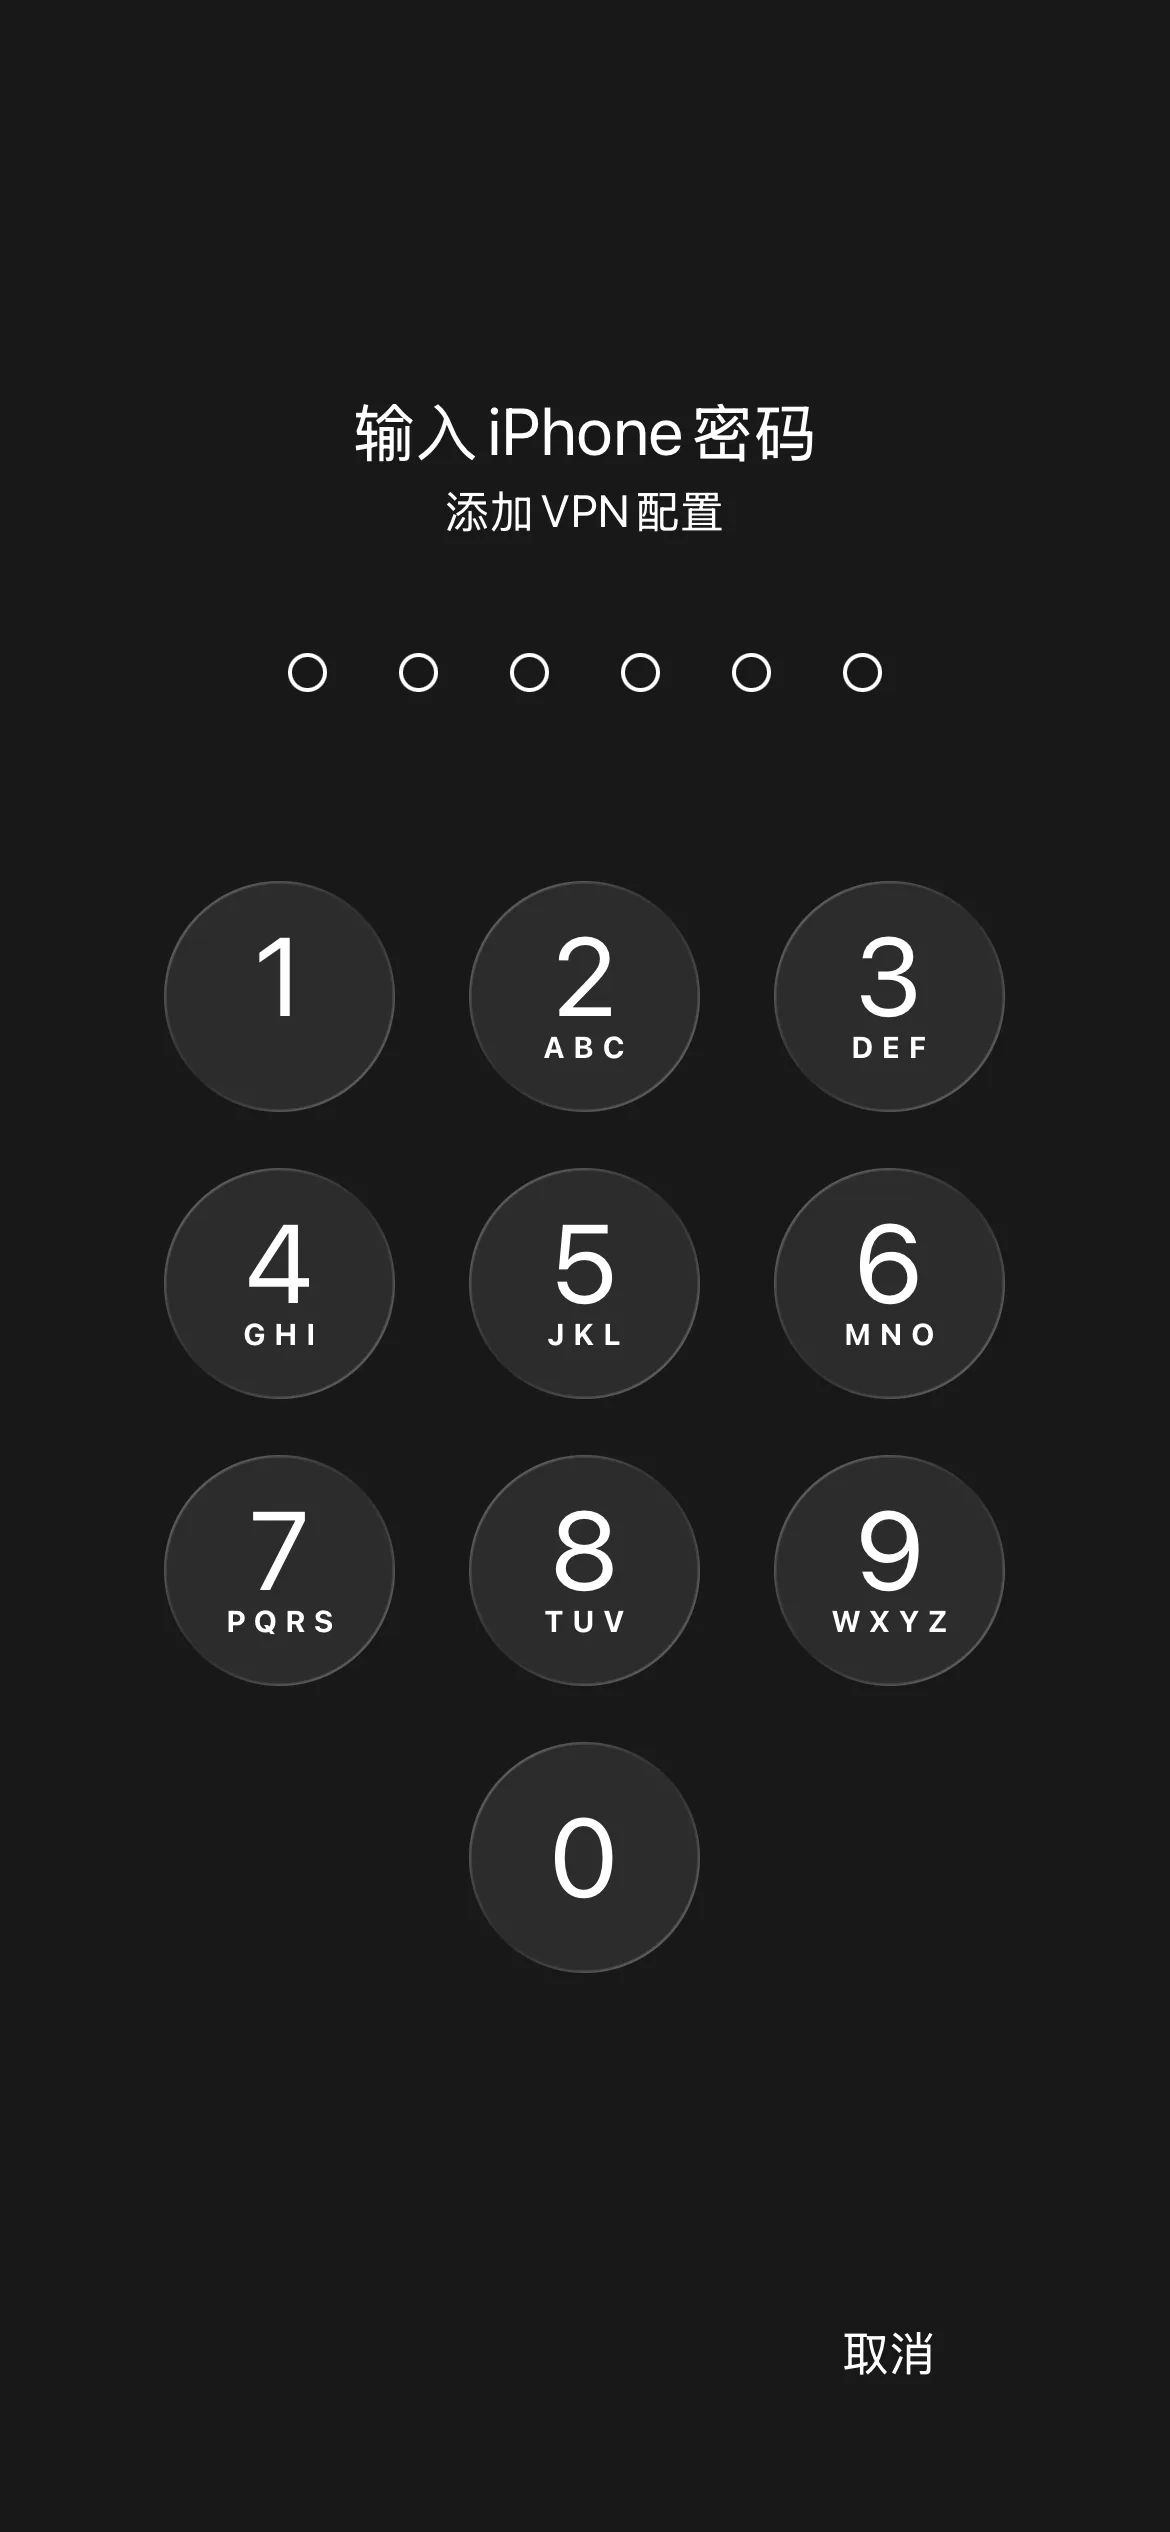
Verify with your passcode
iOS asks for your device passcode to confirm the profile install.
-
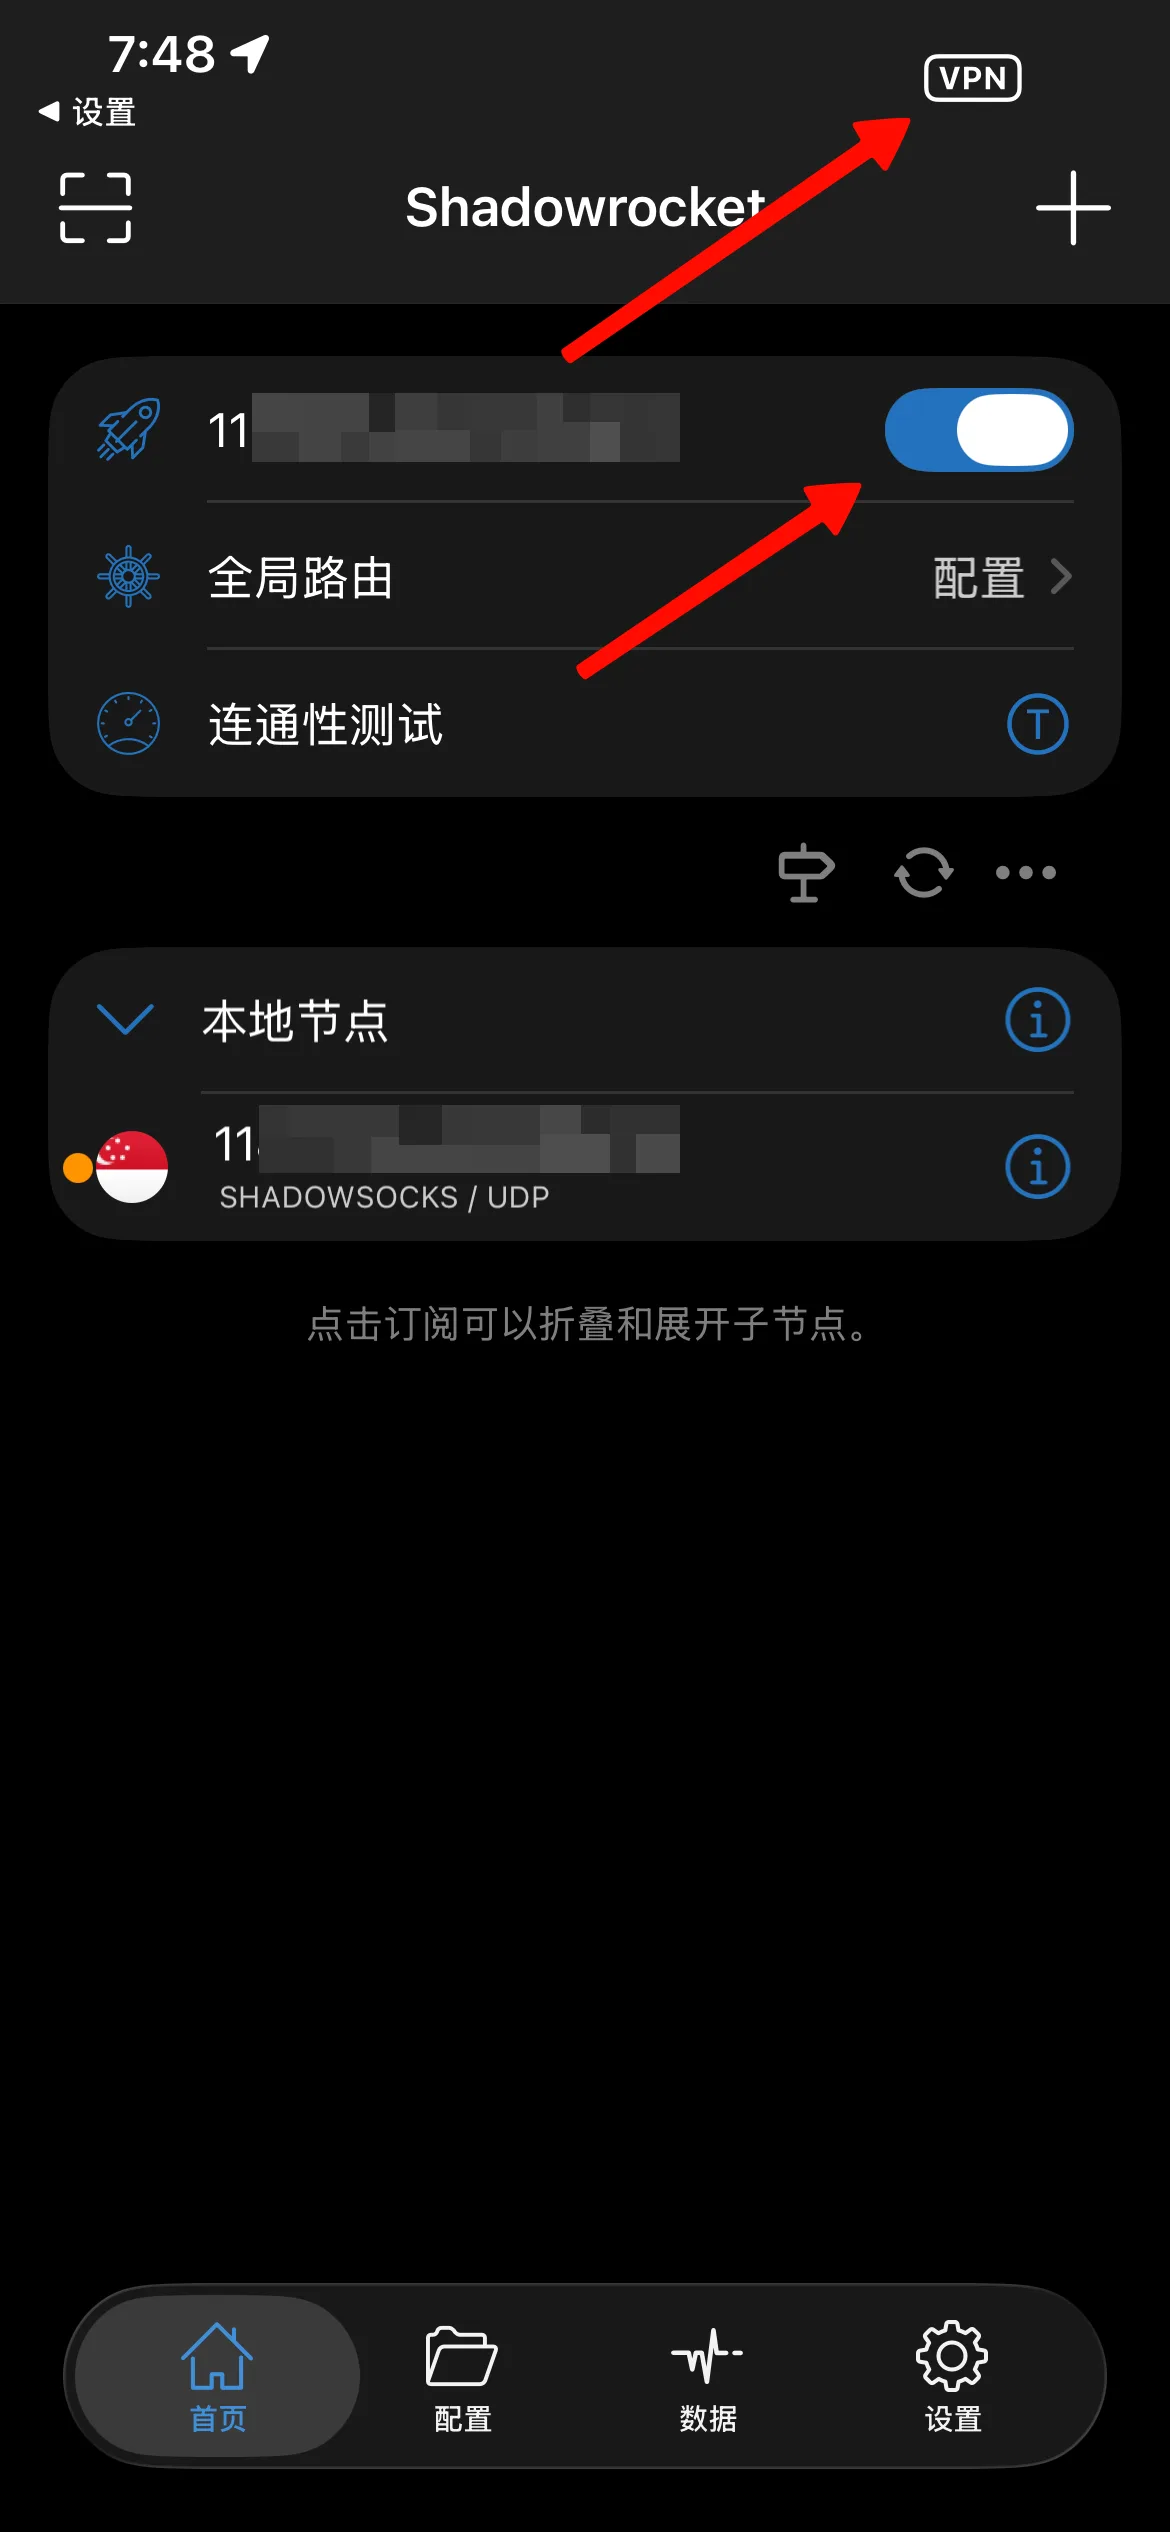
Confirm you see the VPN badge
The toggle should turn on, and a "VPN" badge appears at the top of the screen next to the time — that's your confirmation it's actually connected.
-
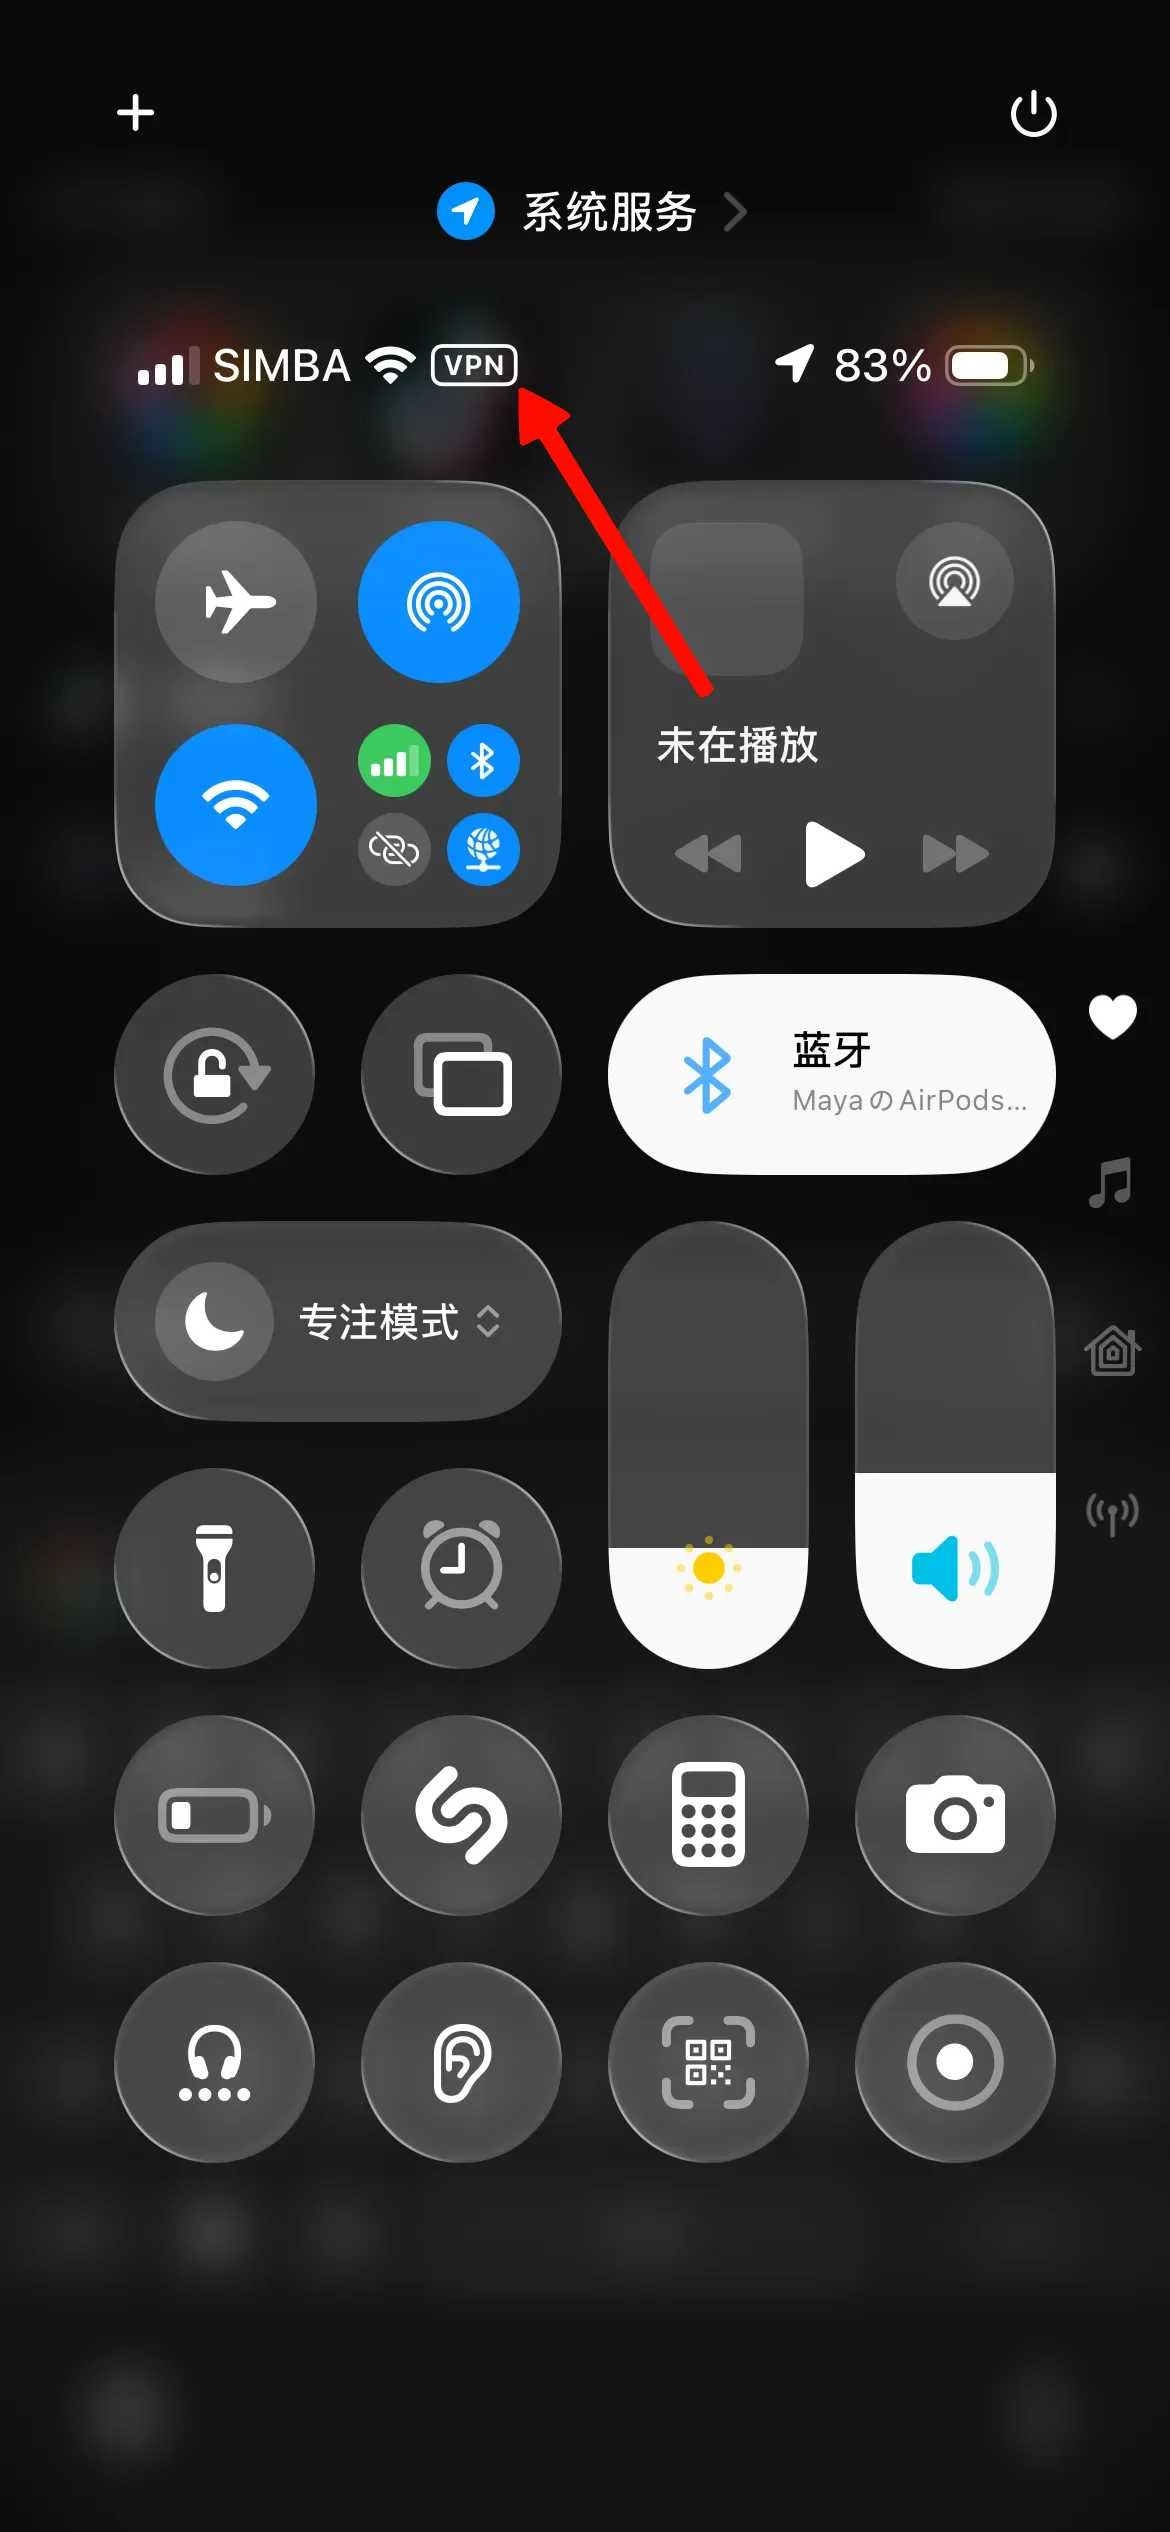
Or check from Control Center
You can also drag down from the top-right of the screen to open Control Center and confirm the VPN badge is showing there.
5. Confirm your exit region
Two quick site checks prove local and international traffic are each going the right way.
-
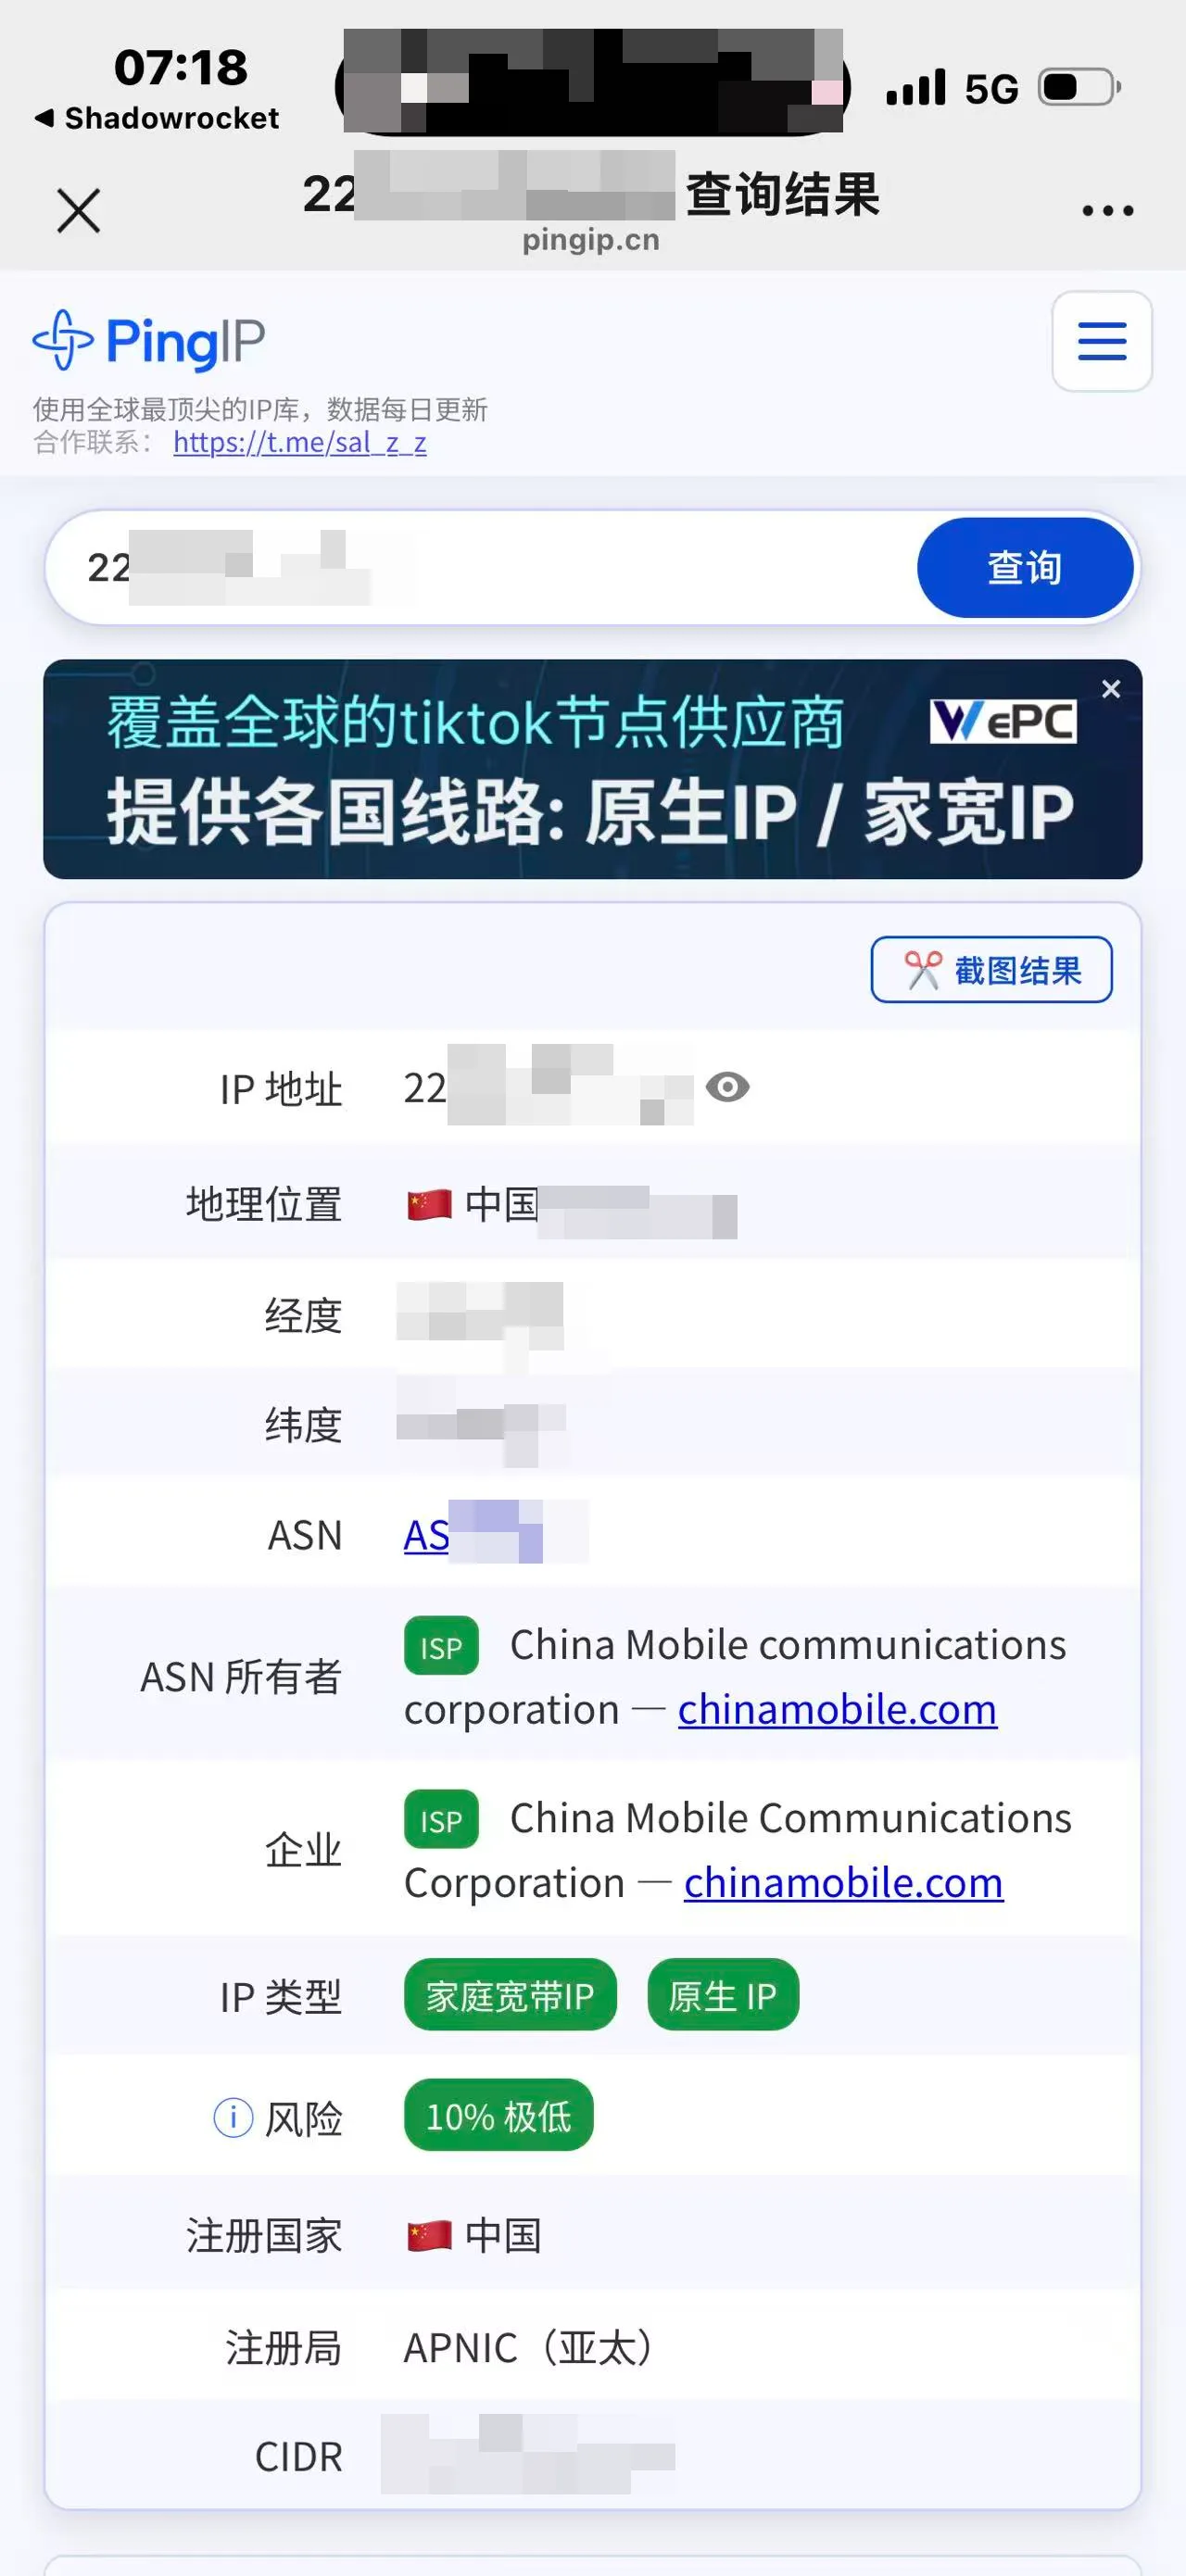
Visit pingip.cn — should show China
Visit pingip.cn. It should report China. This proves Chinese apps/sites are correctly bypassing the proxy — ShadowRocket won't interfere with local services, so they keep working exactly as before.
-
Visit NordVPN's IP lookup — should show Singapore
Visit nordvpn.com/zh/ip-lookup and scroll down to the result. It should report Singapore — confirming international traffic is actually leaving through your proxy.
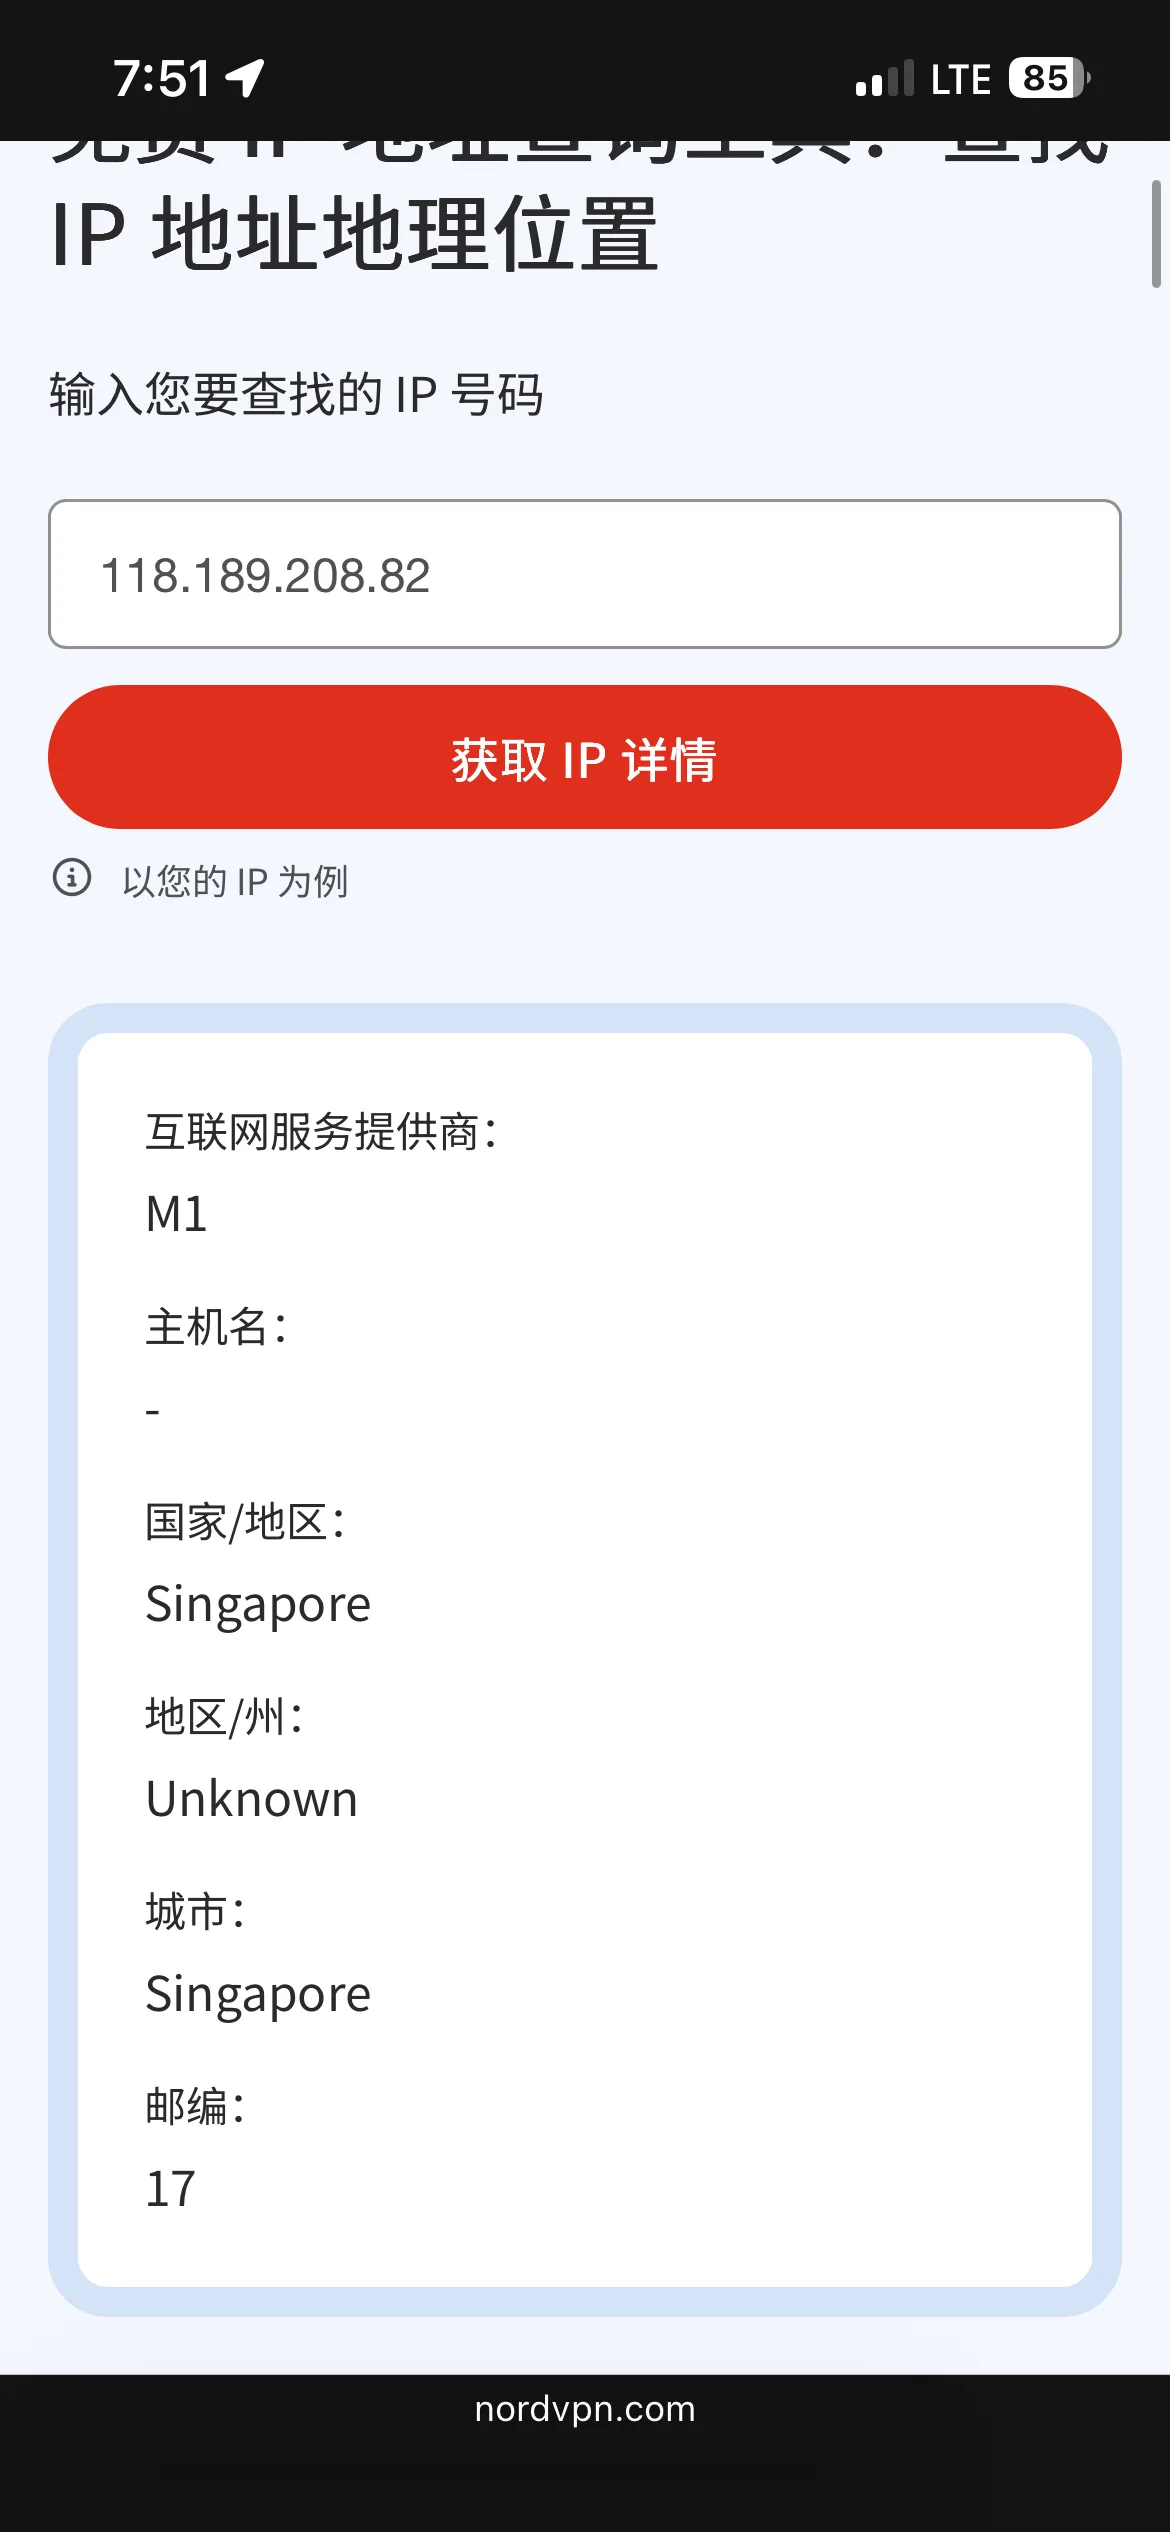
Once both checks match, you're good to go — download international apps like TikTok or Instagram, sign out of your original account, sign in with your international account, then sign out and back into your original account before switching the international app back. Everything will work as normal.
Common problems
Most setup issues fall into one of these.
Connects then drops immediately
Usually a server-side issue (expired subscription, overloaded node) rather than a local config error — try switching to a different server in the same group first.
Everything routes through proxy, even local traffic
Your rule set's Direct rules aren't loaded, or the Final policy is set to Proxy instead of Direct/Auto. Recheck the rule subscription and the Final rule at the bottom of your config.
Rule subscription won't update
Confirm you subscribed with the raw file URL, not the GitHub page URL — the latter returns HTML, which ShadowRocket can't parse as a rule list.
VPN permission prompt never appears
Remove any existing VPN profile for the app under iOS Settings → General → VPN & Device Management, then reconnect from ShadowRocket to trigger the prompt again.